Step 1- Go to Lowes and pick up some spools or reels for free! You can also get them at your local cable or telephone company. If you ask, they might just deliver them to you. You would need the main table to be as tall as a bar or tall counter and the stools, of course shorter and smaller. I show only three of the seats in my pictures but I did manage to get two more of them later and had a stool for each of us in my family of five.
Step 2-Wash your wooden spools and hammer down any nails. They use thousands of nails in these things for some reason and you can tear the hide right off of your hands if you are not careful because a lot of them stick out. After spraying and washing them. Let them dry.
Step 3-Sand them a little or a lot depending how smooth you prefer. The idea is also to get off any tar or oil that they sometimes have on them so that your paint will stick.They can be a little splintery so a lot of sanding might be a good idea if you have the type that seem to be really rough. You will need a leaf blower to blow off all the saw dust in every hole because the paint will not stick well if you are constantly dragging stuff out of the holes with the paint brush or roller.
Step 4-Get some outdoor glossy white paint and just paint the whole thing. It might take another coat. This is going to be your canvas for your beautiful art-work. You could use a cream white paint instead if you would rather tone down the brightness. This ended up to be a family project because my kids were little and this step was the best one for that because the whole thing needed paint. How could you go wrong with a 3 year old and a paint brush...hummm
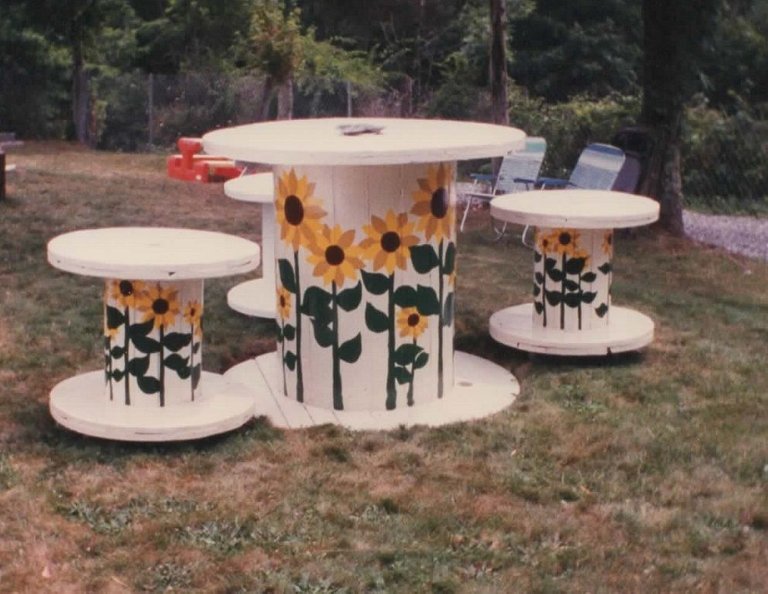
Step 5-After these coats of white paint dry, start painting your sunflowers or any flowers. Be creative. Sunflowers just seemed to be the easiest for me because I am not no where near an artist. The other reason I painted sunflowers is because they are a tall flower and it just fit the project being they were going to be painted on tall spools.
Step 6-After you are really sure everything is completely dry, put a couple of coats of outdoor poly on the whole thing. Remember these things are very heavy and will be too hard to store them somewhere. If you are in an area with changing seasons, they are going to be sitting in a lot of snow and ice. If you are near water or ocean, they will retain a lot of moisture. So you need to think ahead and do what is best for your area in keeping them nice for years to come. You might consider an extra coat or two of a sealer.
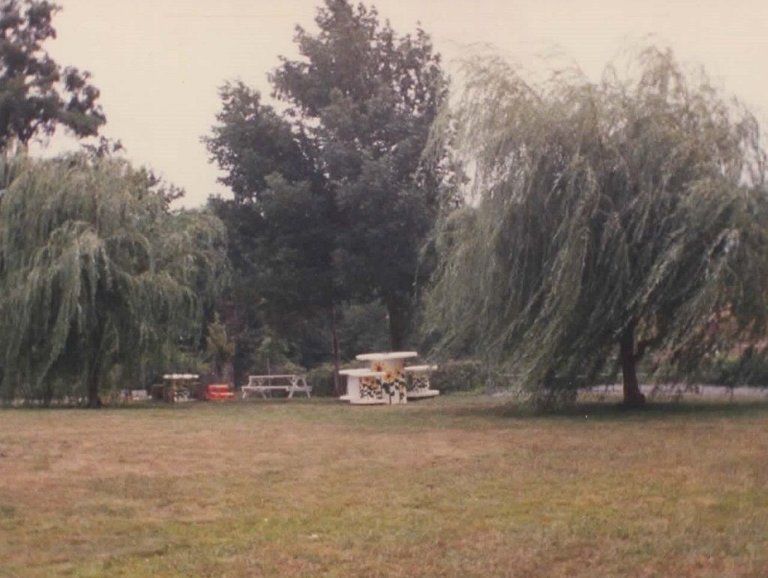
Here is a picture of the spools from afar. Sitting between my two weeping willow trees at our picnic area. We later got an umbrella and fit it into the hole in the middle of the table.
So there you have it!!! All you had to pay for was the paint and now you have the most unique outdoor furniture in town!!
Tell me what you think! Have you ever refurbished a wooden utility spool or reel before?
Please vote, comment, follow, resteem..........Thank You<<<<<<
Please Note:All of my pictures are my own, unless otherwise stated, either taken with my digital camera Kodak 14MP, or an actual picture from my huge collection for many years that I have scanned to my computer to use.


Good idea for the general public. Not putting you down because that is a great diy project but as a professional woodworker I prefer to start from raw lumber and make my own. Still an awesome job!!!
Thank you @guarddog...
💖
Congratulations @c77hall! You have completed some achievement on Steemit and have been rewarded with new badge(s) :
Click on any badge to view your own Board of Honor on SteemitBoard.
To support your work, I also upvoted your post!
For more information about SteemitBoard, click here
If you no longer want to receive notifications, reply to this comment with the word
STOPYay..I'm moving on up!
These things are still available for free??
In my my last-century childhood, would stand on them and walk-roll across the lawn, racing to see who got there first.
Thanks for this post! Good idea for up-cycling and brightening the yard!
Well nowadays @carolkean nothing much is free but if you call around and see. They do make for some great summer time outdoor riding toys too!
Not "safe," as outdoor riding toys go, but 1960s-70s parents were not overly protective the way today's parents are. Big, gas guzzling cars had back windows so bigs, a child could stretch and sleep there. I remember cars that did not come equipped with seat belts. Oh, I'm old!
Yeah i'm old too...I remember running around in the back seat hanging my head out the window like a dog in the 60s...And making mud pies...those were the good ole days.
Mud pies!
The play house!
Jars, lids, tins, old pots and pans, old bedding - nothing was thrown away. It was salvaged by children who would lay claim to a corner of a barn or shed and declare it a play house. True joy was the emptying of the brooder house or some other small wood shed and claiming the entire building, 6x8 feet of heaven. Then we grew up, got married, and a brother-in-law designed and built a backyard Victorian playhouse, which his daughter had no part in creating, and it was not a big hit. The whole point of the play house is for the child to create it herself, with found-objects, not things Mom and Dad buy or make. {{wince}}