A BitF masternode requires 5000 BitF of collateral to operate. BitF is currently available on Crex24 or Stocks.Exchange. This guide will show you how to get started with mining BitF through masternode proof-of-stake. Start out by downloading the BitF Wallet from here and running BitF-qt.
NOTE: You can run your hot wallet on a different computer than your cold wallets. This can increase security by keeping your hot wallet (with coins) on your local computer. To do this, complete steps 1-10 on your local machine’s wallet (editing masternode.conf), and then do the rest on your VPS wallet (editing BitF.conf).
1 Click the Receive tab in your wallet. Create a new address and call it MN1(or your preference) in the Label field. Type 5000 in the Amount field. Click request payment to get an address.
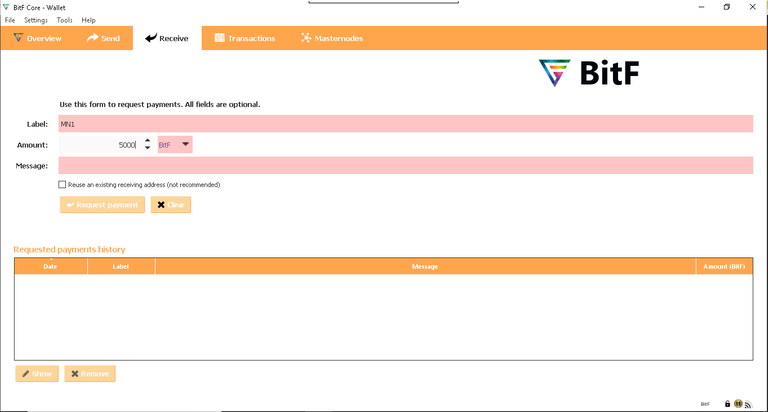
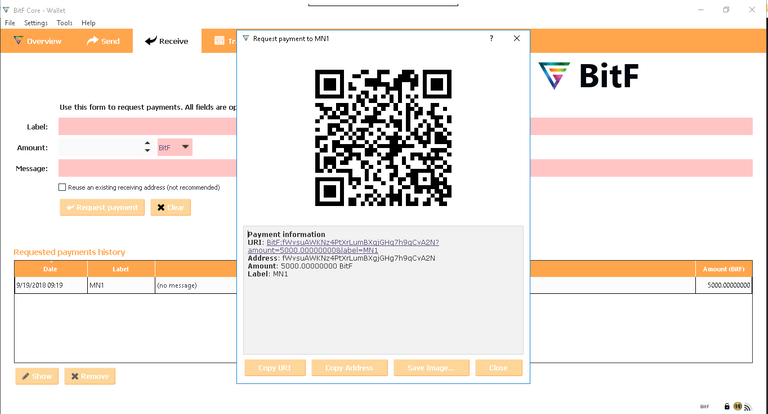
2 This will be the address for your masternode collateral. Copy the Address field.
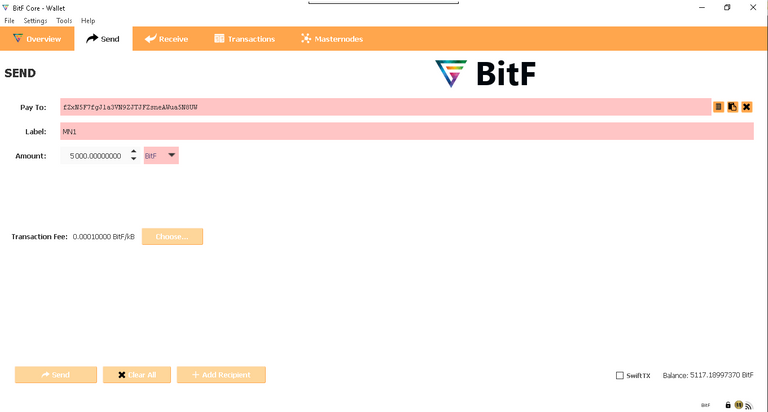
3 Next, send exactly 5000 BitF to this address from the Send tab. Click send to send the transaction and click Yes to accept the fee.
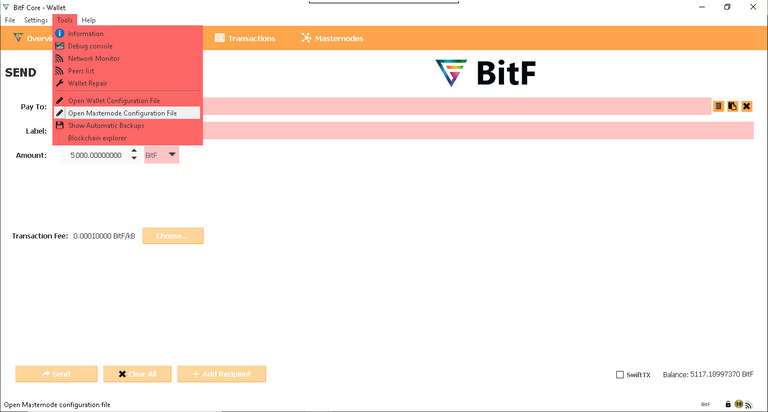
4 Time to edit the Masternode Configuration file. Click on Tools and click “Open Masternode Configuration File”. This should open in your text editor (Notepad).
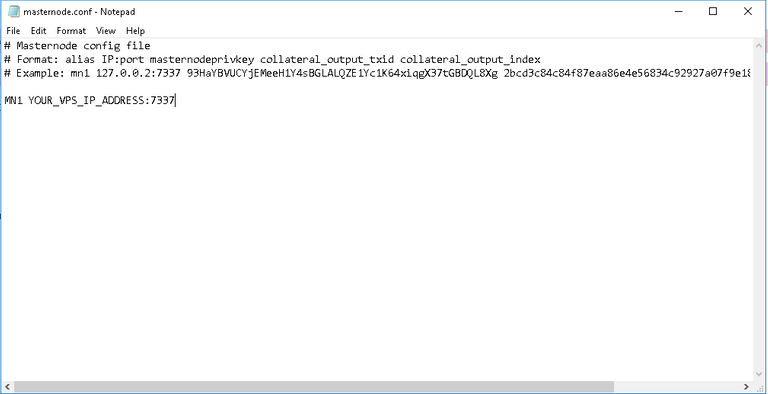
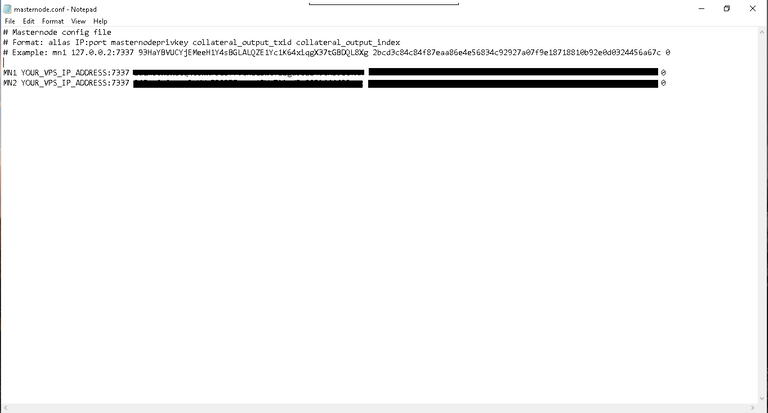
5 Now we need to add 1 line of code to the Masternode Configuration file. This is easy. It just takes a few steps. You need to fill out the following code format: alias IP:port masternodeprivkey collateral_output_txid collateral_output_index. Your alias is your masternode name (MN1). Next, you need your VPS or host computer IP address for YOUR_VPS_IP_ADDRESS. The port for BitF is 7337. Your config file should now look like this:
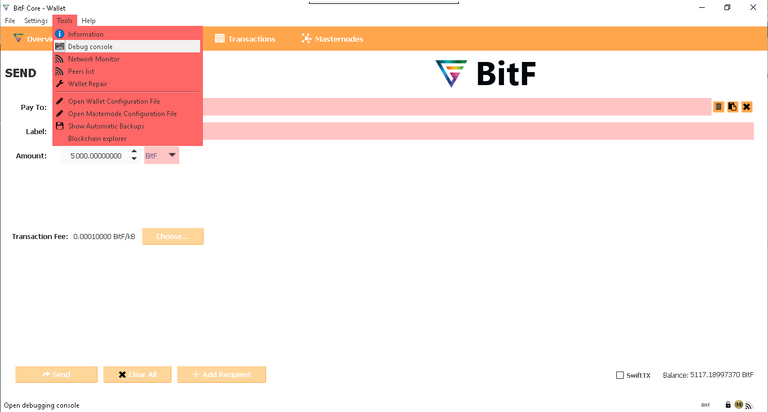
6 Now go to your wallet, click "Tools" and click the "Debug Console".
7 Type masternode genkey and press Enter. Copy the result.
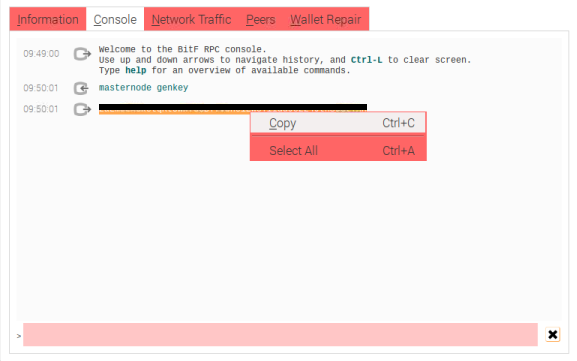
8 Paste into your Masternode config file.
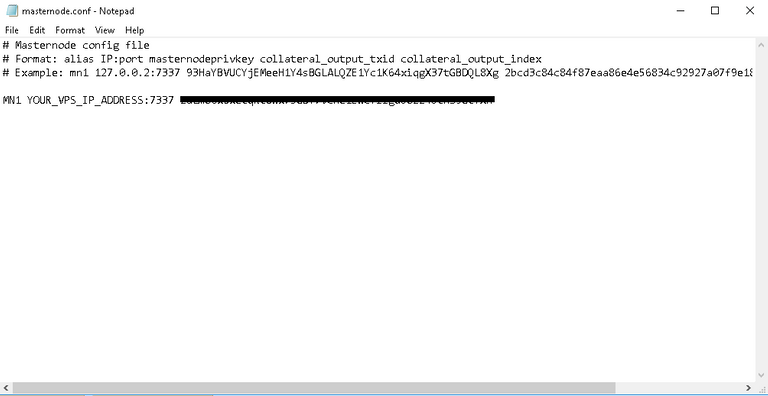
9 Go back to the debug console and type masternode outputs and press enter. Copy the txhash and note the outputidx.
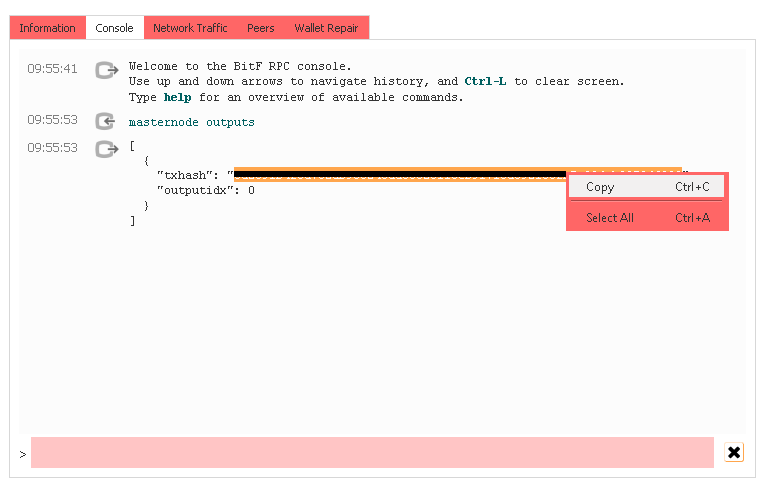
10 Paste the txhash into the masternode config file. Don’t forget the outputidx. Save the masternode config file and then close the wallet.
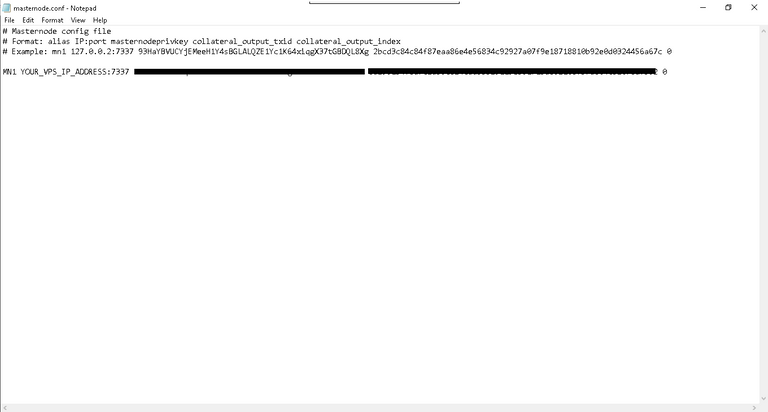
To run a cold wallet, continue with step 11 on your VPS. If you are running everything locally on the same machine, you can continue with step 11.
11 Now you need to edit the wallet config file. Open the "Wallet Configuration" File from the "Tools" menu.
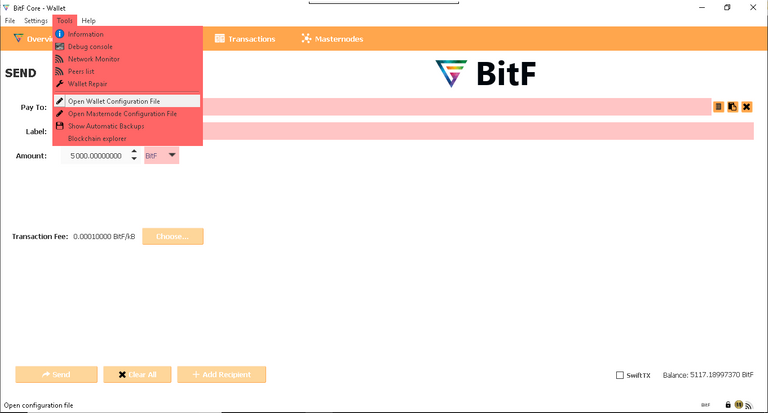
12 When you open your wallet config. Below is what your config file needs to be. Copy paste this into BitF.conf.
rpcuser=longrandomusername
rpcpassword=longrandompassword
rpcallowip=127.0.0.1
port=7337
listen=0
server=1
daemon=1
logtimestamps=1
maxconnections=256
masternodeaddr=IP:port
masternodeprivkey=masternodeprivkey
addnode=carbon1.bitf.cc
addnode=carbon2.bitf.cc
addnode=carbon3.bitf.cc
addnode=carbon4.bitf.cc
Add your IP:Port and masternodeprivkey. Also, change the rpcuser and rpcpassword to
something random. Keep everything else the same, then Save:
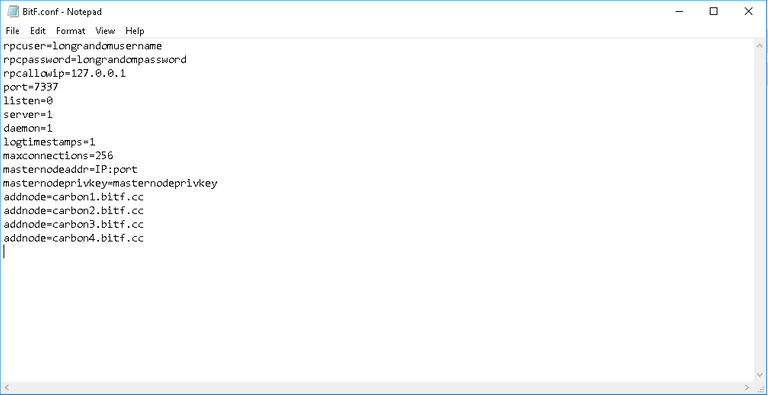
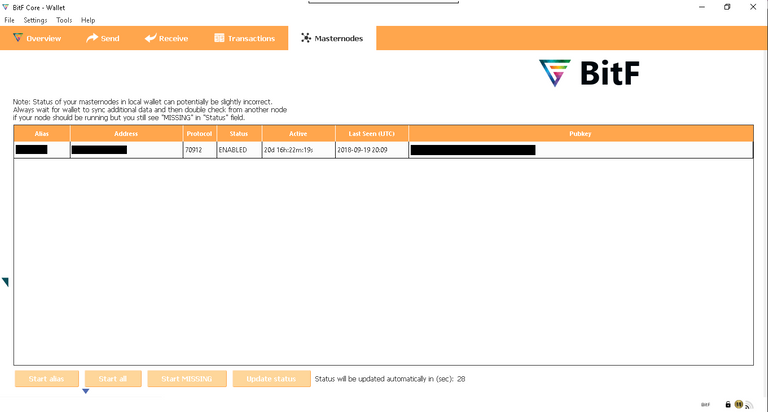
13 Restart the wallet. Now your masternode should show up in the Masternodes tab.
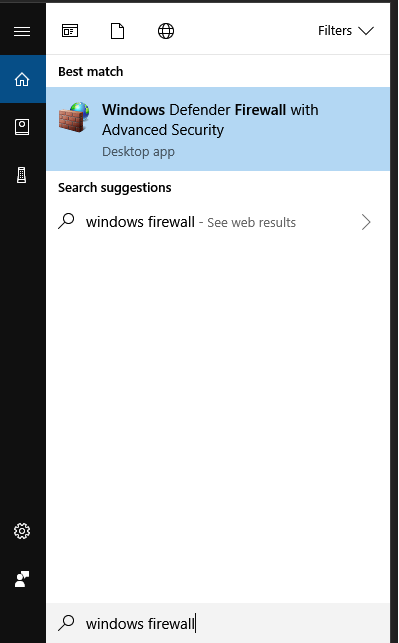
14 Next you have to edit your firewall. We need to open a port for the masternode. Open Windows Firewall from the start menu. Click “Advanced Settings”.
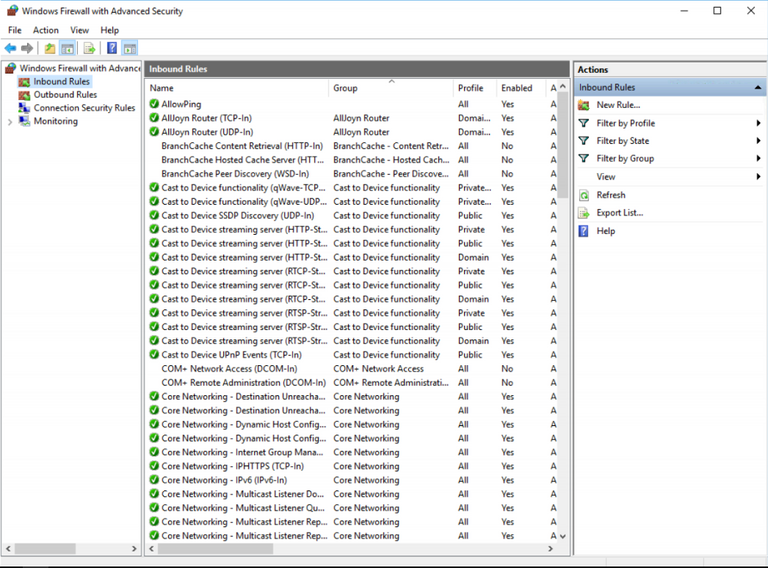
15 Clicking “Advanced Settings” will open the firewall control panel. Click “Inbound Rules”.
16 Click “New Rule” on the upper right side and you will get this screen. Select Port.
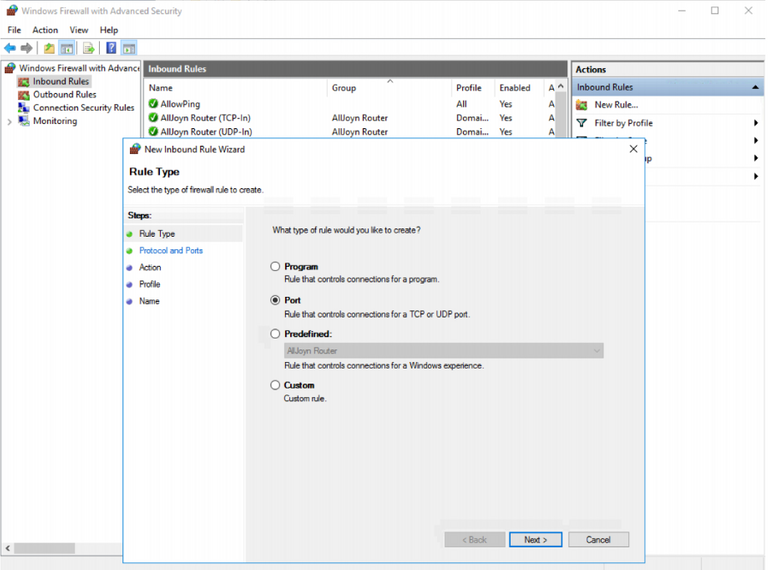
17 Choose the port to allow. In this case it is 7337.

18 Click through, allow the connection, allow it in all places. Give it a name, it can be anything you want. When you are done, you will be back on the Windows Firewall control panel and you will see your new rule. You can now close the firewall control panel.
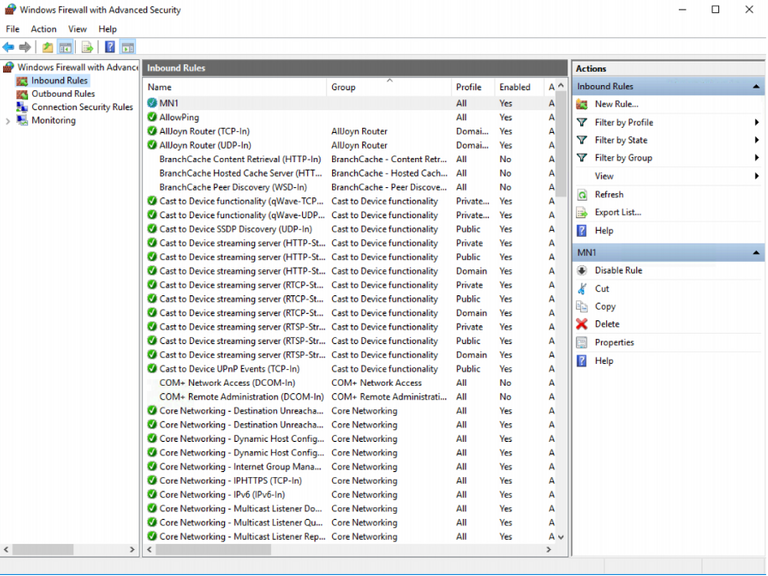
19 Go back to your Masternodes tab and click Start All. Success! Now relax and wait for the stakes to come in.
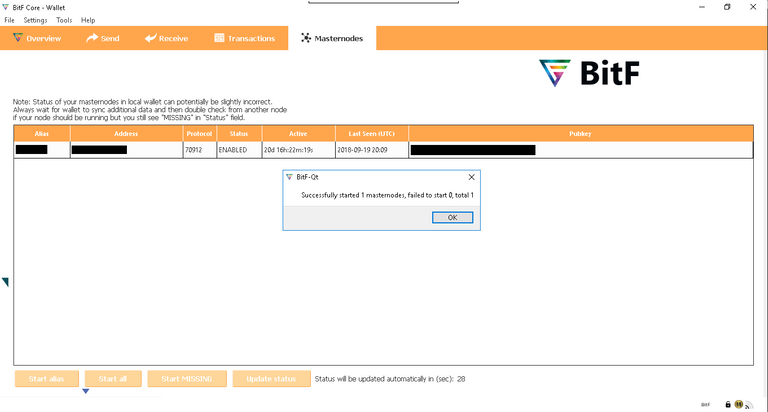
ADDING ADDITONAL MASTERNODES:
To run additional masternodes, start by completing steps 1-10 with the alias MN2 and the port 7337. This means add a new line to the masternode.conf. Do this for each masternode. Here’s what it looks like for 2 masternodes:
For each additional masternode you can increment the port by running 1 masternode per port. As for the alias, it can be anything you want. FYI - the main wallet that holds your masternode.conf file and all your coins is called the “hot wallet”. Next, you’ll have to open an instance of the BitF wallet for each masternode. Each masternode requires it’s own unique instance of BitF. Your first masternode is already running in the hot wallet instance. Opening additional instances will allow you to run additional nodes on the same machine. These instances are called “cold wallets”. They don’t need to hold any coins, they are just there to keep the port open for BitF. In fact, the only thing that matters in the cold wallet is the BitF.conf file. First, we’ll need to give the BitF client a new blockchain database to access.
TL;DR for each MN we need to run an empty BitF wallet to keep the right port open.
Learn More and Get Involved
Twitter: @BitfDev
Discord: https://discord.gg/4pH2YVV
Telegram: https://t.me/BitFChat
Reddit: https://www.reddit.com/r/BitFCoin
Github: https://github.com/BitFdev
BitcoinTalk: https://bitcointalk.org/index.php?topic=4940023.0
Website: https://www.bitf.cc
Wallets: Windows | Linux | Mac OSX
Exchanges: Crex24 - Stocks.Exchange
Email: info@bitf.cc
You got a 31.31% upvote from @booster courtesy of @bitf!
Thank you for your post. :) I have voted for you: 🎁! To call me just write @contentvoter in a comment.
Very good post.
This is really helpful. i have gone through the whole content and looks proper explanation about BITF Masternode.
Great article thanks for sharing this information!
You got a 28.54% upvote from @upmewhale courtesy of @bitf!
Earn 100% earning payout by delegating SP to @upmewhale. Visit http://www.upmewhale.com for details!
You got a 17.86% upvote from @upme thanks to @bitf! Send at least 3 SBD or 3 STEEM to get upvote for next round. Delegate STEEM POWER and start earning 100% from your share, daily payouts ( no commission ).
Quick delegation links: 25SP | 50SP | 100SP | 250SP | 500SP | 1000SP | 2000SP | 5000SP | Custom Amount
Congratulations @bitf! You have completed the following achievement on the Steem blockchain and have been rewarded with new badge(s) :
Click on the badge to view your Board of Honor.
If you no longer want to receive notifications, reply to this comment with the word
STOPTo support your work, I also upvoted your post!
You got a 28.51% upvote from @postpromoter courtesy of @bitf!
Want to promote your posts too? Check out the Steem Bot Tracker website for more info. If you would like to support the development of @postpromoter and the bot tracker please vote for @yabapmatt for witness!
@bitf purchased a 45.67% vote from @promobot on this post.
*If you disagree with the reward or content of this post you can purchase a reversal of this vote by using our curation interface http://promovotes.com
it's very interesting on my PC, you get me (upvote). 👍
Perfexms Solutions,
Calidad, entregado a tiempo y por debajo del presupuesto.
Consigue tu presupuesto para tu empresa y lo que ofrecemos en nuestros servicios.
Ricardo Guadalupe,
CEO - Director Ejecutivo.
https://www.perfexms.solutions
https://www.perfexms.com
Congratulations @bitf! You have completed the following achievement on the Steem blockchain and have been rewarded with new badge(s) :
Click on the badge to view your Board of Honor.
If you no longer want to receive notifications, reply to this comment with the word
STOPHow.much is the barrier to entry for running a master node? Where can i get the instructions to set it up on linux?
Posted using Partiko Android
your post has been very nice
excelente información gracias...
Congratulations @bitf!
Your post was mentioned in the Steemit Hit Parade in the following category:
thank you so much for the guidance
Thank you.
What kind of returns can you expect staking BitF?
great love it!
want to receive and learn about universal basic income based on blockchain
https://goo.gl/RzwdKs