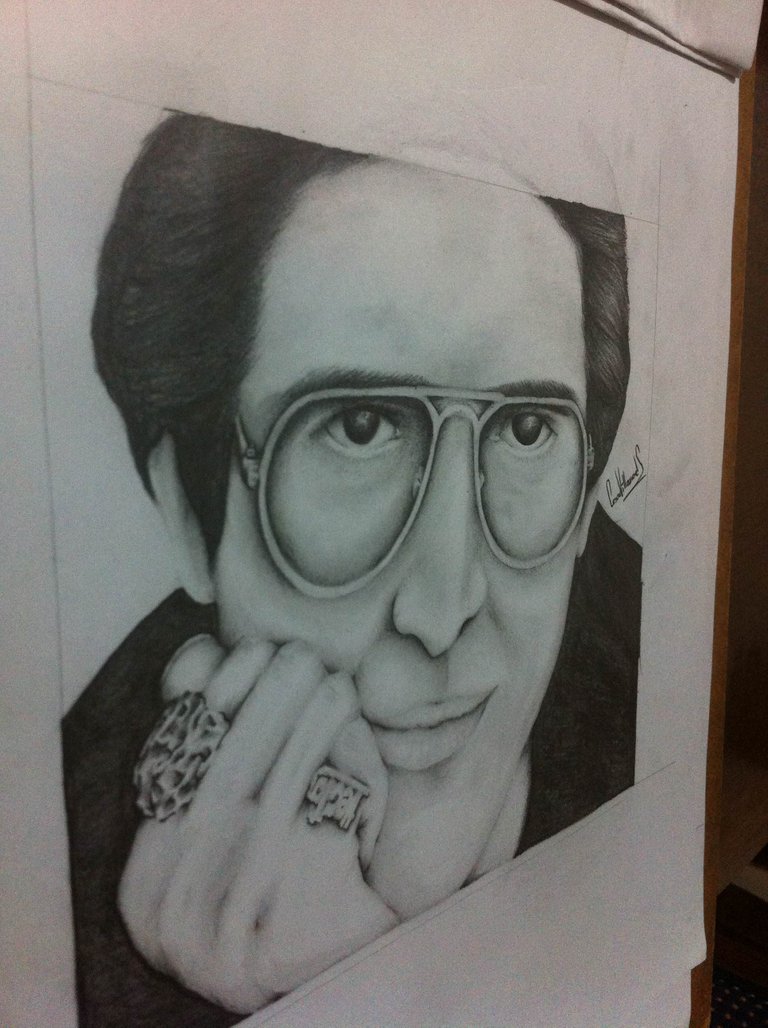
Greetings dear Steemians a pleasure to greet you, I hope you are well, today I bring you another of my repertoires that have in my drawing portfolio, made in honor of THE SINGER Héctor Lavoe, pencil drawing that can be done a year ago, and although I do not treasure photos of the step by step since the beginning of this piece, I have them that show the progress in each section that I merit this drawing to obtain these results.
Before starting with the development of the drawing, why not talk a bit about the protagonist of this post, and so know through a brief review.
¿ Who was The Singer?
Héctor Juan Pérez Martínez, known as Héctor Lavoe (Machuelo Abajo, Ponce, Puerto Rico, September 30, 1946-Queens, New York, June 29, 1993), 11 was a singer, songwriter and salsa music producer over the years 1970 and 1980. He played the Willie Colón orchestra, from 1967 to 1974, where he achieved recognition with songs such as "Aguanile", "Che Che Cole", "La Murga", "Juana Peña", "Calle Luna, Calle Sol" , "Barrunto", "Timbalero", "Abuelita" and more. He also joined the Fania All Stars salsa orchestra from its creation, in 1968 to his last years of life; It is worth mentioning that Lavoe was one of the main artists of the Fania Records label, as well as the Fania All Stars. With them he recorded several songs that became musical hits, such as "My People", "The King of Punctuality", "Ublabadú", "I Feel" and more songs that came out in the compilation album Fania All-Stars with Hector Lavoe in 1997
Since they are a little more familiar with the story of Lavoe, we will start the step by step that was carried out when making this drawing using a technique of realism and soft strokes to achieve a good definition of facial features.
Materials
- Graphite pencils models: 2H 3B 5B
- White sheet
- Clears Moldeable
Initial Step
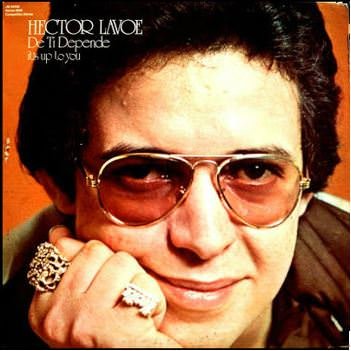
As you can see, the photo I use to make this realism is a color photo, and realism design it in black and gray, in these cases I usually grab the reference image for my drawing and through editing programs I place it in black and white and I modify the scales of shadows to take this image to a plane more similar to the result I want to obtain, this helps to determine which shades of gray and white black should be present in the design
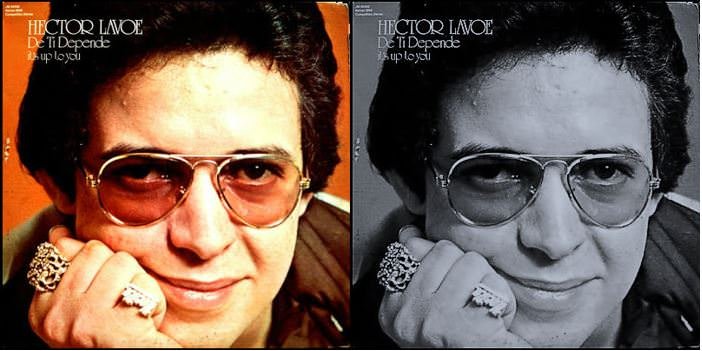
We present the design on the white sheet with smooth lines with the graphite pencil 2H, lines that are apt to be erased in case of some modification and leave no marks on the sheet, I mark a pattern lines with a ruler with the dimensions I want my drawing, in this case the design if they are fixed I did it complete but I will just fill in and focus on what is inside the box, once the lines are already defined we proceed to give shadows with the same 2H pencil so that the design gets shape, and when making the shadows with the darker pencils we already know what are the fields of shadows and where to start, in this case with the 2H pencil I shaped the hair, nose, lips and hand, what to say true, it was the most complicated thing that I had to do the drawing
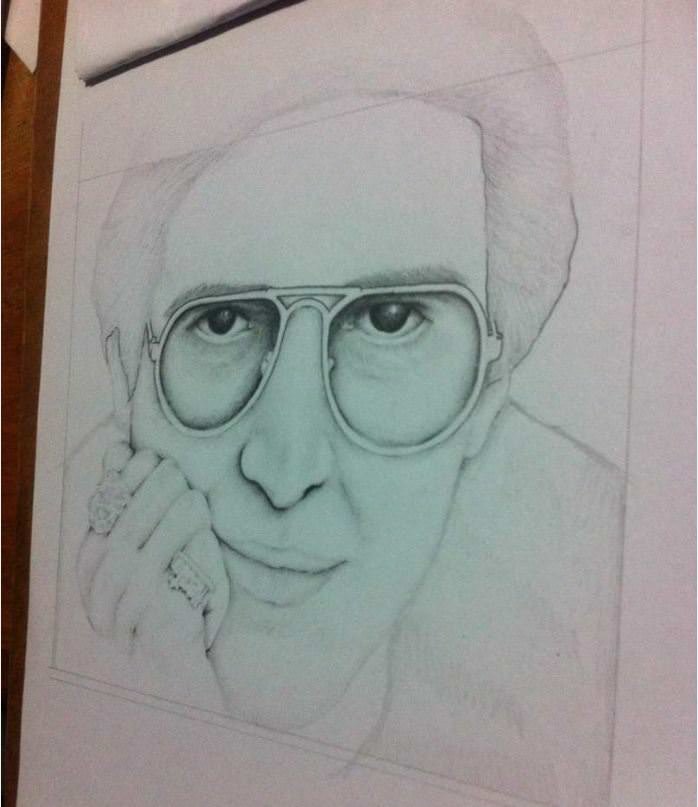
As I mentioned in my previous post about the realism of Armando Reveron, I always start to develop the design by the eyes, and it is there where I start to shape the already defined shadows, in this case with pencil 2b and 3b start in the shadows pattern that I had already done with the pencil 2h at the beginning of the drawing, I only faded with the 2b and darkened the beginning of the shadows with the pencil 3b, if they are fixed there are parts of the drawing that will remain with the shadow of the 2H pencil because they are delicate details that when marked with a very dark tone can lose the effect of realism that we have achieved, as in this case are the lips, part of the nose, the folds of the cheeks and the lower part of the eyes
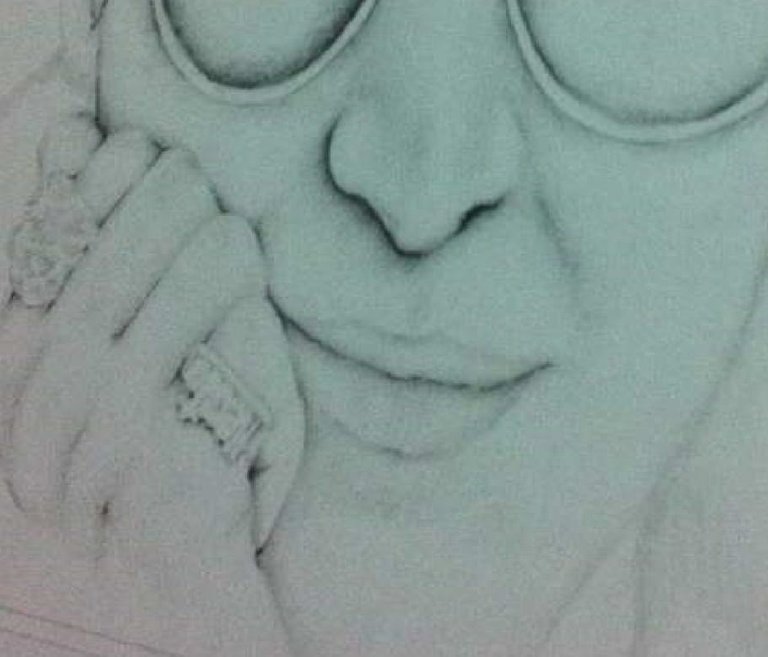
If you look here, as we go deeper with the 2B pencil, the area of the nose, lips and the union between the fingers, with the 2H pencil, diffuses over the dark tone giving a better shape to the design and also retouching those details that will remain in that tone that are part of the most delicate, as the outer part of the lips, cheeks and the partition.
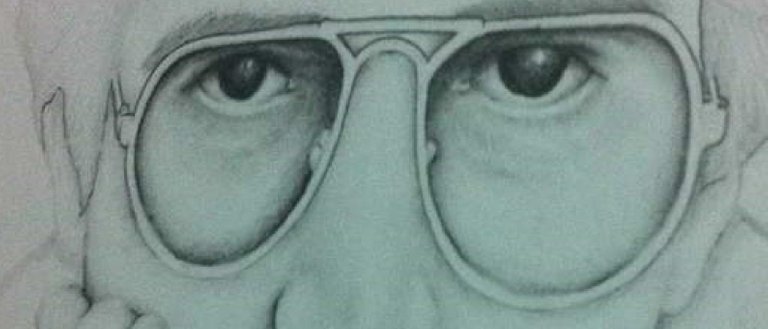
As for the eyes and lenses, fill the iris with the pencil 3B leaving a blank space that I gradually faded with the 2B and 2H pencil until leaving a small blank, this to shape the brightness and reflection of light in the eyes, and so that the eye does not look very animated, it must have other shades that give it a touch of realism, in the case of the sclera (white part of the eye) when shading its edges with the pencil more dark inside and finishing the blur with the 2H pencil we obtain a depth effect that stands out among the features of the realism view, the eyelids and folds of the eye were made with soft strokes made with the 2H pencil.
As for the hair, we already have some pattern lines that we placed at the beginning of the drawing, which we would subsequently reinforce with darker shades, in this case we followed that pattern that we had, with the 3B pencil leaving clear spaces to draw with the 2B pencil and thus achieve a hair effect with a little bit of light shine
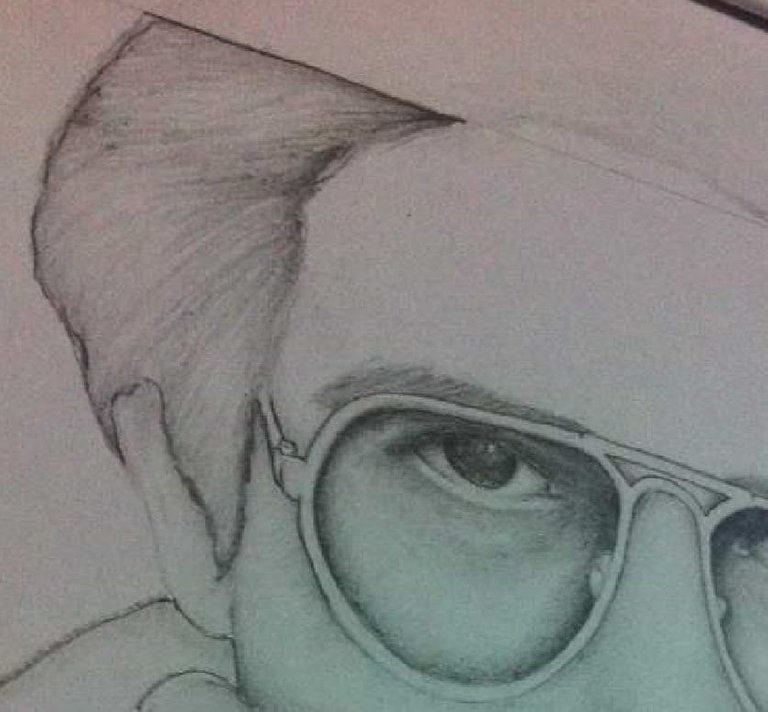
Once applied this step we get results like this, that even though it has a better shape and a more defined, the hair even in the union with the skin is with slightly thick lines that will later be smoothed with the 2H pencil at the moment of give shade to the
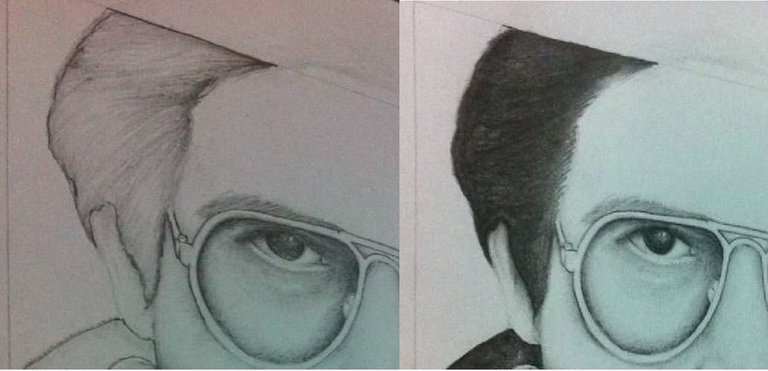

In addition to these effects, I also added details of shadow and folds in the ears, fingers and the union between neck and jaw, so that the slight cut between the face and the neck is seen
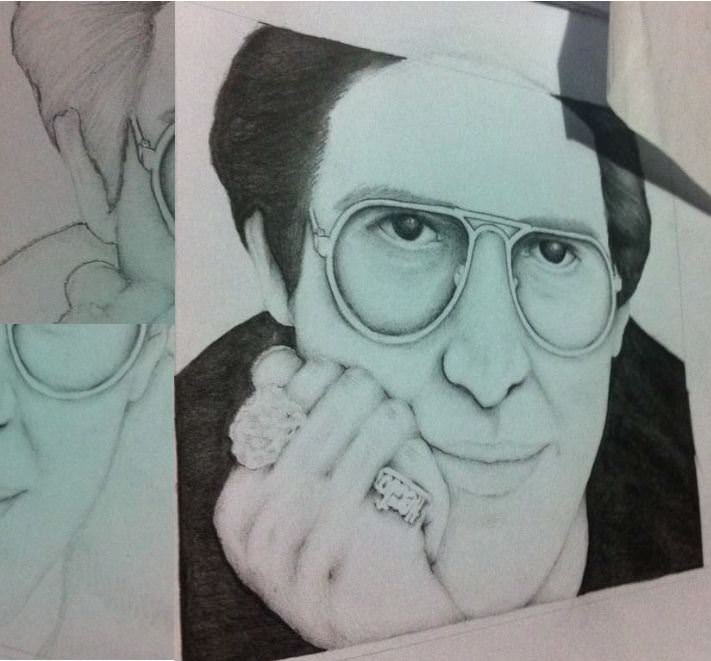

Once we apply the aforementioned shadow processes, we go from having a face with pattern lines to have a more advanced portrait, which is only to attach the details that soften lines and shadows to give the final result
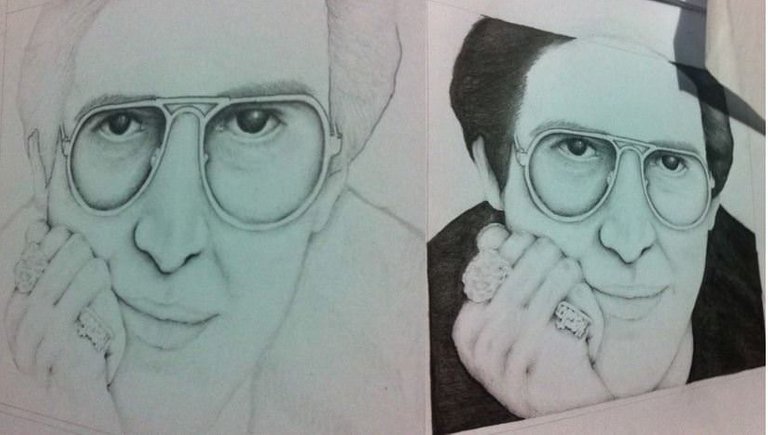

Next, I will show you the advances that the design had from the standard lines, to the complete application of shadows and details.

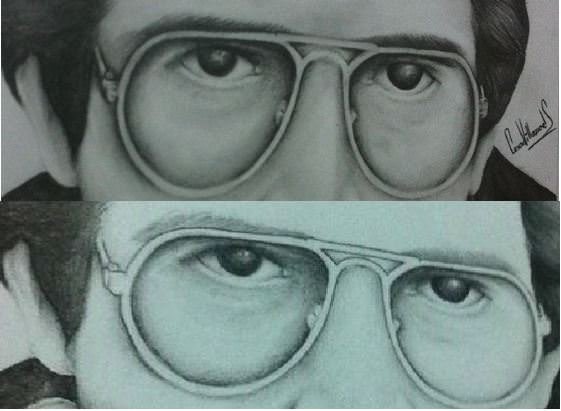


These were the stages of the process by which it was passed to obtain the final results, notice the progress in details and form that was drawing the drawing little by little, missing many details such as the reflection in the lens crystals among others, which I intend to improve little by little with practice.
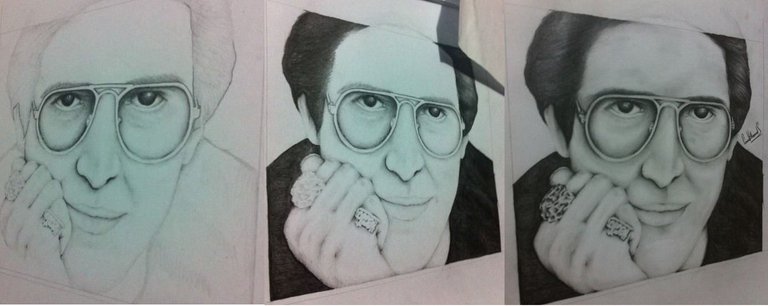

Well dear Steemians, this has been our final result, thanks in advance for the support and reading to my post, always open to criticism and suggestions that can make my work for each day better a little, see you in an upcoming post , Good Vibrates
Nice! Do you use twitter? I have my twitter account linked through steemengine to automatically tweet my posts. saves me a lot of time.
Your post has been featured on @artzone..
Courtesy of @nmalove
This post was shared in the Curation Collective Discord community for curators, and upvoted and resteemed by the @c-squared community account after manual review.
A good portrait ! You certainly captured his likeness well :> Good skills with the pencil :>
How good is that drawing, congratulations!
Congratulations @cdvs! You received a personal award!
You can view your badges on your Steem Board and compare to others on the Steem Ranking
Do not miss the last post from @steemitboard:
Vote for @Steemitboard as a witness to get one more award and increased upvotes!