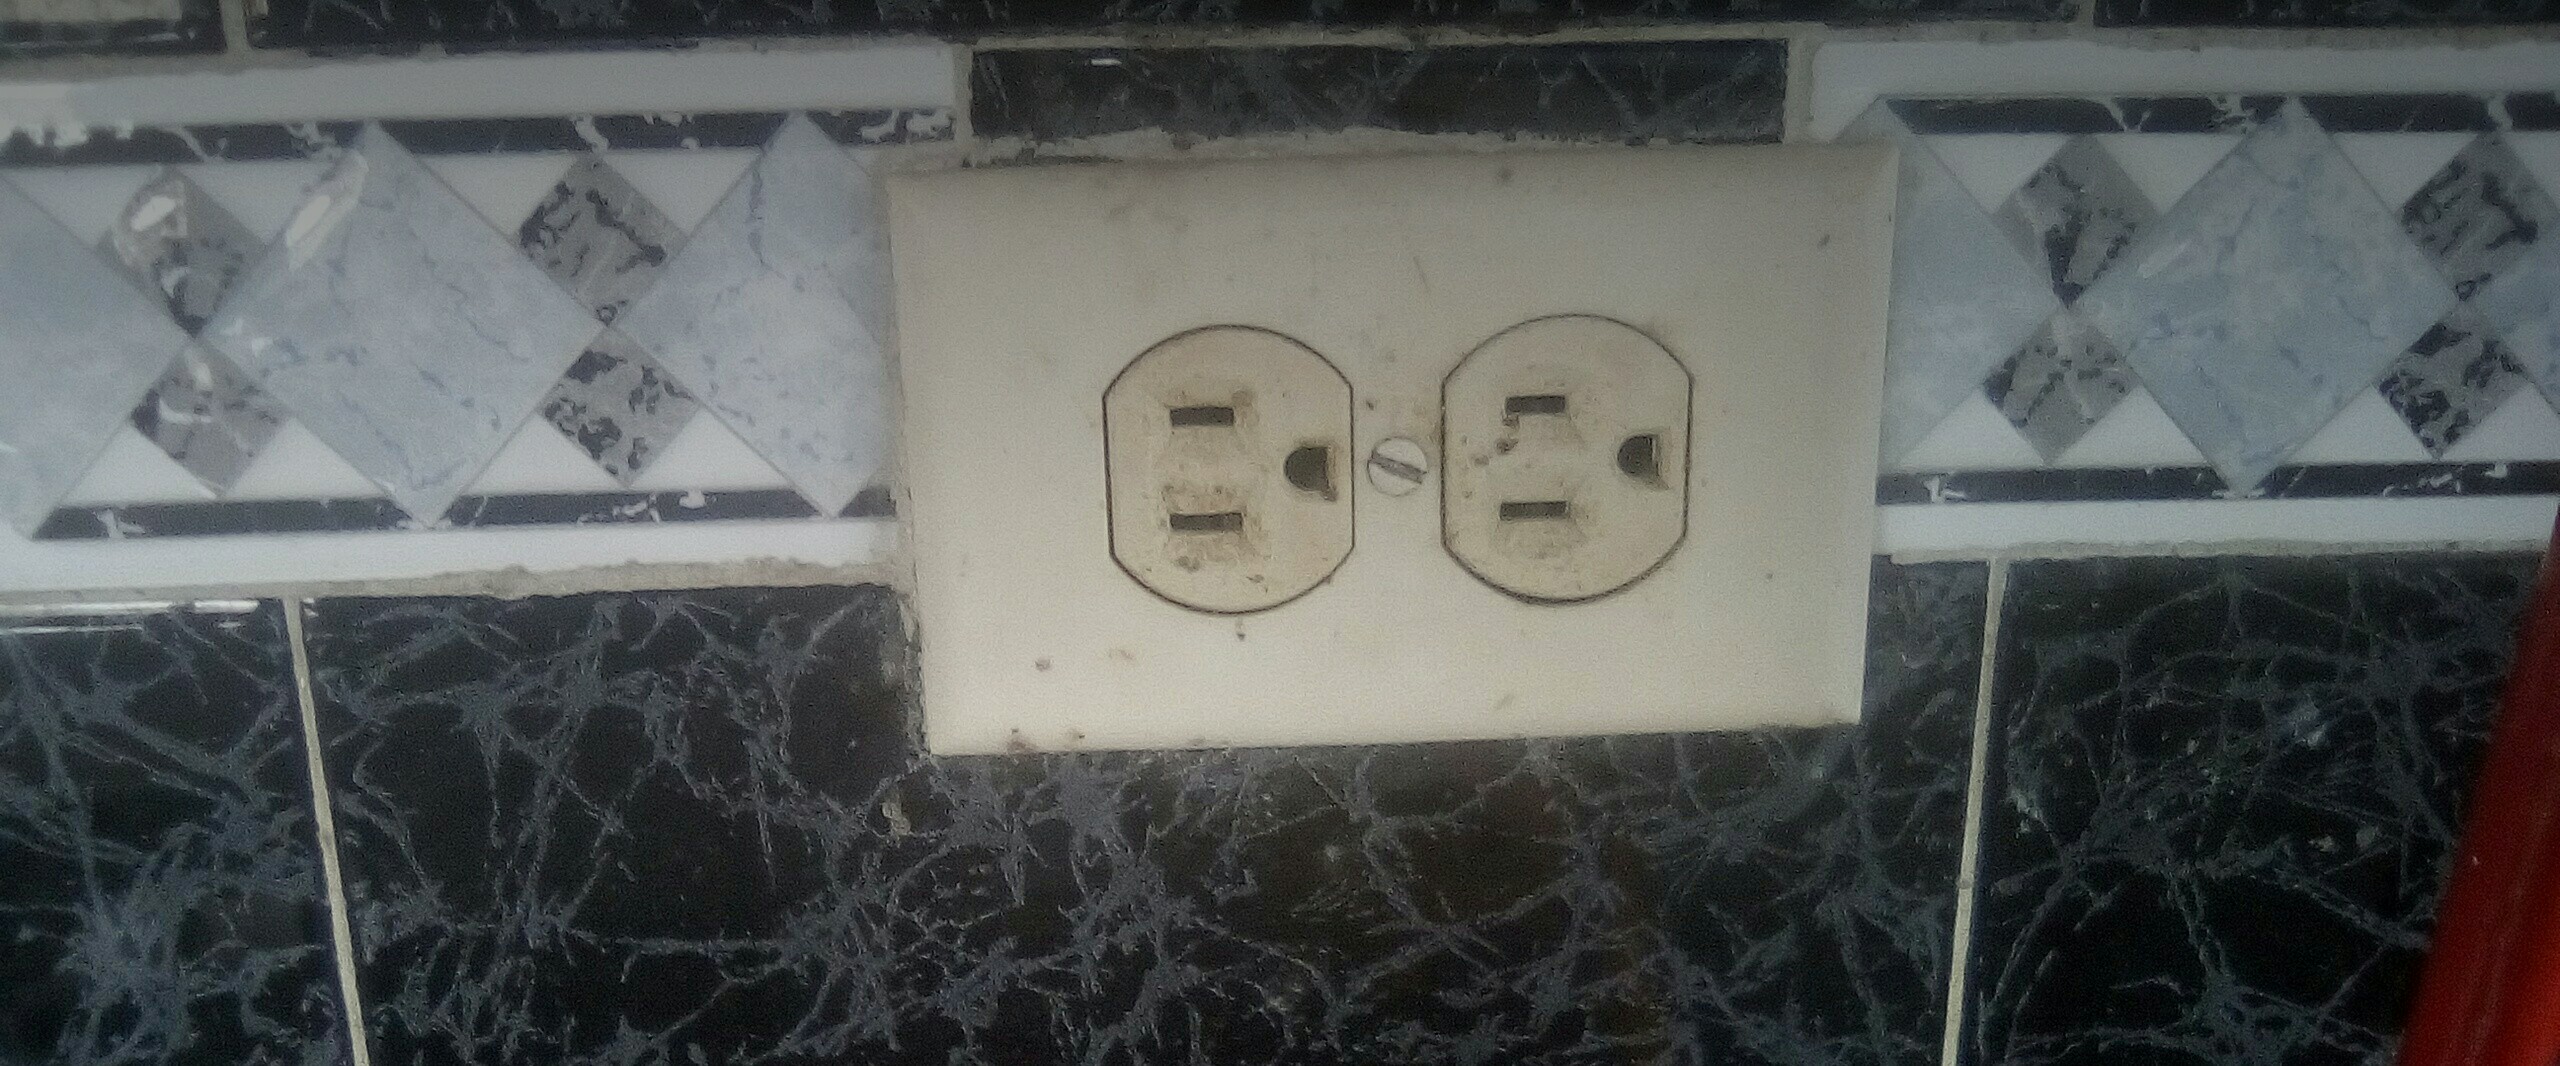
Buenos amigos de hive hoy les voy a presentar una forma rápida y segura para cambiar un tomacorriente dañado o defectuoso que normalmente se deteriora por el tiempo, en algunos casos por eil mal contacto al enchufar algún electrodoméstico.
Good friends of hive today I am going to present a quick and safe way to change a faulty or defective outlet that usually deteriorates over time, in some cases by bad contact when plugging in an appliance.
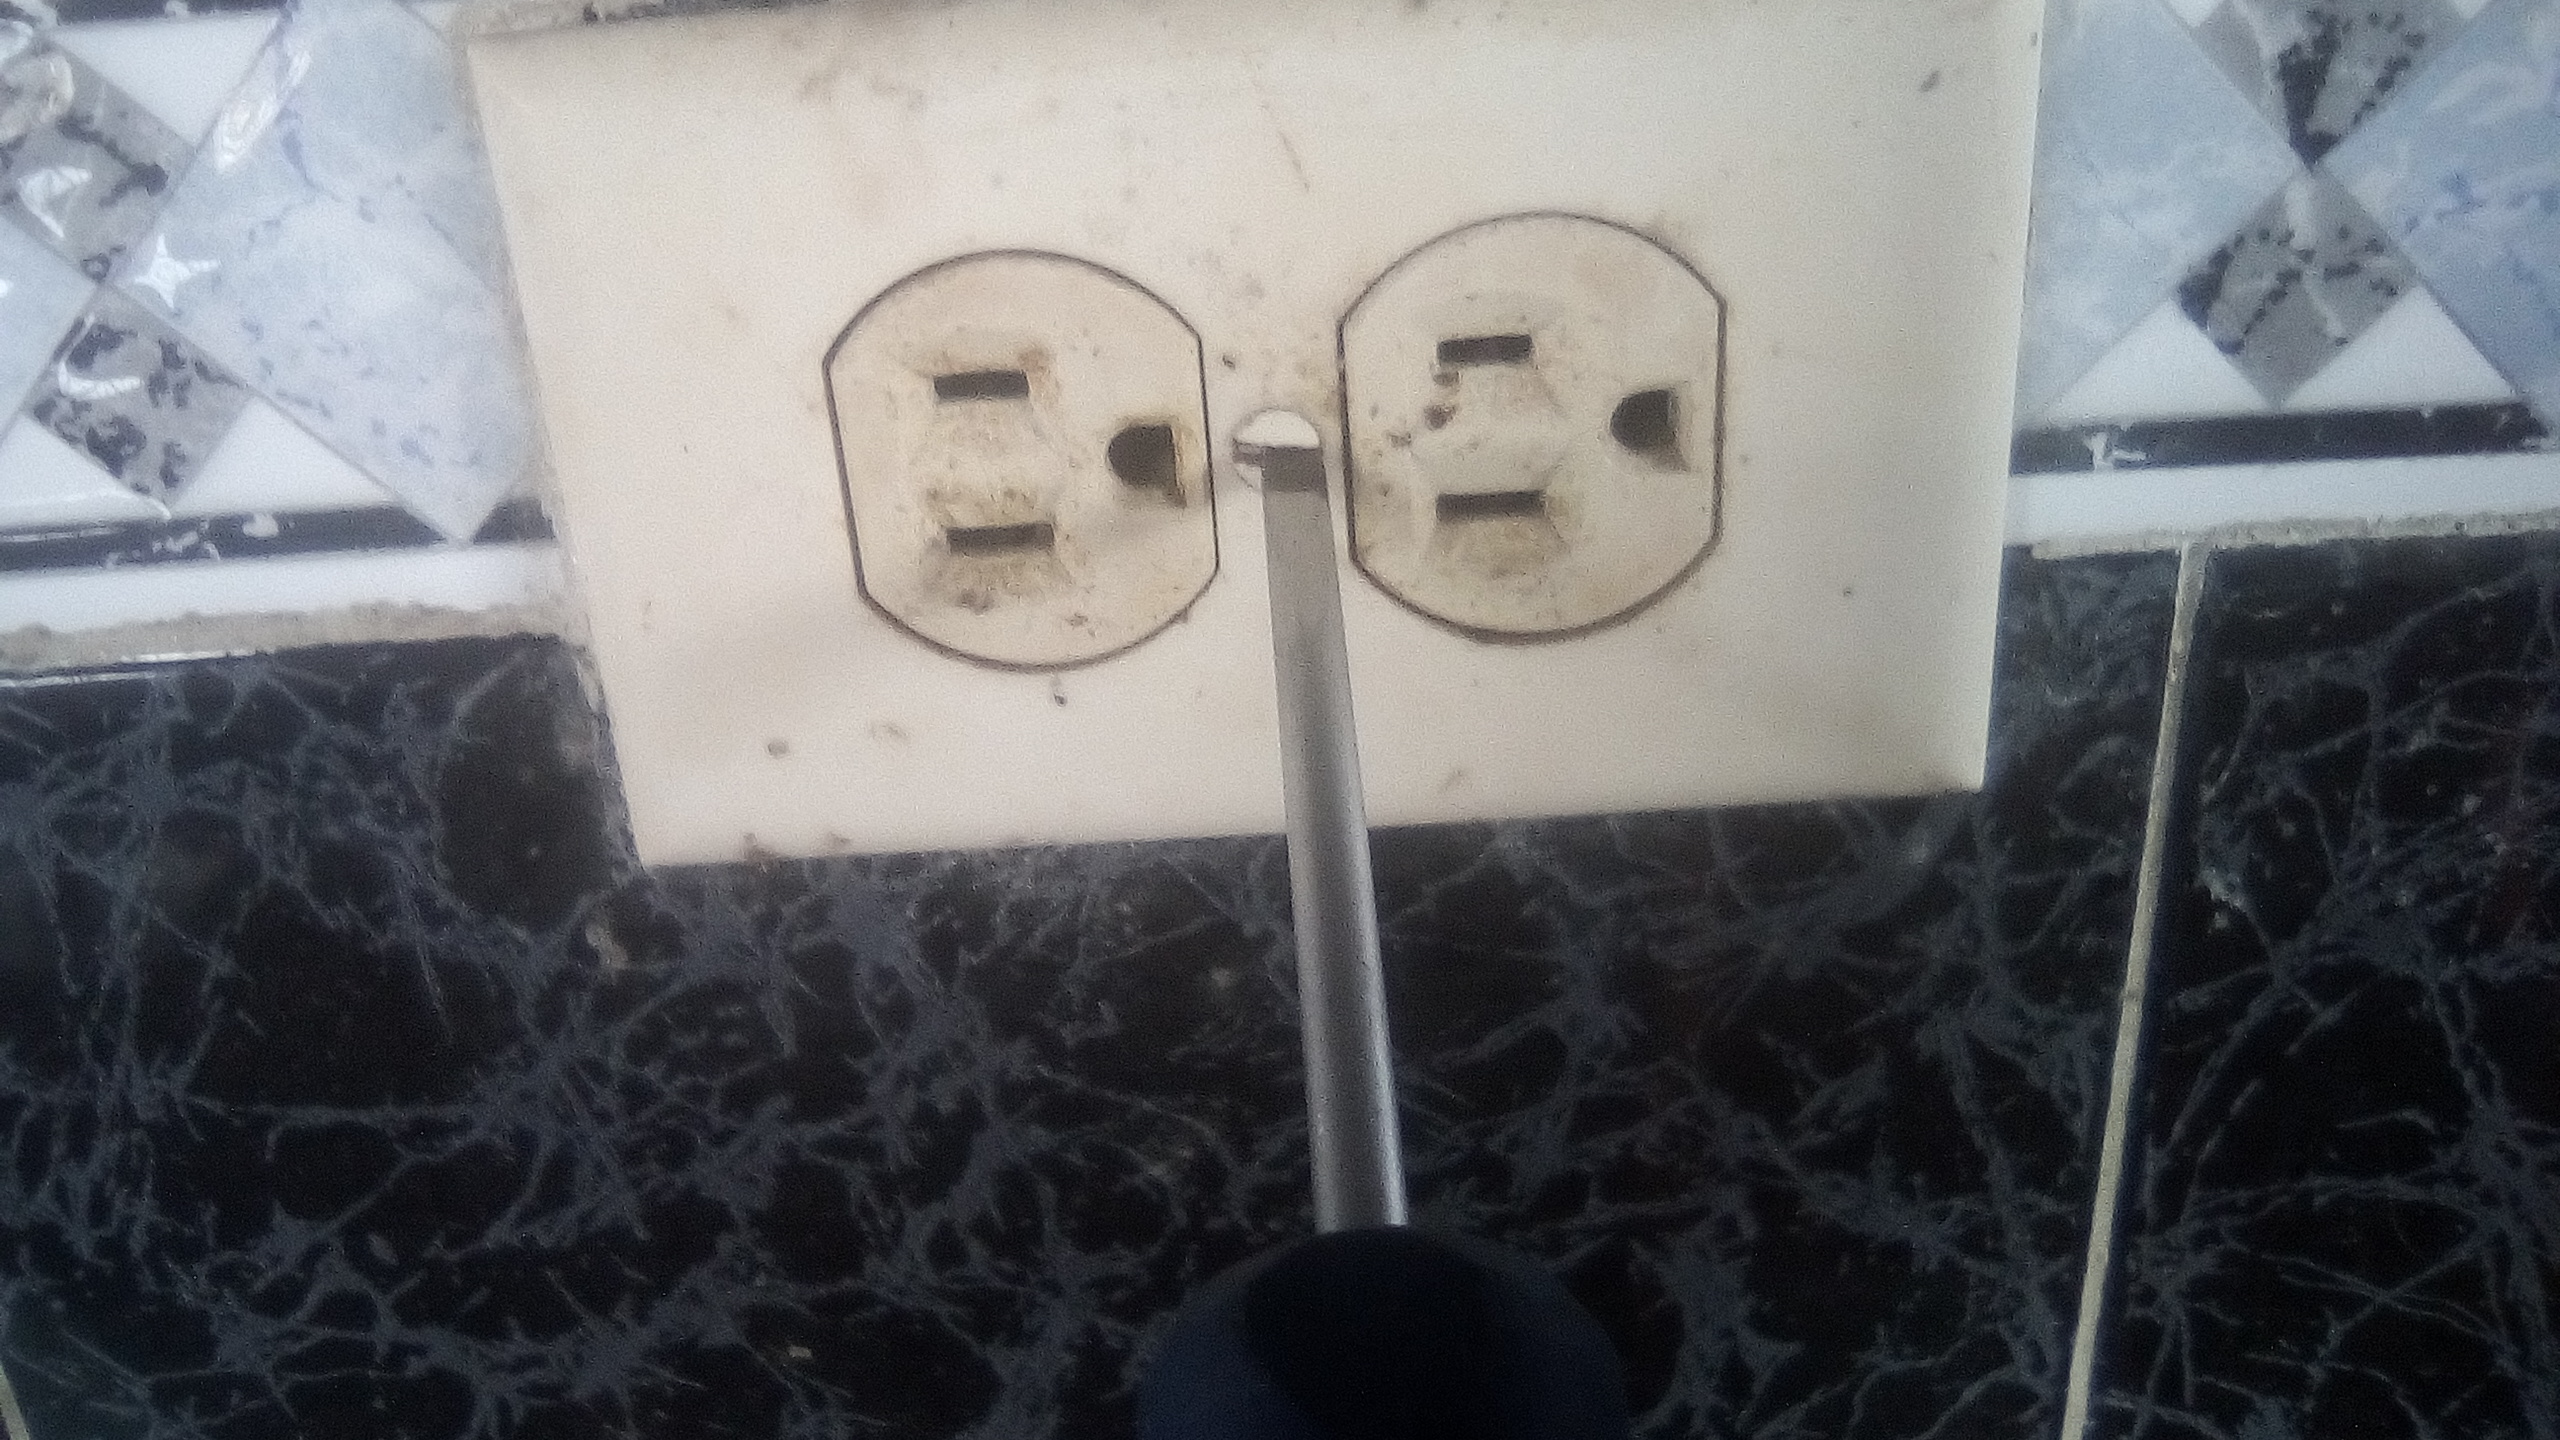
La formas más segura es bajando la cuchilla o breque, el cual corta el flujo de electricidad y nos mantiene a salvo de recibir una descarga eléctrica al momento de hacer el cambio del tomacorriente.
The safest way is to lower the blade, which cuts off the flow of electricity and keeps us safe from receiving an electric shock when changing the outlet.
Para comenzar necesitaremos las siguientes herramientas:
To get started we will need the following tools:
Destornillador de pala. Destornillador de estriás. pinzas de electricidad. Tomasomacorriente que vamos a remplazar.
Blade screwdriver Phillipscrewdriver electrical tweezers socket that we are replacing.

También podemos hacer un probador de corriente con un sócate y un bombillo para cerciorarnos que hemos cortado el flujo de corriente para mayor seguridad a la hora de hacer el cambio.
We can also make a current tester with a socket and a bulb to make sure that we have cut off the current flow for greater safety when making the change.
Lo des incorporamos del cajetín.Luego con mucho cuidado desenroscamos los cables uno a uno, en algunos casos necesitamos desenroscar los tornillos completamente y para ello usamos las pinzas para tener el menor contacto, para retirar los cables, normalmente los cables son de color rojo y negro, en algunos casos varía el negro por el color blanco
Then carefully unscrew the wires one by one, in some cases we need to unscrew the screws completely and for this we use the tweezers to have the least contact, to remove the wires, normally the wires are red and black, in some cases the black varies by the White color.
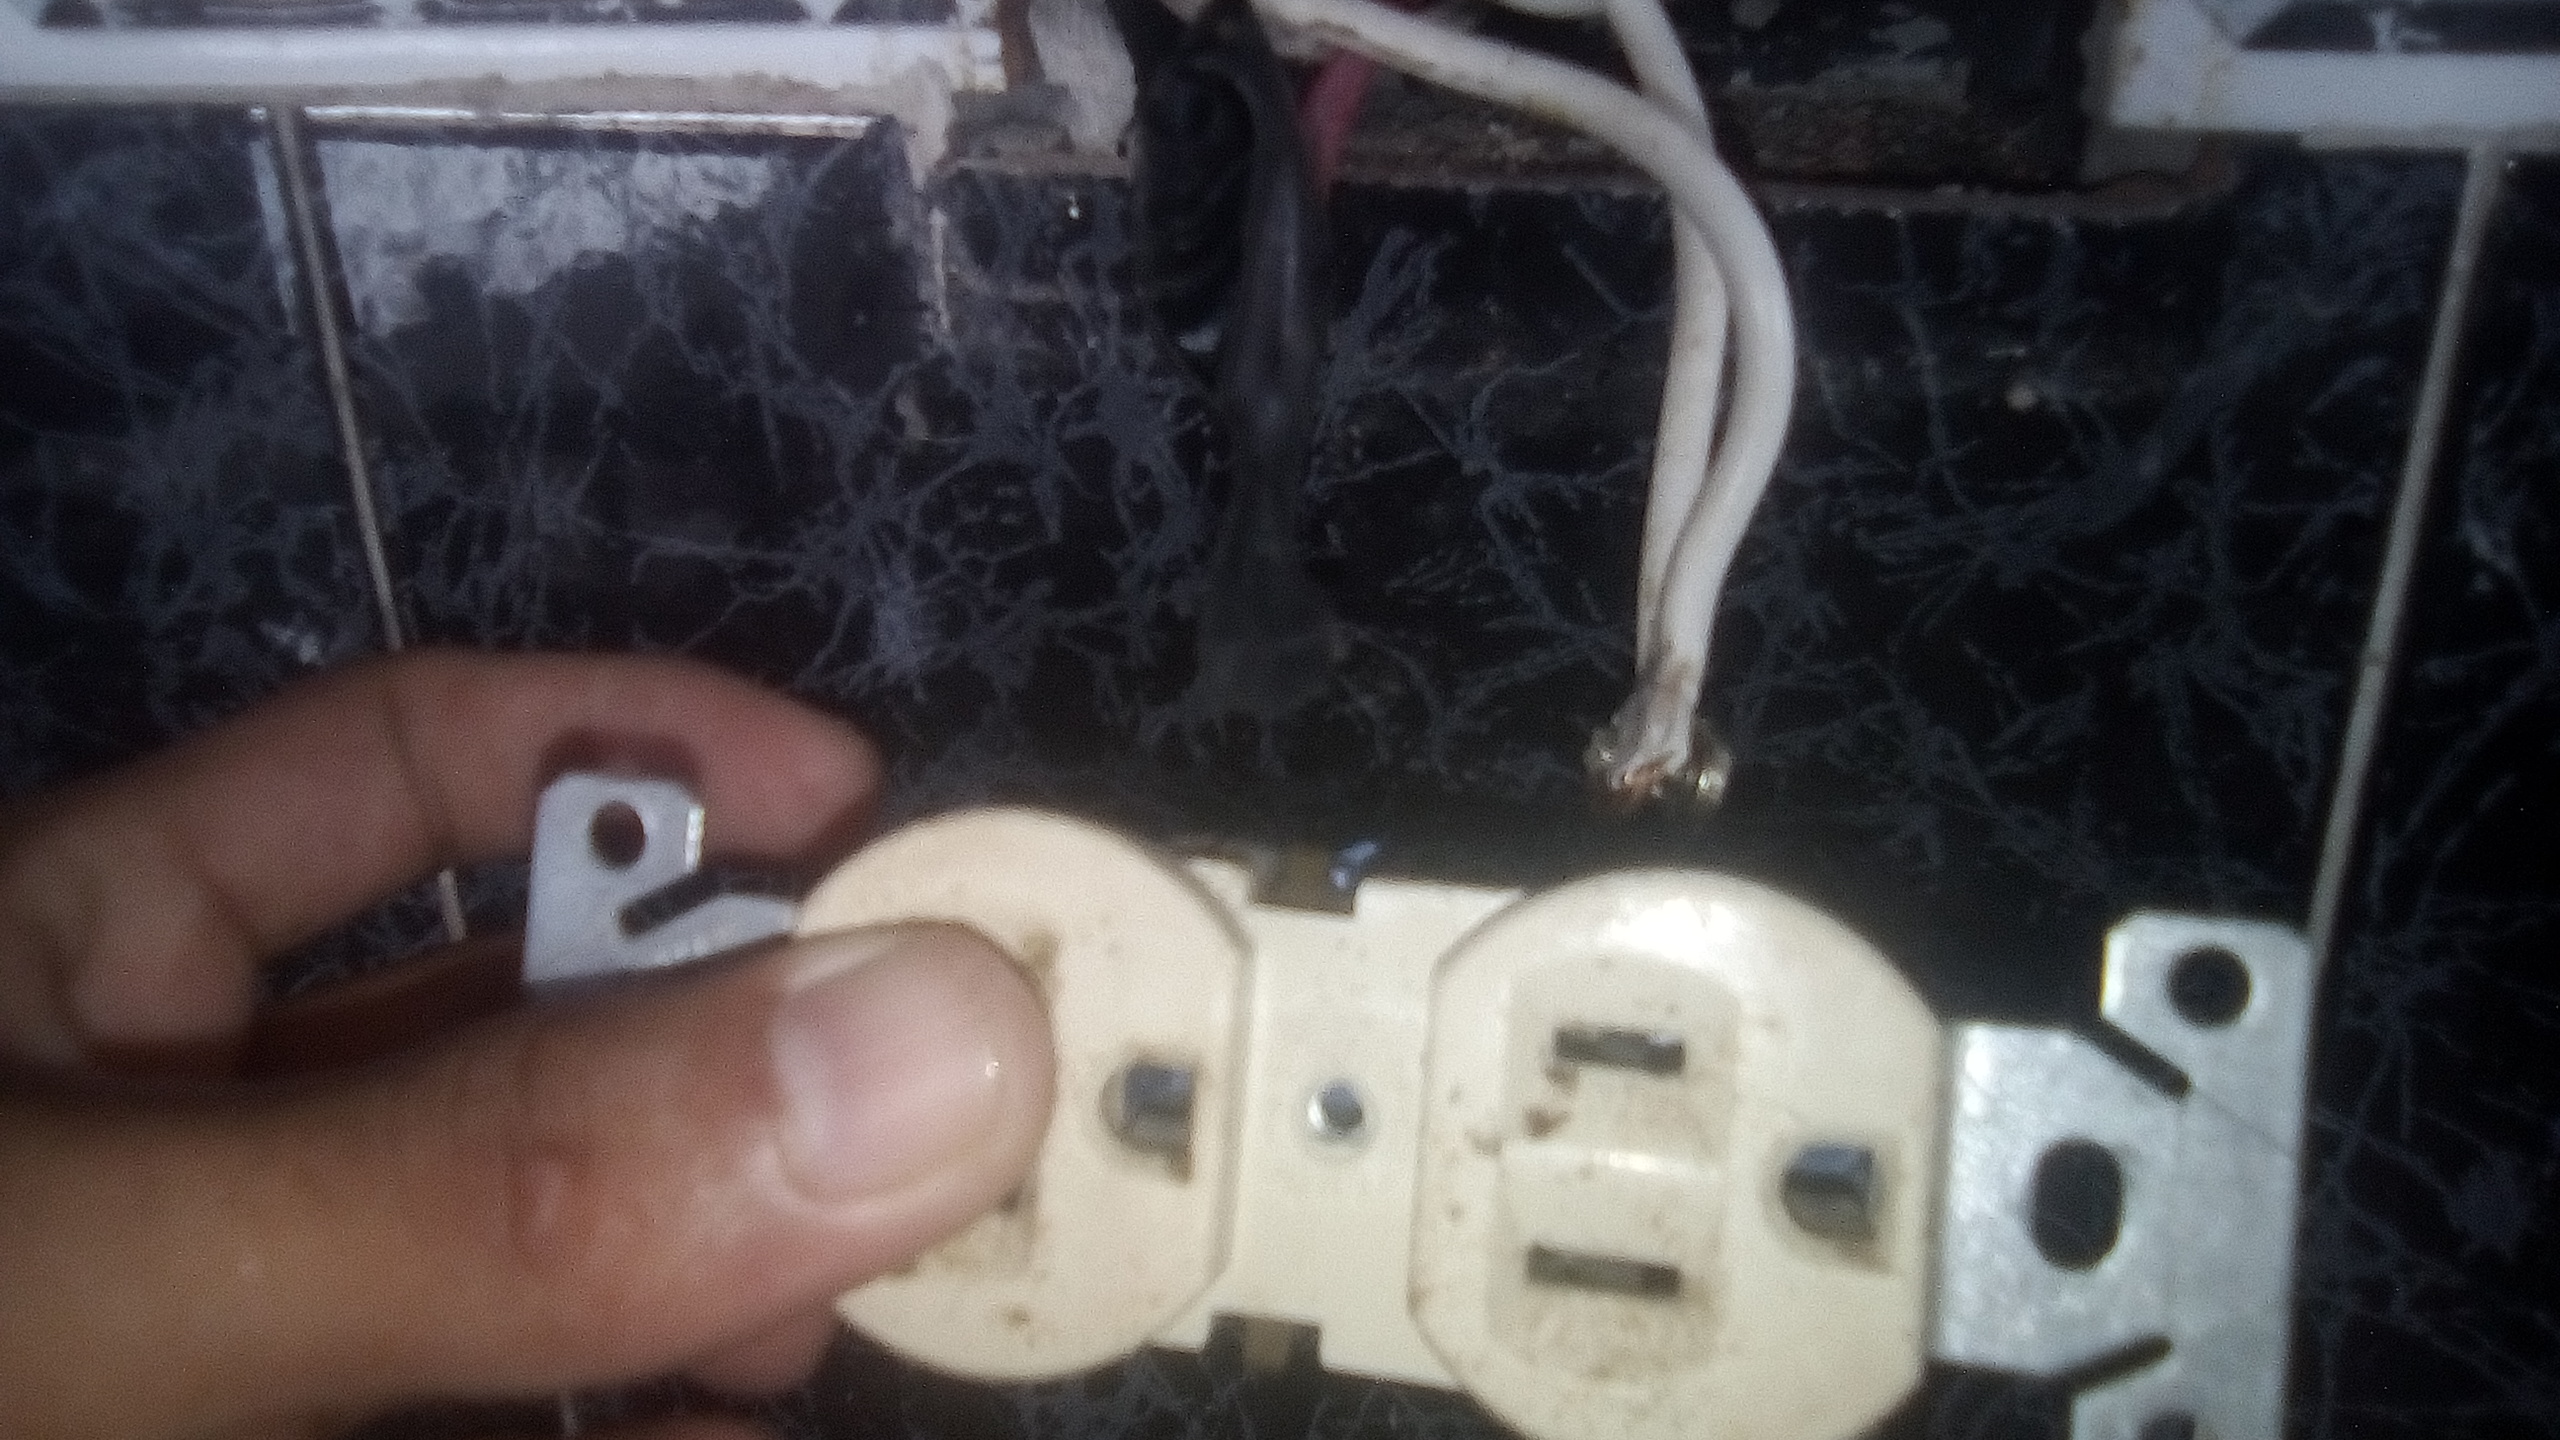
Comenzamos a colocar los cables en el mismo orden el cual lo retiramos, para que a la hora de conectar la corriente no ocasione ninguna corto. Luego de hacer esto, incorporamos él toma en el cajetín y colocamos los tornillos de sujeción con su respectiva tapa de protección.
We begin to place the cables in the same order in which we removed it, so that at the moment of connecting the current it does not cause any short. After doing this, we incorporate it takes in the box and we place the screws of subjection with its respective protection cover.
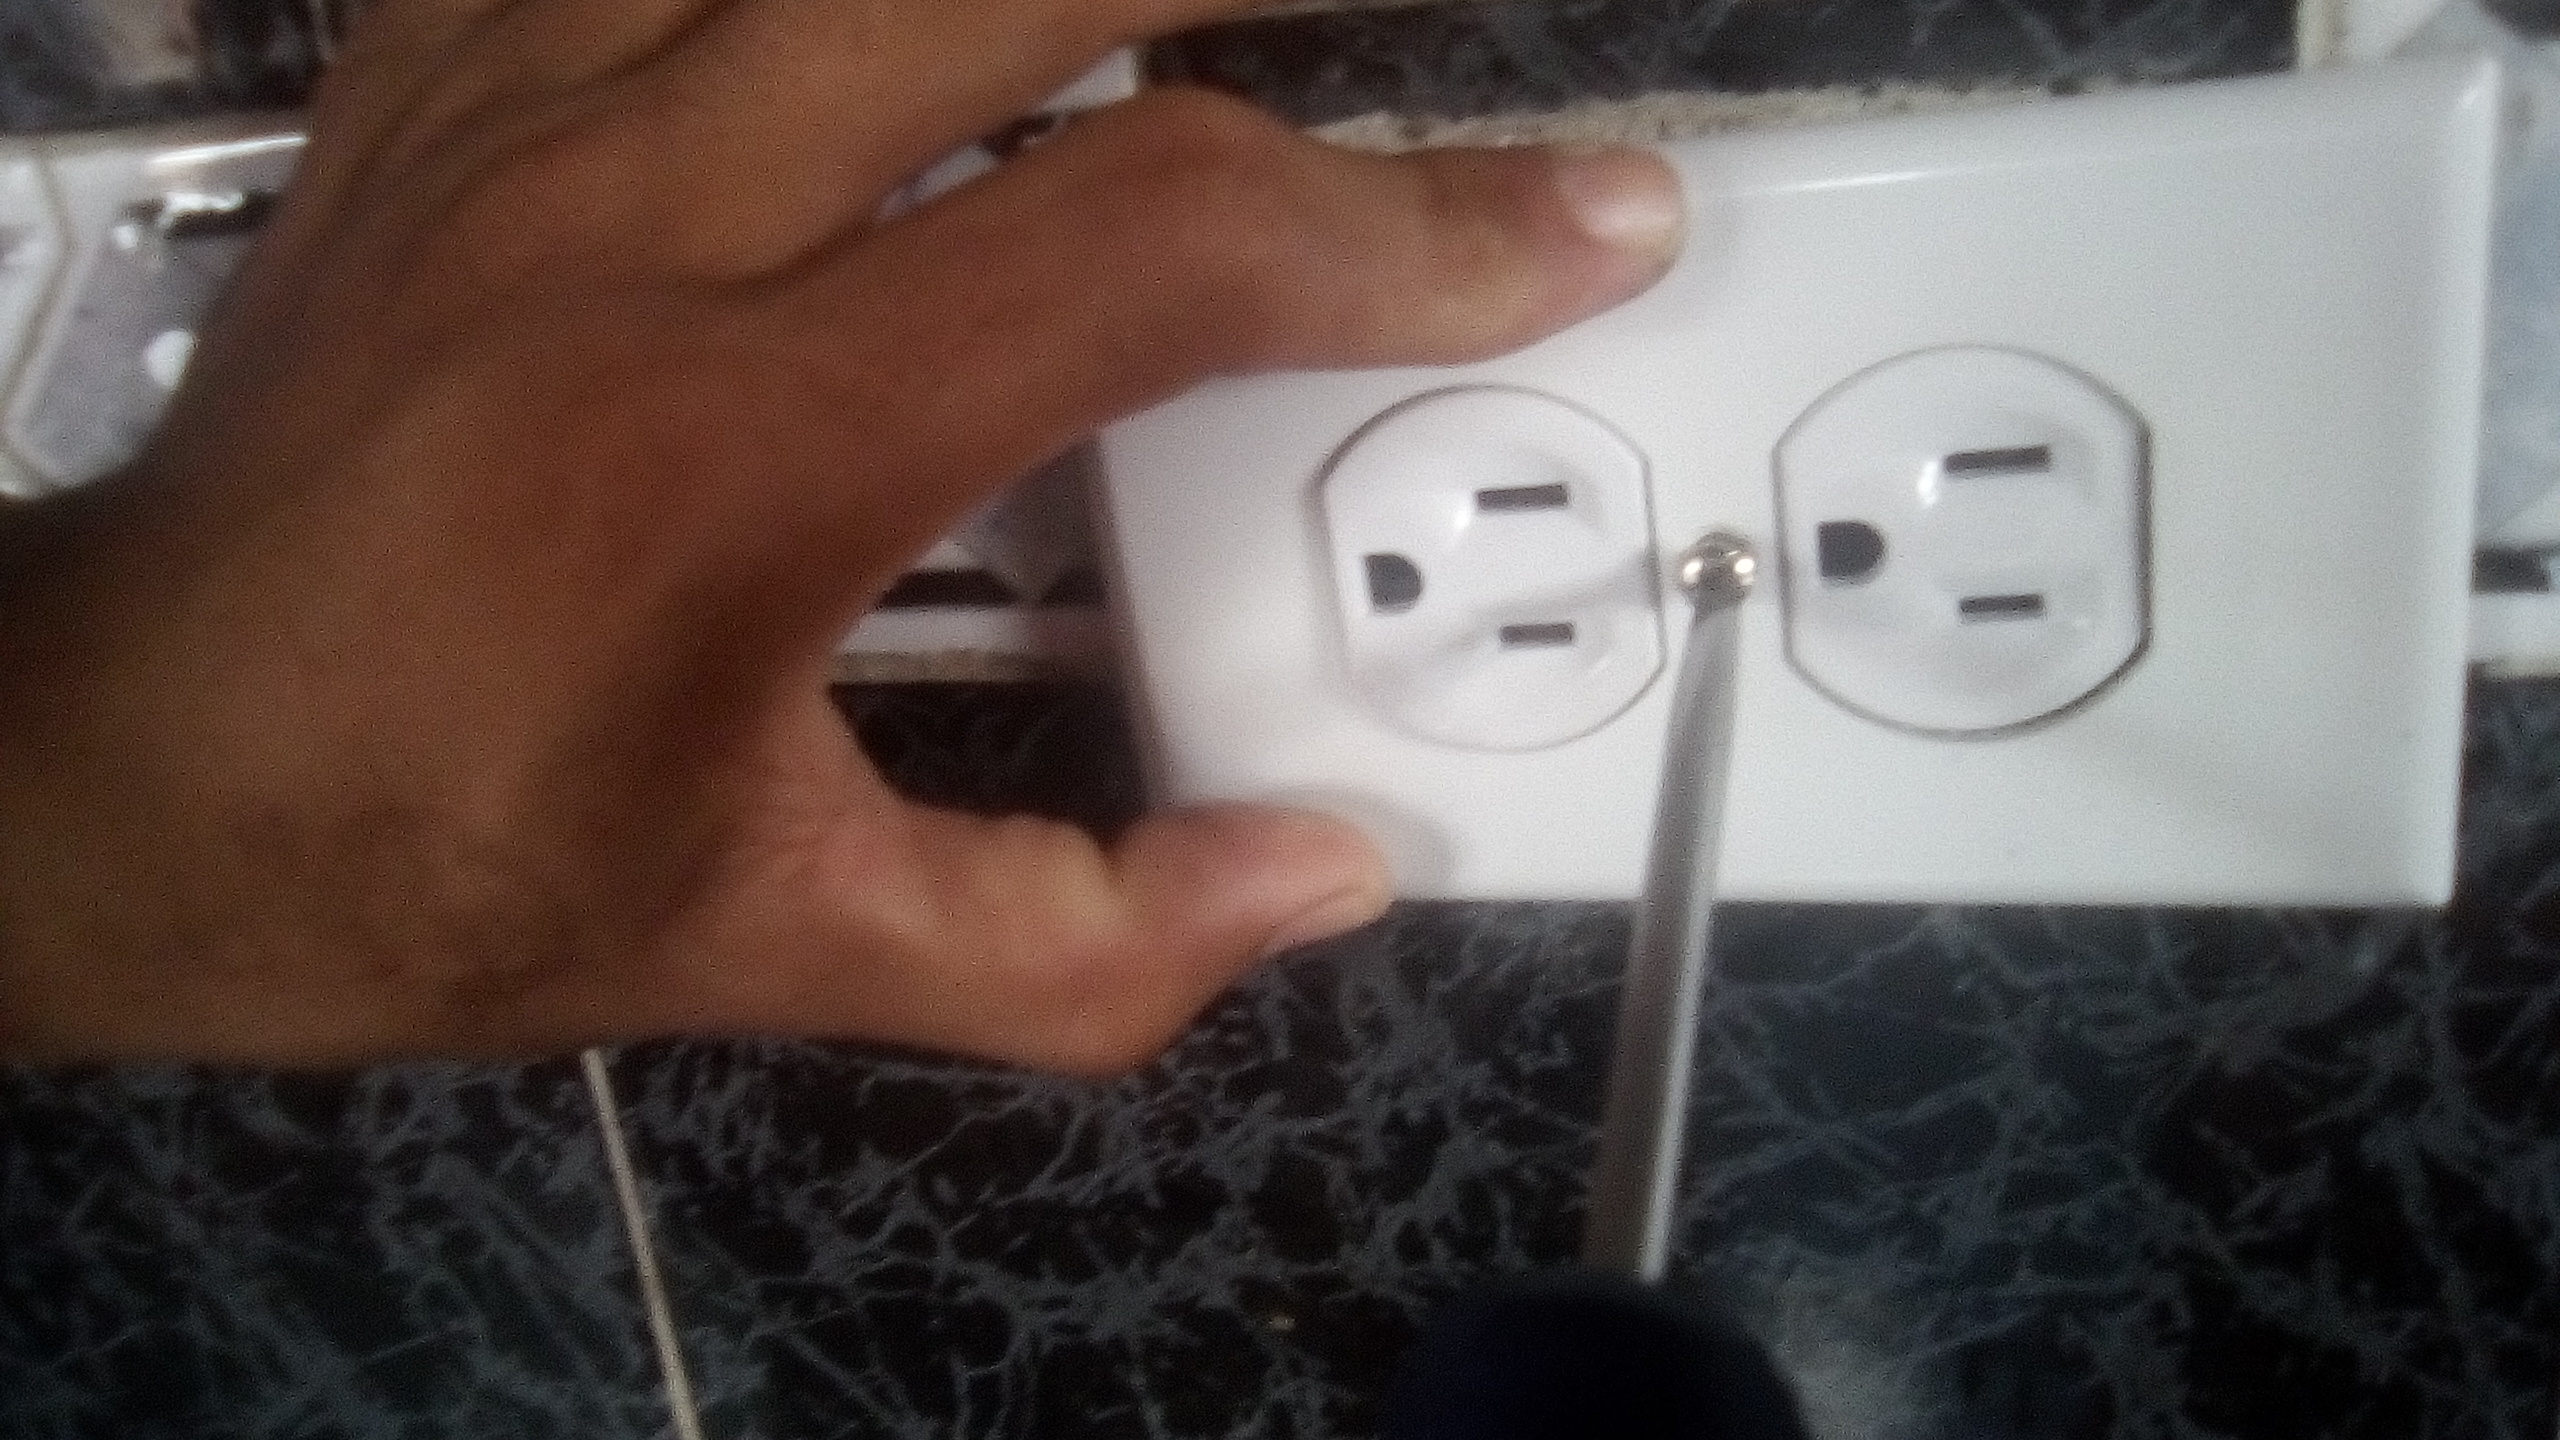
Colocamos nuevamente la corriente pasando la cuchilla o breque y podemos emplear nuevamente él toma estaba dañado. Espero que sea de utilidad amigos gracias.
We place again the current passing the blade or breque and we can use again the socket that was damaged. I hope it is useful friends.
Congratulations @perrillo14! You have completed the following achievement on the Hive blockchain and have been rewarded with new badge(s):
Your next target is to reach 50 upvotes.
You can view your badges on your board and compare yourself to others in the Ranking
If you no longer want to receive notifications, reply to this comment with the word
STOPCheck out the last post from @hivebuzz:
Support the HiveBuzz project. Vote for our proposal!