Setting up a private Ethereum blockchain network is not an extremely difficult task for the coders. However, it may be a bit of a challenge for the beginners. I will skip some technical details and avoid using some jargon so that everyone can understand the basic concepts.
Prerequisites
Before setting up the network, you need to install the following software:
- Visual Studio Code
- git
- NodeJs
- Ethereum Wallet
- Geth
The go-ethereum client is commonly referred to as geth, which is the command line interface for running a full Ethereum node implemented in Go. By installing and running geth, you can run a private network or participate in the Ethereum main network. By running geth, you can perform the following tasks:
- mine real ether
- transfer funds between addresses
- create smart contracts and send transactions
- explore block history
- and much much more
Creating the Genesis Block
To set up the private network, we need to create the Genesis block, the first block of the blockchain in our network. The code for the genesis block is written in JSON format. JSON stores data as a name/value pair. For example:
"name": "John"  ,
"age": 30
It uses JavaScript syntax, but the format is text only. Therefore,
JSON can be read and used as a data format by any programming language. You can use any text editor to write the JSON code(JSON: JavaScript Object Notation), I use Notedpad++. The sample code for the genesis block is as follows
{
"config":{
 "chainId": 45,
 "homesteadBlock": 0,
 "eip155Block": 0,
 "eip158Block": 0,
 "byzantiumBlock": 12
 },
 "alloc" : {},
 "coinbase" : "0x0000000000000000000000000000000000000000",
 "difficulty" : "0x20000",
 "extraData" : "",
 "gasLimit" : "0x2fefd8",
"nonce" : "0x0000000000000042",
 "mixhash" :"0x0000000000000000000000000000000000000000000000000000000000000000",
 "parentHash" : "0x0000000000000000000000000000000000000000000000000000000000000000",
 "timestamp" : "0x00"
}
I will not discuss the contents of the genesis block here. Copy the code in a text editor and save the file as
myGenesis.json
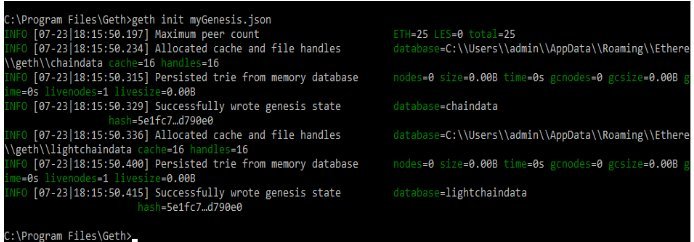
Now run the following command in the command prompt to initialize the genesis block
geth init myGenesis.json
The output is as follows:

Once the genesis block is successfully created, a folder name ‘Ethereum’ will be created in the following path:
“C:\Users\admin\AppData\Roaming\Ethereum”
This folder contains the details of the Private Blockchain.
Starting the Private Network
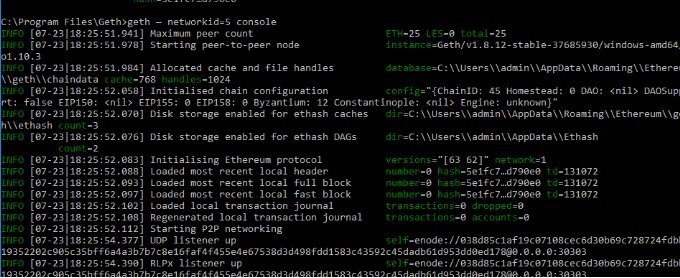
Once the genesis block is created, run the following command to start the private network:
geth — networkid=5
*“networkid=1” stands for the main Ethereum network. So any random number apart from 1 can be given as the network id. Also, “console” is appended to the command in order to enable us to write commands while the network is running.
The output is as follows:

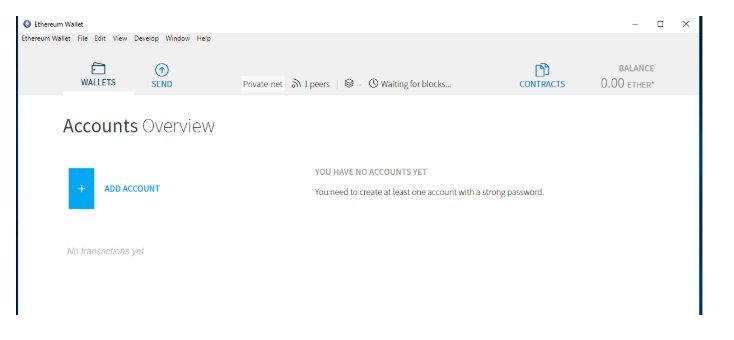
Launching the Ethereum Wallet
The output is as shown in the following figure. Notice that the network name is Private net.

Creating a New Account Address
You can create an address in the Ethereum Wallet application. The address can be created on the Ethereum Wallet App. In the ‘Wallets’ section, click on ‘Add Account’ to create a new account address.
To create new account using the Geth Console, use the following command:
geth account new
The output

Start Mining
To start mining on the private network, Enter the geth console with the following command
Geth --rpc console
In the Geth Console type
miner.start()
The output is as follows

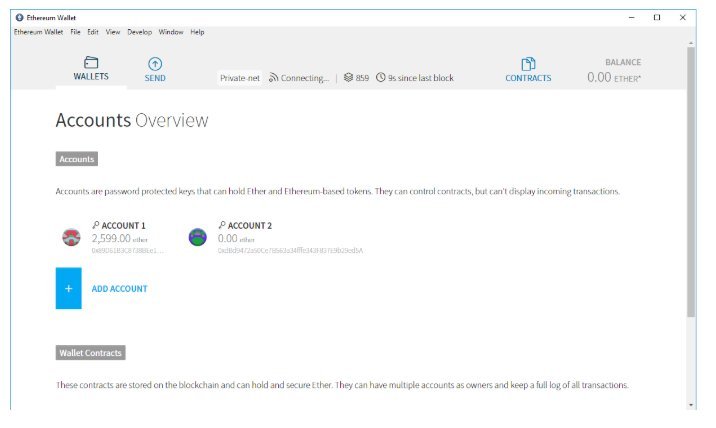
Now you can see that the mining process is generating Ethers , as shown in the following figure. Bear in mind that these are fake Ethers and can only be used for a private test net.

Stop Mining
Type Ctrl+C in the geth console and key in the following command:
miner.stop()
Type Exit to quit the geth console
Posted from my blog with SteemPress : http://www.blockchainguide.biz/setting-up-a-private-ethereum-blockchain-network-on-windows/