The Story
Saturday afternoon the Hobo Sketchers Commando had their weekly drink & draw meeting. Weather was just perfect, 23 º Celsius and a clear sky. We decided to shoot our pencils against an architecture location. So we choose la place du Ménage of Angoulême.
As if we were a secret command of the special forces, we occupy the square strategically. The square has a trapezoidal shape with a big fountain in the middle. We sat down and occupy the perimeter, three Hobo agents sat down on the terrace, at twelve o'clock, according to my position, another two at three o'clock. A beer supply chain was then established between the terrace agents and the perimeter. I decided to sat in the border of the fountain.
"Captain Sphericus! Captain Sphericus! -that´s my hobo surname -"Could you draw a panoramic view of the place?"-one of my commando mates asked.
-With pleasure! -I answered.
Step one: tasting the curvature
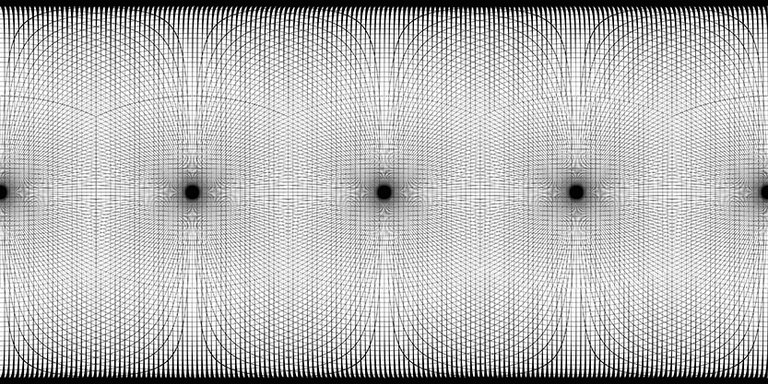
Fortunatly, I always have a geodesic spherical grid in my sketchbook. Until those amazing lines do not grab into my mind, I am obligated to have one with me. Time to time. As in the next days, I will publish lesson 3 of my Curved Drawing Lessons, my devote reader, you will have access at a deep step by step tutorial of this kind of drawing.
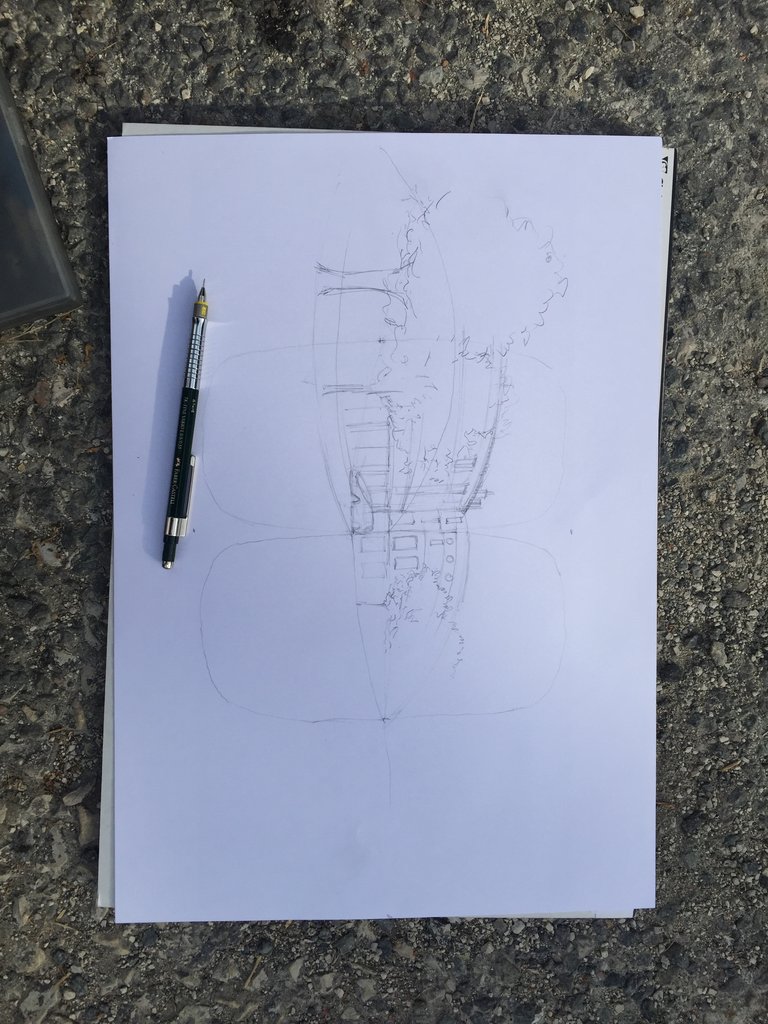
I take my time watching the top of the building, trying to understand the inner rhythm of the shapes. As a necessary visual transformation is required, I begin to follow the geodesic lines according to my grid which was printed in the back of my paper:

I like to use a 0.3 mm Staedler mechanical pen. It is incredibly soft and obedient.

I make pause every ten minutes and try to have the big picture. Curved lines can give a lot of pleasure but the are extremely pickey.
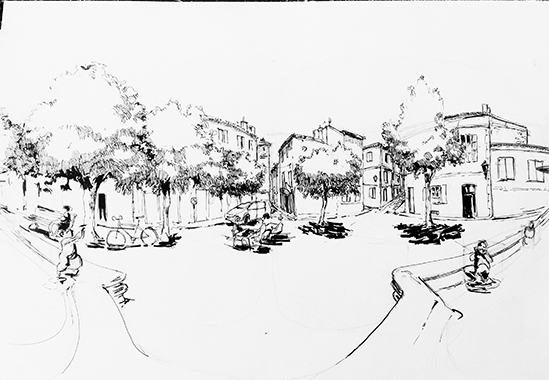
step2: Inking
Once the geometry is drawn, next step is inking. For recall, take your time in building a correct geometry because it is not a good strategy to fix incorrect lines with the fountain pen or liner. As your mum or your dad may have advise to you: First things first! :)

Inking process
step3: balancing lights and shades
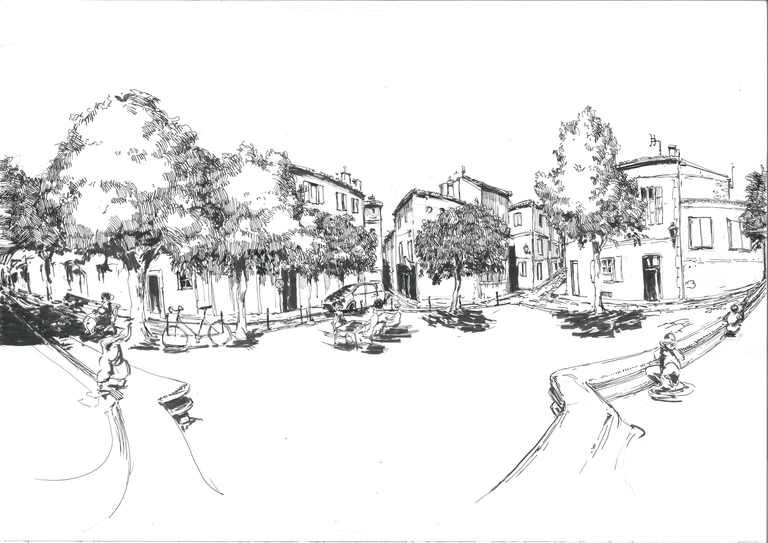
This is the most pleasant step of the process. Once the geometry is build, and the first ink layer rendered, you can take all your time to polish the details, keep in mind, always, the big picture, and trying to find the correct rhythm among every single feature. Remember, the Japanese proverb I read one time: The sum of us is greater than the individual parts.
The final outcome

Thank your for reading and have fun!
Other Curved drawing published:
- Sketching in a curved space #1
- Sketching in curved spaces #2 Rafael, the "Artisant chansonnier"
- drawing in curved spaces #3 360º sketch
very nice way how you are going towards sketching and the whole process
thank your @edgarstart!
Dear Artist @javier.dejuan ! This post has been resteemed and upvoted from FineArtNow account ! See you soon !
thanks! @fineartnow
Very awesome
thanks @uv10!
@resteemator is a new bot casting votes for its followers. Follow @resteemator and vote this comment to increase your chance to be voted in the future!
This post was shared in the Curation Collective Discord community for curators, and upvoted and resteemed by the @c-squared community account after manual review.
wonderful, @javier.dejuan ! every lesson builds up a reader's knowledge in this topic <3 and the accompanying pictures are very beautiful <3
Wow impréssionant! Never thought of drawing that way. I shall give it a try. Truly inspiring content. Glad I bumped into you. I'm following of course!
thank you! @jrej
So I read everything and looked at everything (once I managed to stop being mesmerised by the grid! XD) and I still don't know how you managed to go from a bunch of arcs on a grid to fish eye lens ink drawing. But it doesn't really matter. The finished piece looks amazing and it was fun watching it coming together :)
thank you @ryivhnn! keep tuned to my lessons. I will go into the details in the next posts
your post are very informative :)
i want to keep an eyes in your future post as well and learn this much too
i'm starting following you ^^
thank you!
very beautiful painting
@javier.dejuan
You really like writing about the weather temperature, Javier ^^.
And I always admire how great each and every one of your post is, I don't know how you manage to do it, but you did it so far. Each of your post is always filled with great trove of information and awesome art, this one is no exception. Once again, great job ^_^.
-upvoted-
The curves of this are beautiful, like a well planned symphony it appears to meld and flow so smoothly, but behind it is planning and work. Love it.
thank you @donnadavisart! What is important to retain, as I explain in lesson 1 is that below any drawing, illustration, sketch you draw, lays a geometry. Do your remember when you build a perspective grid? (I guess you've done that). Well, perspective grid is nothing but a geometry. What I am trying to say, is: the election of a particular geometry comes to join the election of colors, shapes lights and shades as a new aesthetic criterion to build an artwork. This is one of the main conclusions of the art research I am involved right now. And yes, I agree with you, curves are sexy and beautiful because nature is plenty of curves in every single being, animal or vegetable. Unfortunately, we still under the dictate of Cartesian space which is as boring as Monsieur Descartes. I have never seen a straight line build by nature, or God. Have you?
kind regards
Congratulations @javier.dejuan! You have completed the following achievement on Steemit and have been rewarded with new badge(s) :
Click on the badge to view your Board of Honor.
If you no longer want to receive notifications, reply to this comment with the word
STOP