~ Steemit Journal ~
Hello there!
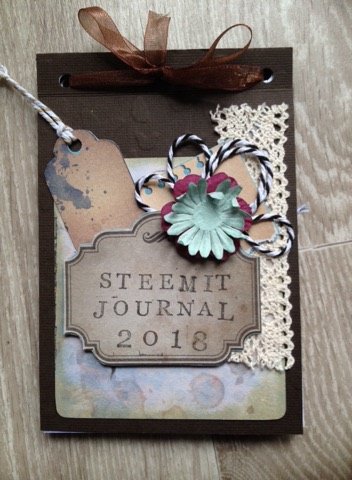
Today I'm gonna show you my DIY project tutorial "Steemit Journal". It's a simple mini journal for daily "to do list". I prefer vintage and made some diy embellishments. Please follow the instructions below and enjoy! So let's get started!
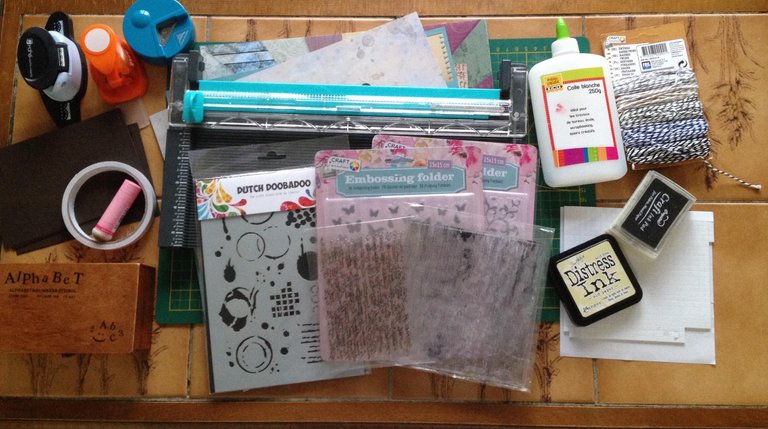
Materials and tools:
- Stamp
- Stencil
- Embossing folder
- Paper design/scrapbook paper
- Card stock ( brown)
- Notebook sheets/white paper
- Black ink
- Distress ink (old paper)
- Tags
- Twine
- Ribbon
- Lace
- Paper flower
- Sponge
- Glue
- 3d double sided tape
- Scissors
- Regular ruler
- Big shot plus machines
- Cutting & scoring board
- puncher design
Instruction :
Step 1:
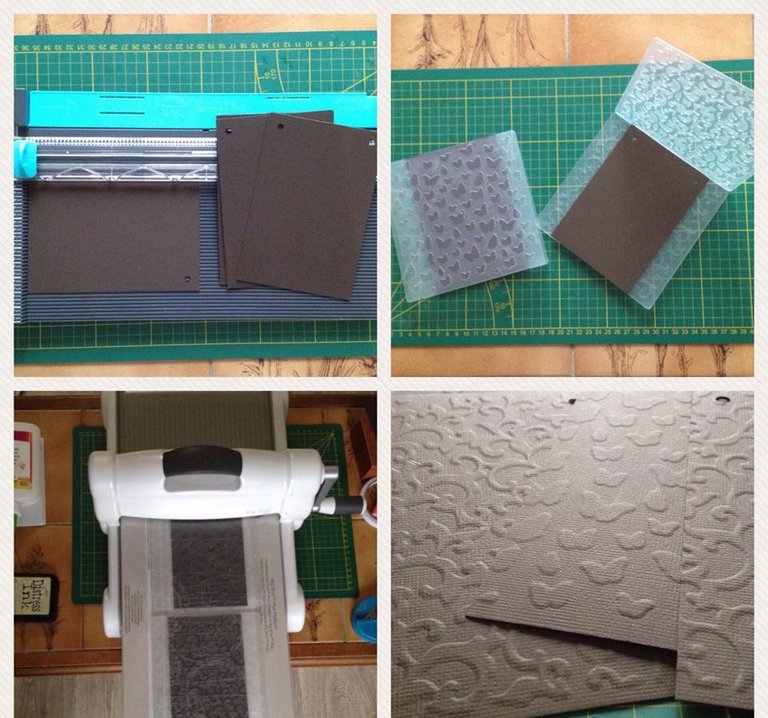
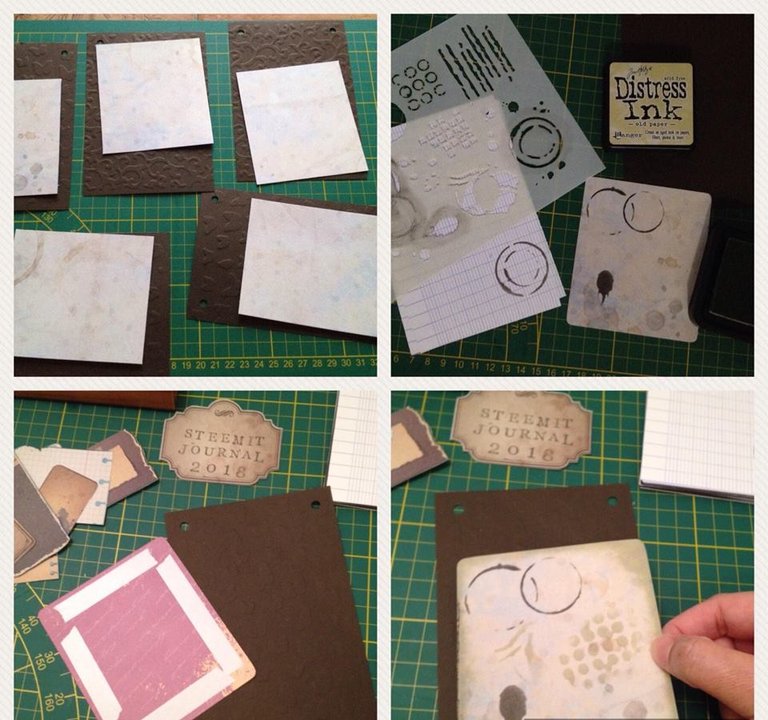
In a 30.5 x 30.5cm brown cardstock , cut 5 rectangles of 6cm x 4cm. Use a hole puncher at the top for binding. Insert the cardstock in the embossing folder, close and move into the big shot machine. I'm using a cardstock from Maché papier crèatifs, 216 gsm, embossing folder from Craft sensation, size 15 x 15 cm and Big shot plus machine from Sissix.
Step 2:
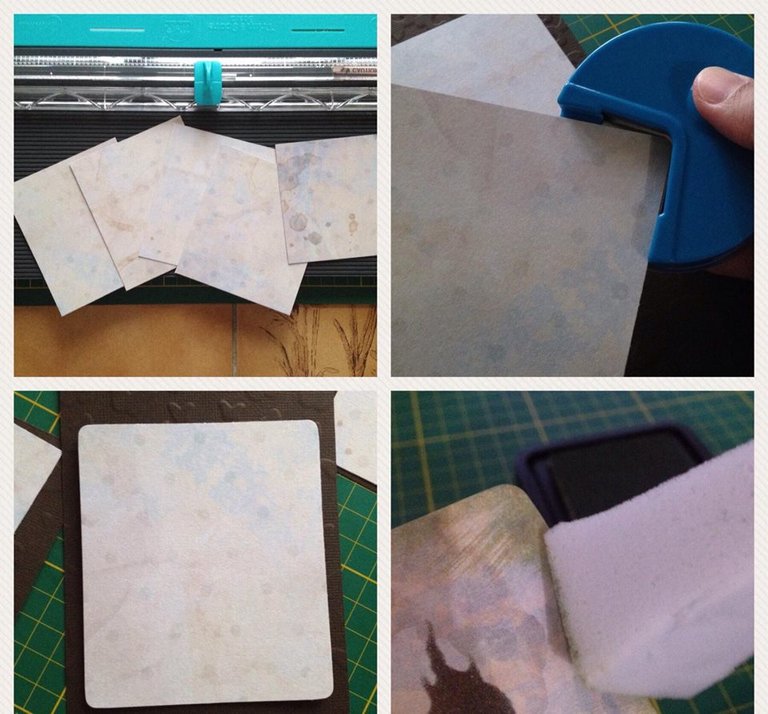
In the design paper, I use Vintage basic from craft sensation, 250 gsm, size 30.5 x 30.5 cm and it's a double sided design paper. Pick your choice, cut 5 pcs of 4cm x 3.5cm. Punch each paper using corner puncher and ink all the edges with distress ink (old paper) from Tim Holtz. This ink create an aged look on papers, fibers, photos & more.
Step 3:
Classify the papers by alternating 1 cardstock rectangle, notebook sheets and so on. Pick up the black ink and the "cut and dry" sponge and then stamp the stencils on all the 5 design papers. In the brown cardstock, glue the design paper. Cut out 8 (or more) notebook sheets with the following dimensions; 6cm x 4cm.
Step 4:
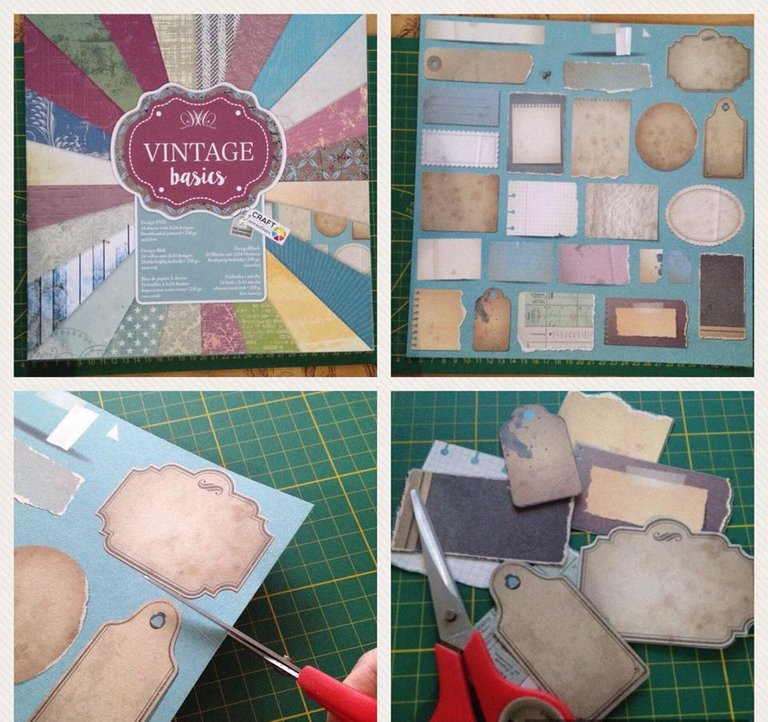
Take the design paper with the patterns of your choice, trim the elements with scissors. I choose pattern with some tags and etc, then fussy cut all the elements and stamp.
Step 5:
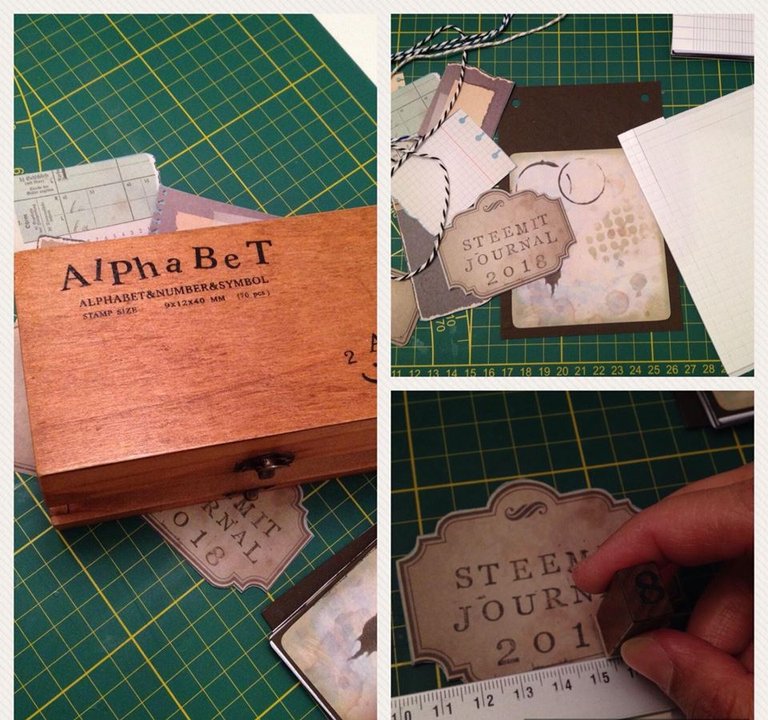
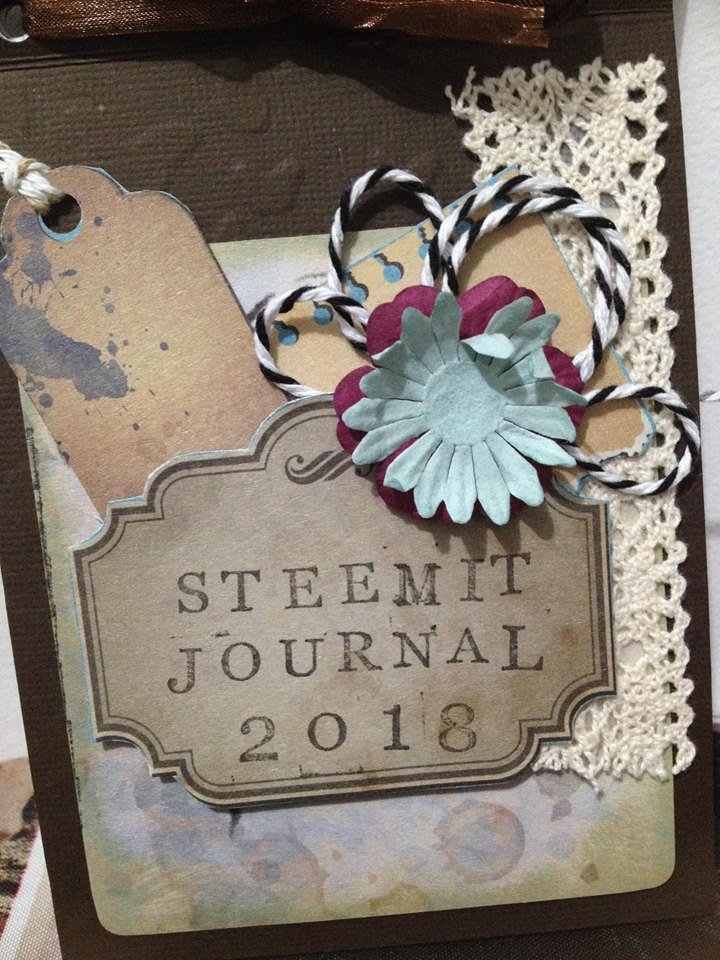
With black ink, stamp the text "Steemit Journal 2018" in your elements. I got the wood stamp from Aliexpress online shop. Use a regular ruler when stamping for your guideline.
Step 6:
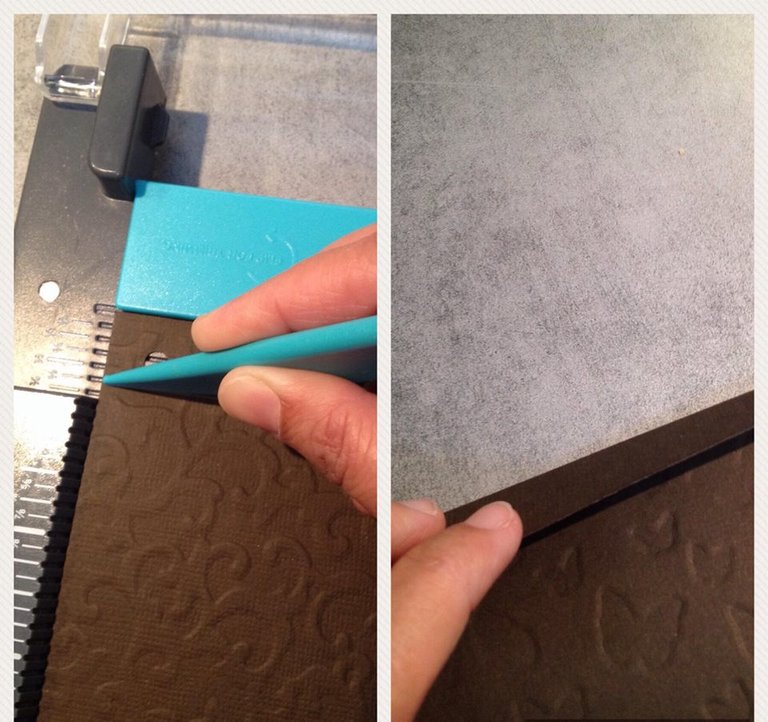
Score all the cardstock and design paper by 1.5 cm at the top of the paper then fold.
Step 7:
On the cover page, arrange your embellishments. With the twine, design a kind of flower. Stick with the 3d double sided tape in the center of the cover page. Paste over the label "Steemit Journal 2018". Apply the stamp on the cover page and some notebook sheets. Then add some embellishments like paper flowers, lace and tags.
Step 8:
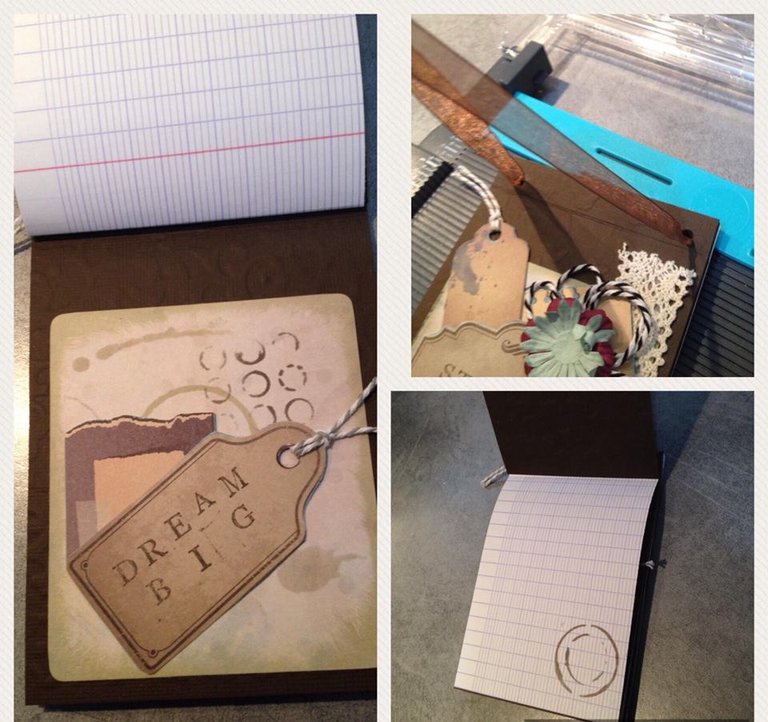
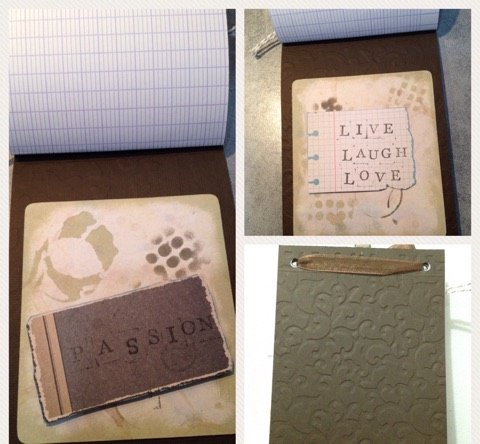
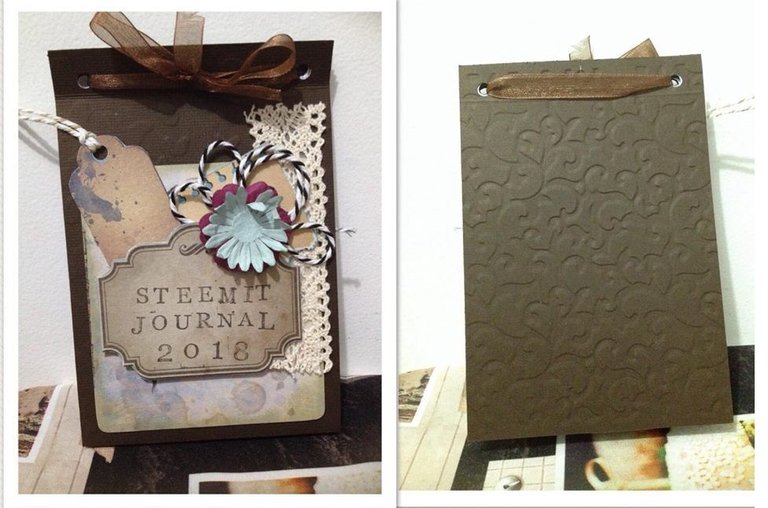
Lastly, reclassify the different papers by alternating them. Stamp and design all papers and bind it all. Place a ribbon, then tie and bow. Now it's done and ready to use! Happy crafting and enjoy!
Thanks for dropping by! Happy crafting!


I love these so much friend. Congrats! #steemitachievers is so proud of you!
Thanks friend... unexpected kauu :)
Wow I love its classical theme.,
Thank you I love vintage hehehehe
I love what you did there! Good job! Can you make one for me too? kidding tho.. ^_^ DIY crafts rock!
Thank you! If only the shipment is cheaper why not! Hehehehe
Waooo good work . U r way of explaining ur work is great
Keep in touch
Thank you @annie :)
you got curied! congrats dear.. oh i love traditional scrapbooks!
scrapbooks or journals!
Thanks dear...I didn't expect this :)
Enjoy the vote and reward!
Thank you :) a good year to start
i know it feels good you want to make more!!! go for it!
I'm so glad! As a newbie here, I will continue my passion and learn more
yes sis. go for it!!! habang di pa lumalampas sa 53 ung sp mo..maraming pang chances of getting curied!
unexpected lng jud ni nga post girl lol! Yes I will try to share some craft bhala cents ra ako makuha atleast naay post heheheheh
Crafty hands at work!
One of my passion :)
great work you did there! anyway, are you bisaya? cause im also a filipino living in cebu.. hehe anyways keep up the good work here and thanks for sharing your wonderful work with us! :)
Hello! Thank you... Oo bisdak kaau ko from Davao hehehehe
it looks so adorable, sis. Congrats!
Thanks sis... :)
Great artist! thank you for sharing your brilliant Idea @tonie on how to make some DIY project. It Encourage us to make our own DIY project.
Thanks ... I love diy even up cycling :)
wow nice i like vintage design...very creative
Thank you girl... :)
You are so creative. I love the work.
Thank you... :)
Super nice!!!! I want this one too!
Thanks girl... :)
So creative! I do love crafting too.
oh really? good! you can post some of your craft too :)