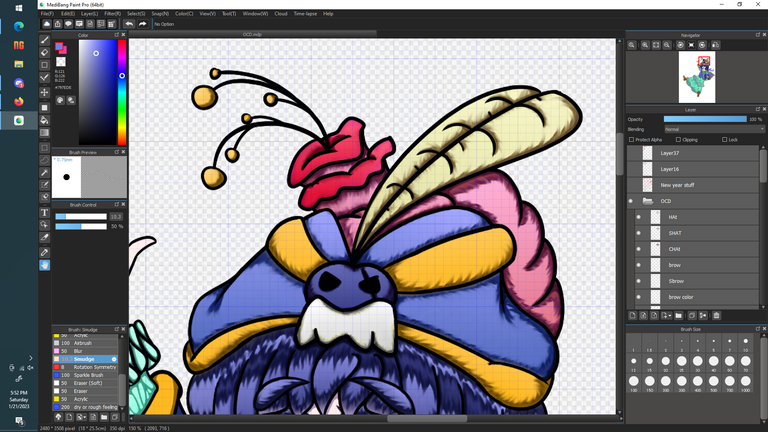
Hat: Cross Chapeau
Ohh, hello there!
Its just me, ya boi TAKURI! Doing segmented post to have more in depth post for each segment, so that if you want to replicate my style. Reading my post will help you by alot! Kewk im only a lvl.7 Dark Arts User, so don't expect much.
We have to start with the basics
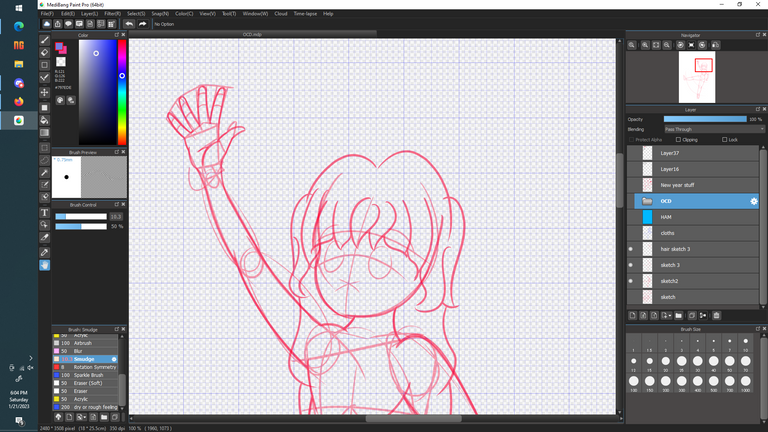
Sketch 3
After Creating your sketch, determine the angle and type of hat you want the character to wear.
For me my inspiration was the Anime-Series One piece and trying to get a pirate hat, to fit with the pirate theme.
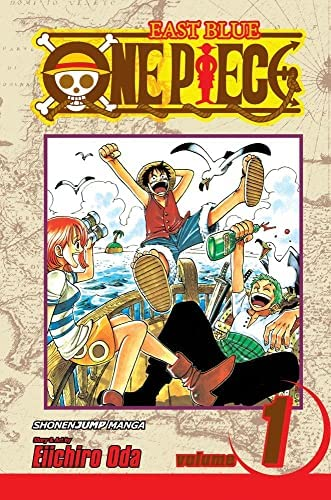
Didn't want to go with a
"Straw-Hat"
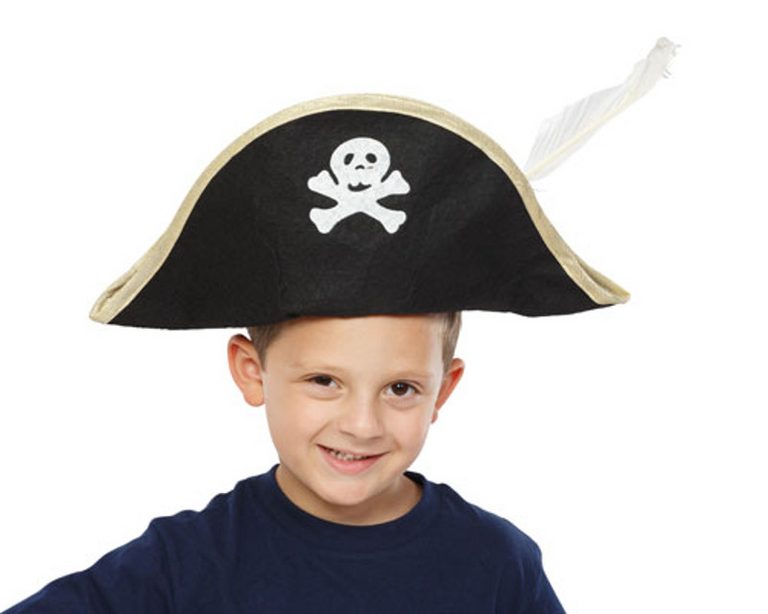
So i just picked the front facing skull one, with minor adjustments. So i did a bit of searching and found out that there are many types of real-life pirate hats, usually just modified navy hats.
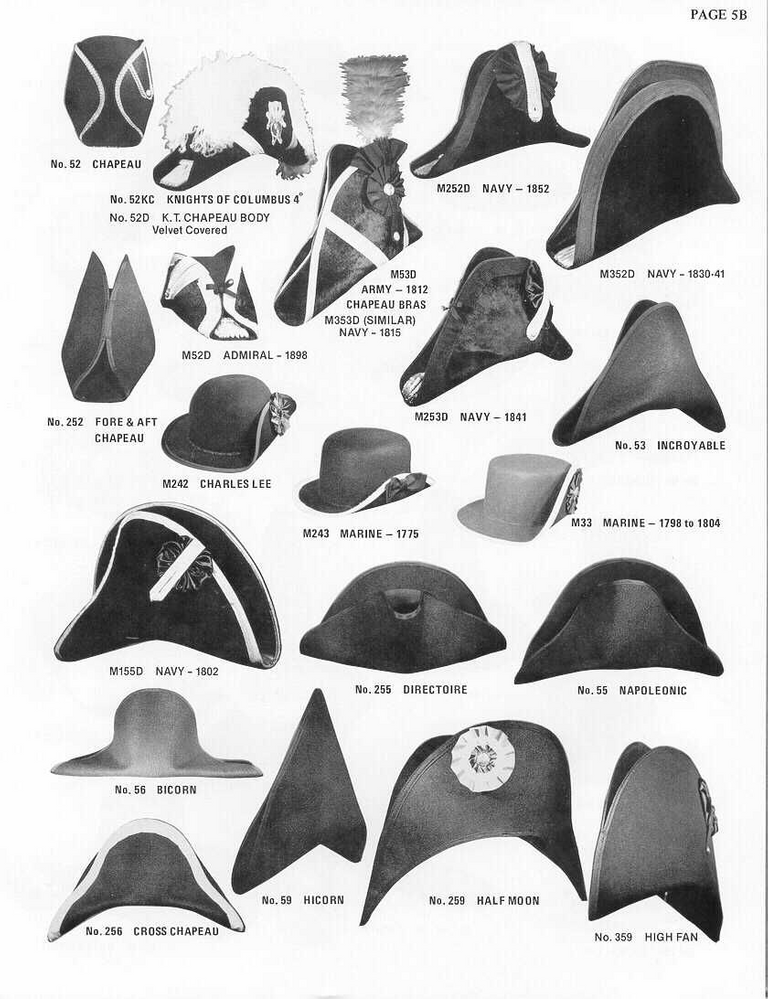
The one im going to reference is
"No.256 Cross Chapeau" (Bottem-left)
There are alot of hats but for this drawing i want the Cross Chapeau because it looks cool! And blends in well with the Character design im going for.
Fun Fact about Pirate hats:
Why do pirates wear Bandanas underneath their hats?
-- Its to prevent the sweat dripping to the eyes from all that hot tropical climate of the Caribbean sea.
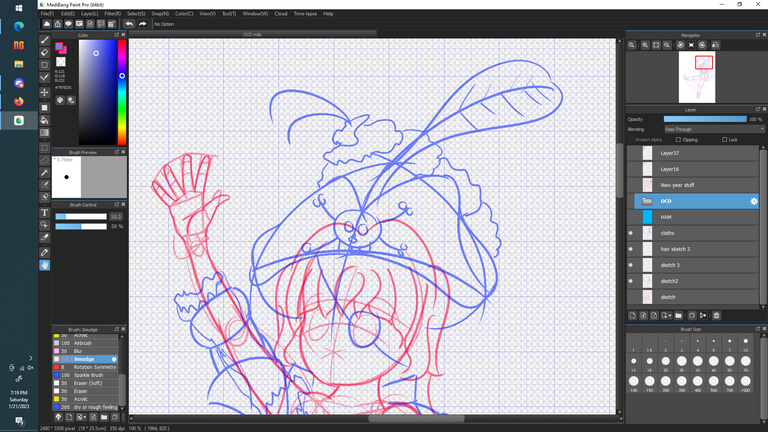
Cloths Sketch 2
After Creating the Hair sketch, you can go ahead with the Hat sketch. Sketching allows me to plan and refine before committing hours to weeks of my spare time. KEWK
*Ignore the Eyepatch, Might create a variant where the character is wearing one. Hahahha
I went with the classic, Jolly Roger + Big feather + Flowers. Similar to that spanish fruit lady
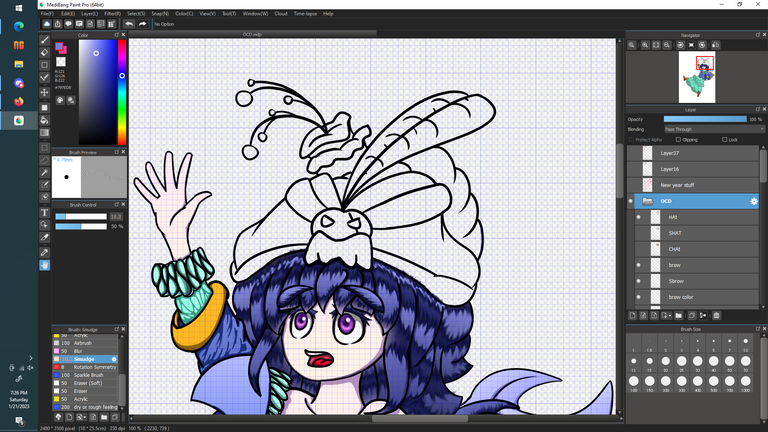
Outline
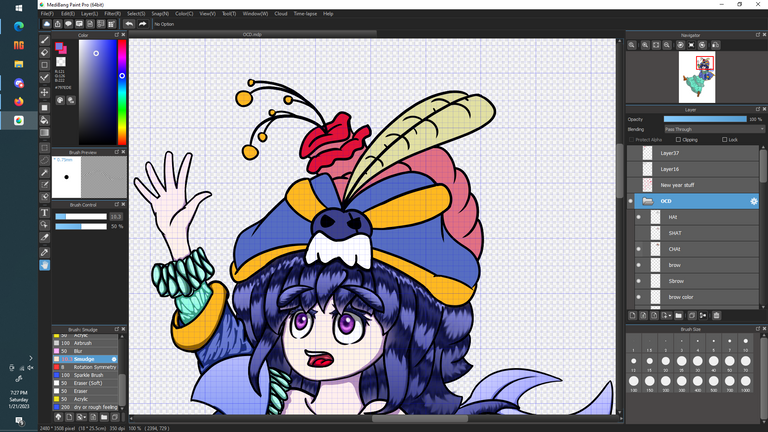
Base Colors
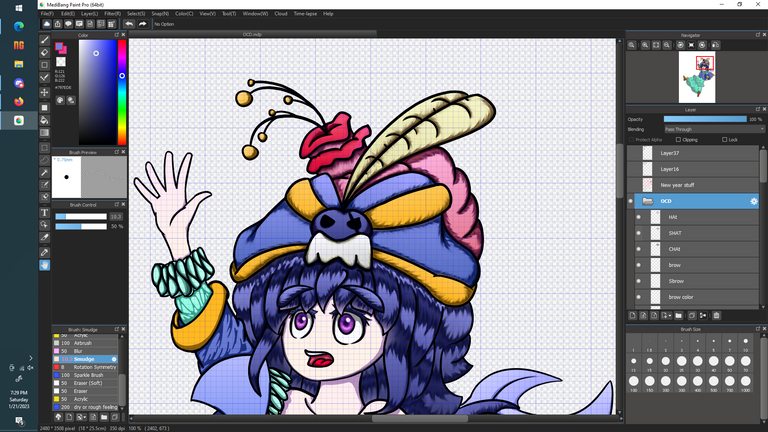
Final output (No filters)
Color Choice
Since im going with a Deep Blue + Flamboyant colors aesthetic.
Here are the colors i decided on.
Base Colors
Hat:
- Blue
- Yellow Orange
- White
- Deep blue
- Black
Feather:
- Sand yellow
Flower:
- Yellow Orange
- Red
- Pink
After picking Noice Solid base colors, that's when i experimented with complementary colors like green or yellow to give POP to the art.
At the end of the day, while narrowing my thought's to just the hat. I realized and zoomed out.
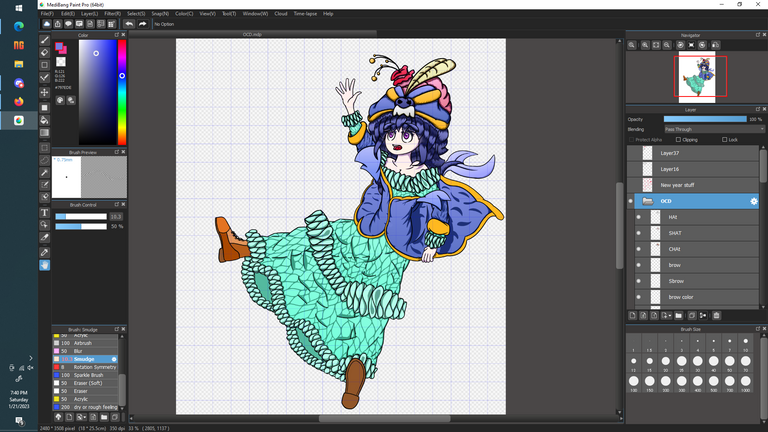
OCD Waifu WIP
With the character laying down trying to reach for something, i decided to boost up the lighting and abuse the gradients.
*OHH I LUV YOU GRADIENTS!
After deciding what angle and intensity. I created the Shadow hat layer, that's where i will put my shadows + Effects so that if i make a mistake, i can just back track.
Gradients
I just took the base colors and adjusted the lightness and saturation.
Hat:
- Light blue (50%)
- Lemon yellow (50%)
- Gray (50%)
- Purple (25%)
- Yellowish-brown (50%)
Feather:
- White (25%)
- Yellowish-brown (50%)
Flower:
- Violet (75%)
- Purple (50%)
- Orange-brown (50%)
- Light pink (50%)
- Light red (25%)
- Dark red (25%)
After adding the Gradients, now we get to the good part. Strokes and smudges.
For now imma try to recreate what i did so you can follow the step by step process on how i achieved the other details.
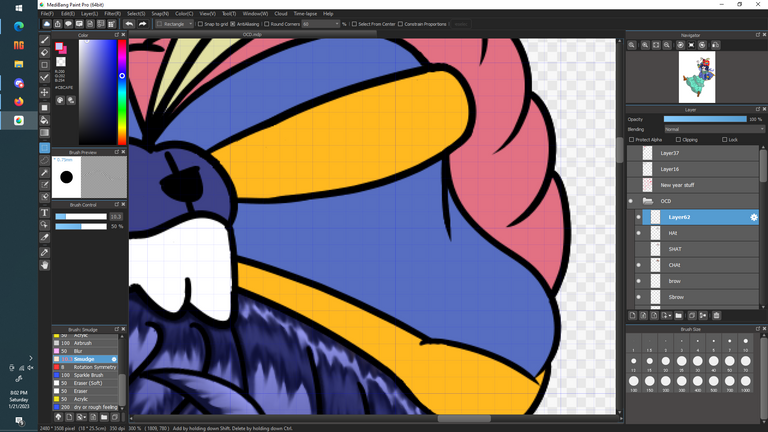
We going to use this part of the hat as an example. Use the Magic pen tool to select and highlight the area to you to color.

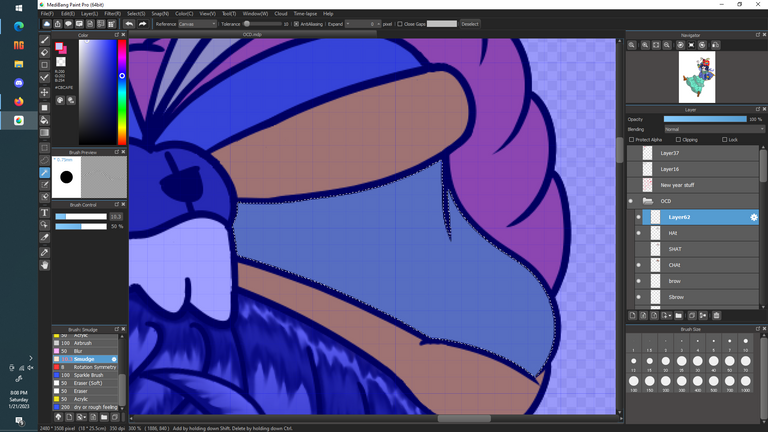
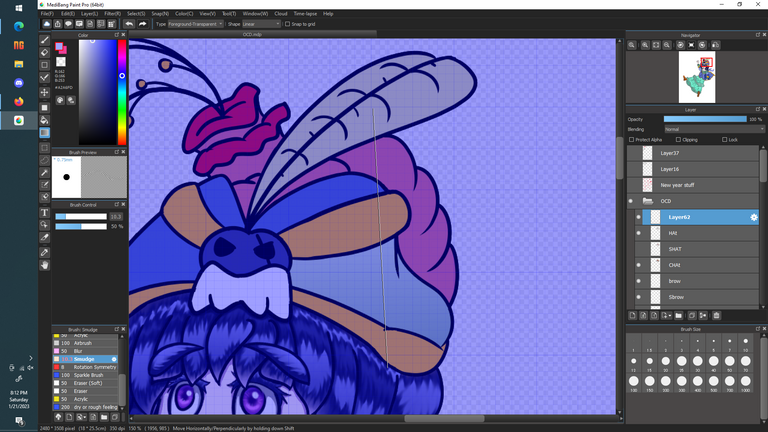
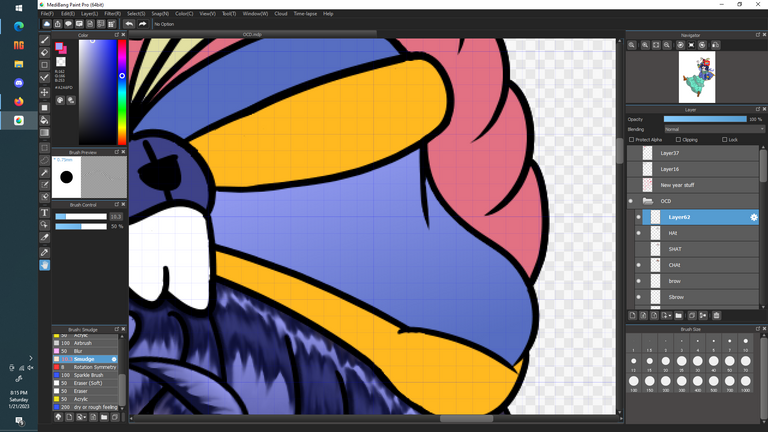
Create a new layer, call it Effects or Some other thing.
We select the region we want to highlight using the Magic Pen, or you can do it manually. HUhuhu.
Set it below the Outline layer, so that whatever mistakes we make get covered by the outline. #Drawing-Hax
After selecting the layer, create a distance and apply the 2nd color you want.
For me im doing (Foreground-Transparent) So that only the primary color get spread out. The distance helps with easing the Gradient intensity.
After Applying the Gradient, exit the highlighted area and revel in the powers of TOOLS!
Finally were getting into the Sweaty try hard part.
The Shadows!
Shadows and Strokes
We going to do a simple Shadow + Strokes.
*I should have taken screenshots whilst i was drawing hahah!)
Shadows:
- Dark Blue
Strokes:
- Purple
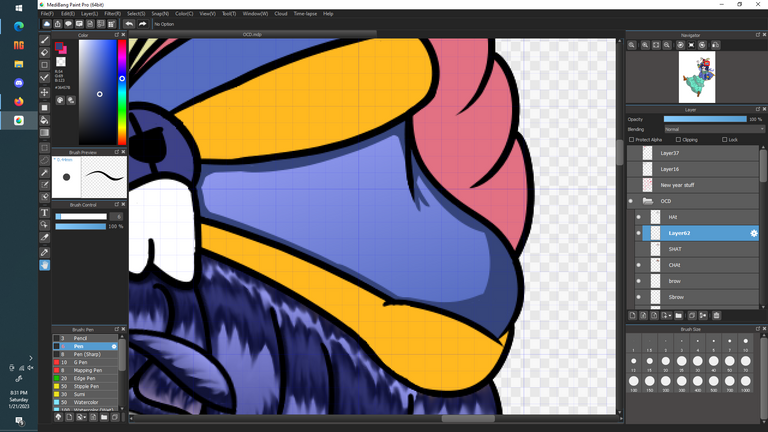
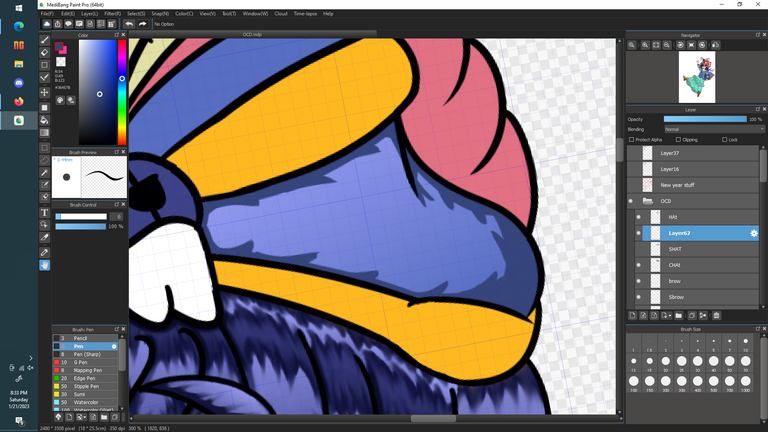
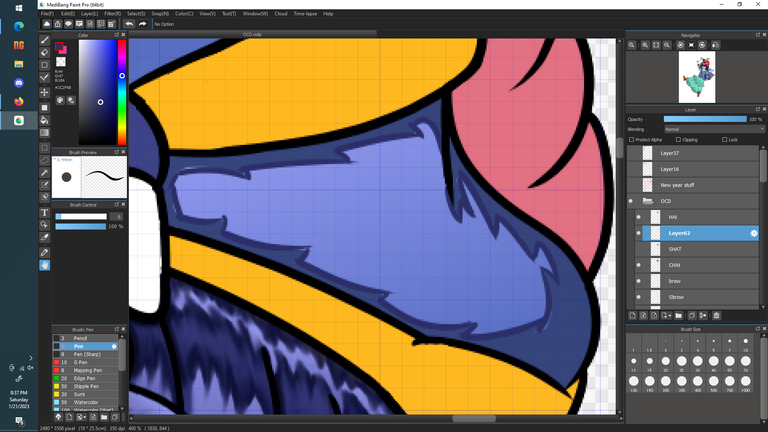
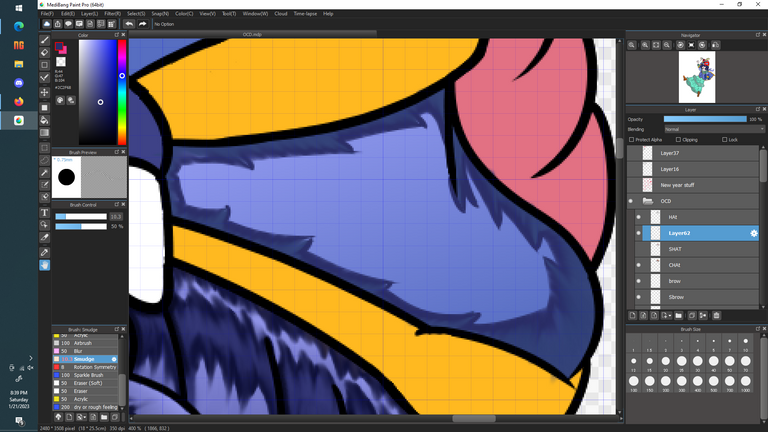
(Fig.1)
Create Shadows, try using a darker version of the base color. In this case i used Dark blue. I created a simple shadow, nothing fancy.
(Fig.2)
After doing the shadows, you would want to make sharp points to give the hat some bumpiness. Actually this is optional if you want your hat to be more streamlined.
(Fig.3)
Then select purple or a darker blue hue and draw an outline. Strokes if you will, of the shadows. This will create a contrast between the light gradient and dark blue. So that our drawing looks more vibrant.
(Fig.4)
At the end of all that work, use the smudge brush.
My settings are (Brush size:10 / 50% Opacity)
The settings depends on what fits you best. These are the ones that suit me.
Simply Drag the purple outline inwards the shadows to cast a smooth edge coloring, of which we will be helping us during the Smudging process.
Although if you want a more mellow Smudge, skip Fig 2-4
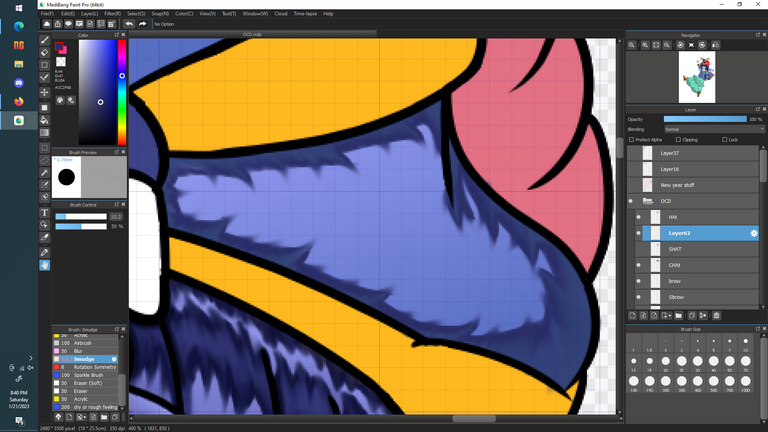
Base Smudge
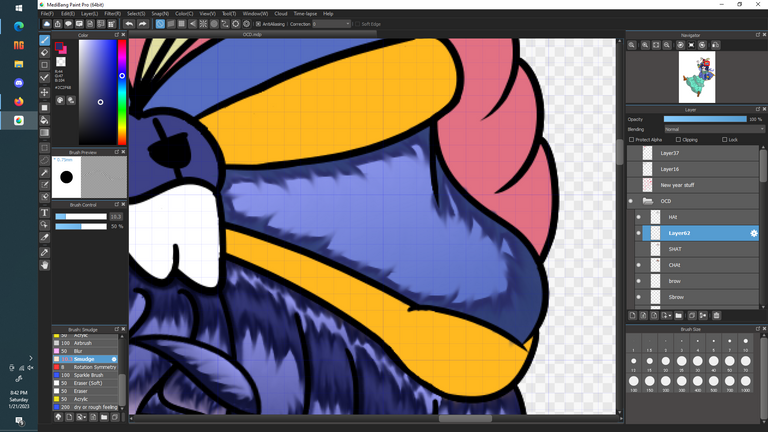
Smudge Delux
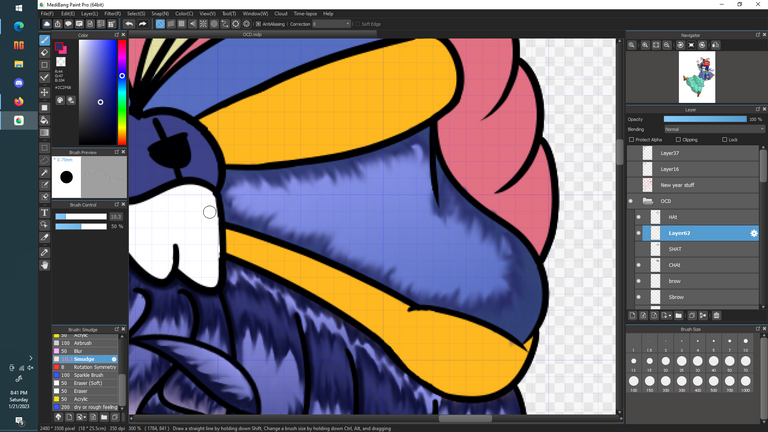
Smudge Wash
Fig 5.
Finally we are here, the last few steps of which you can repeat for the rest of the hat.
Grab that smudge brush and drag all the shadow colors inwards (Compliment the angle of spike)
This will spread out the intense color and give you a nicer finish. Repeat it until you have hammered out all the bits.
Fig 6 and 7.
You can choose to make it more intense but doubling the amount of smudges, or going wild and washing the entire thing making your strokes unrecognizable.
Either way find, something that fits you.
Links and sources
ONE PIECE!
https://www.amazon.com/One-Piece-Vol-Romance-Dawn/dp/1569319014
Kiddo with hat + Cringe
https://neverwashadish.com/foldable-pirate-hat/
Pirate Hats : By Antonio Robateau
https://www.pinterest.se/pin/781233866582168651/
Drawing program used: Medibang
https://medibangpaint.com/en/
The rest of the drawing
UWU by Me.
I might upload some crazy stuff in @takuris yohohoho.
Imma make that account my bad ending (Went insane takuri)
Don't want to flood this account with the kinky + Suicidal/Depressing content. Since im going to use this one as the front face to share between my friends and fellow artist.
Grrrrr! @tibfox there ahahha, even though i was only active for +4 months. I have been grinding my art + Writing skills.
You can check the SIGMA MALE GRIND HERE.
https://peakd.com/return/@takuri/my-1-year-training-arc-is-over
Also @apsu come back to life! I wanna eat you!
Welp i guess that's about it. Thanks for wathing!
-- Takuri
Never!
YOUR ALIVE!
Pls come back and talk in the discord, we miss you so much!
I'll do my best and activate myself again at a good point :)
In Finnish there's a word "ruuhkavuodet", basically "traffic jam years". When kids are at a certain age, life is at a certain point and you don't have time for anything for some years.
I think I'm going through them right now.
No worries, unlike Derangedvisions im not a old fart yet!
I can wait a 100yrs until then. Don't let yourself become moldy you breadmann! Take care of yourself because im the only one allowed to eat you alive!
Never again!
WOW! Great post...
UWU ty, kewk im so busy ahahha
I like how detailed your process it. Now I think my art blogs need a little vamping haha! I learned something today about the bandanas. I thought it was only for the hair to keep them out of the face.
Have some !PIZZA !
GRRRRRR, i must surpass you and adamada!
Hey there! Such a detailed guide and you got talent. Perhaps share your future blogs like this in Sketchbook or other art related communities?
UWU ty, will try.
Already in On-chain art and art-bees. Me want to check other art communities huhuhu
Congratulations @takuri! You have completed the following achievement on the Hive blockchain And have been rewarded with New badge(s)
Your next target is to reach 400 upvotes.
You can view your badges on your board and compare yourself to others in the Ranking
If you no longer want to receive notifications, reply to this comment with the word
STOPCheck out our last posts:
Support the HiveBuzz project. Vote for our proposal!
I gifted $PIZZA slices here:
@jijisaurart(2/5) tipped @takuri (x1)
Learn more at https://hive.pizza!