Hello Steemians. This is another in a series of tutorials that I want to share in the community. I am sure that there are fellow artists that can learn something from these, the same as I am learning from you Steemian artists every day!!
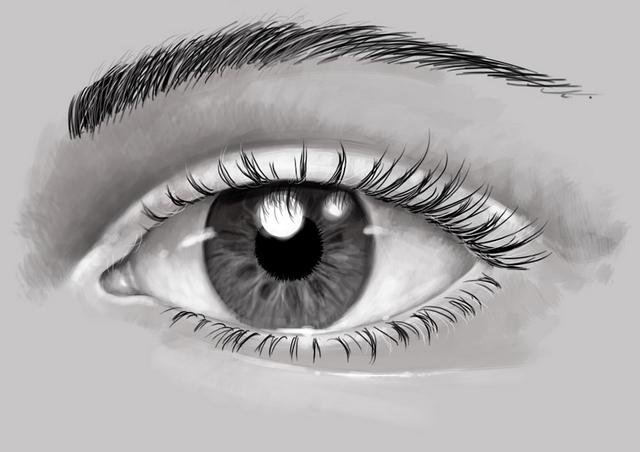
The shape of an eye is as varied as there are people, but this is a typical female eye and is a good standard to use.
In the inner corner of the eye is the lachrymal or tear duct area. Look at your eye in a mirror to see what I mean. I start with that and then follow a curve as can be seen below. Sharper upward curve on the inside and then a gradual tapering down toward the outside. I have drawn the arrows to demonstrate:

As you proceed with the eye, its important to bear in mind that its actually a sphere or "ball" shape. It fits into the socket inside the skull and only a portion is visible; the eyelids cover most of the sphere. If you scroll down, I have sketched a cross-section of the eyeball that will serve several purposes throughout this post. There you can see how the eyelids cover the eyeball and how much is visible: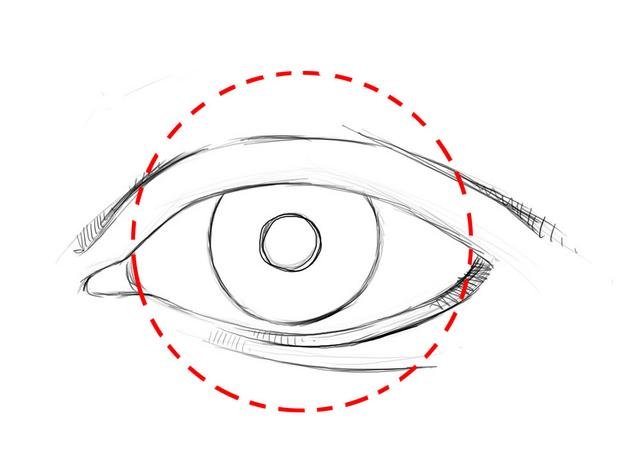
Below is a simple drawing of the structure of the eye. Note the thickness of the bottom lid. Again, look in a mirror at your own eyelids and you will see how "squared-off" the edge of the lid is. Because we are looking slightly down on this eye, the bottom lid will show the squared-off edge:

The eyebrows, too, are as varied as there are humans!
Now, lets have a look at highlights in the eye and how they relate to the light source that is illuminating the drawing. As the light source is coming from the top left from our viewing angle, It should be positioned as drawn below (the little circle slightly covering the pupil):
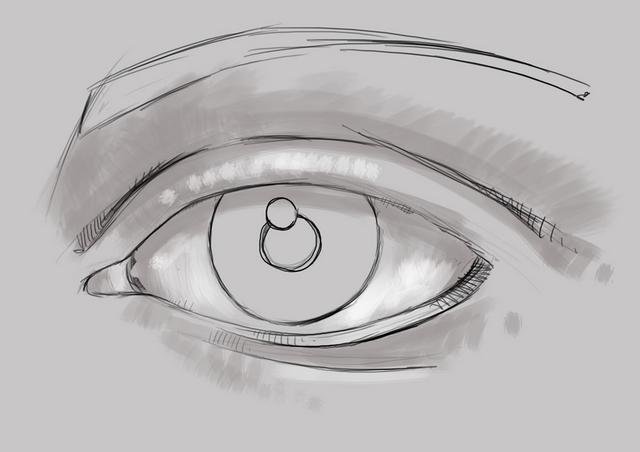
Below is a cross-section of the eye that should, hopefully, demonstrate what is happening here. The iris, or colored part of the eye, has a shadow cast where the top eyelid, in this case, is shielding a portion of the light-source. Here though, the highlight just happens to be in the same position as the shadow because it reflects off the shiny and clear cornea which is a convex shape (bulges out). If one was drawing a white, shiny ball, the shadow would be on the opposite side from the highlight, but here, the shadow sits behind the highlight. This will give a bright, lively look to the eye.
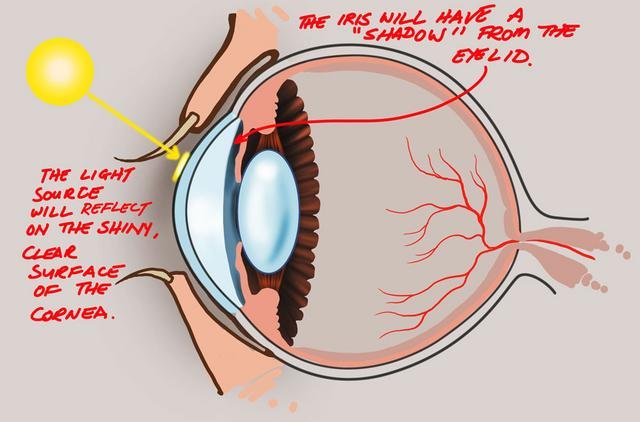
So the sketch below explains this phenomenon. This will show the distance that exists between the cornea and the iris:
The pupil is the darkest part of the sketch - in this case I made it pitch black.
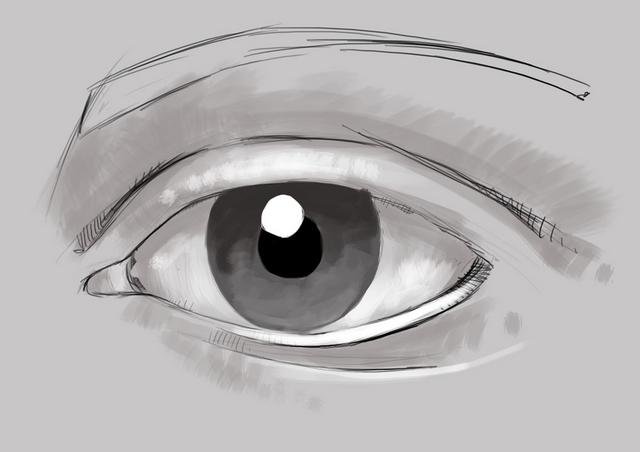
Now something about eyelashes. If you scroll up to the cross-section sketch, you can see the way an eyelash projects from the lid. Often eyelashes are sketched as lines going straight up from the lid. But they follow an attractive curve, out and up. Also, they are not evenly spaced as one would think, but cling together in little clumps due to the moisture in the eye - something intensified in women that add mascara to the lashes:
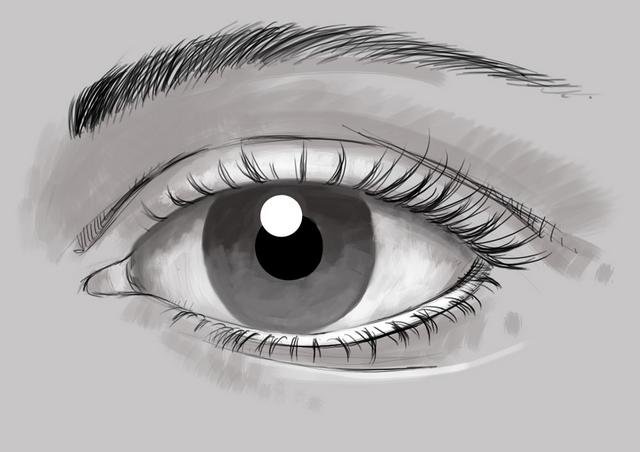
Now, "sculpting" the shape of the eye in the drawing through highlights and shadows can be undertaken to as much detail as your creation demands.
And that's it! With the shape captured, the details can be added with confidence. In this case, I worked on the iris to show some of the texture that is found there, added some more highlights and added some smaller ones on the bottom lid against the eyeball to demonstrate moisture in the eyes.

Why not have a go? I would LOVE to see what you come up with. Seasoned artists in the community could probably add some further insights
Congratulations @juniorshelver! You have completed some achievement on Steemit and have been rewarded with new badge(s) :
Click on any badge to view your own Board of Honor on SteemitBoard.
For more information about SteemitBoard, click here
If you no longer want to receive notifications, reply to this comment with the word
STOPreSTEEMed
Thank you so much for re-steeming, @digitalplayer
a pleasure my dear. hope to continue to see posts about draw and how to.
Thank you for sharing your technique. Excellent post. Following to see your future techniques you share. I share my quick decorating ideas for the same reason - make it easy for people interested in your craft.
Thank you @malya. Look out for more tutorials
Spanish/ Español
Hola no soy una artista experimentada como tal pero, me gusta dibujar en mis tiempos libres es muy genial tu explicación la puedo traducir en español y subirla a mi steemit al igual que la original claro, colocandote en el que traducire como autor @juniorshelver. saludos desde venezuela espero verte por mis articulos compartiendolos, comentadolos y al igual que yo comentadolos. Hasta luego.
English/ Inglés
Hello I'm not an experienced artist as such but, I like drawing in my free time is very great your explanation I can translate it in Spanish and upload it to my steemit just like the original clear, placing you where I translate as author @juniorshelver. Greetings from venezuela I hope to see you through my articles, sharing them, commenting on them and just as I comment on them. Bye.
Thank you @artemisjane26. I appreciate your feedback.
Spanish/ Español
Podrás ver tu contenido en spanish/ Español en el siguiente enlace: https://steemit.com/art/@artemisjane26/como-dibujar-el-ojo-humano-paso-a-paso-autor-https-steemit-com-juniorshelver
English/ Inglés
You can see your content in Spanish / Spanish at the following link: https://steemit.com/art/@artemisjane26/como-dibujar-el-ojo-humano-paso-a-paso-autor-https-steemit-com-juniorshelver
Espero te guste y lo puedas compartir y votar :3 / I hope you like it and you can share it and vote it: 3
Interesting :)
Hi tiamaria. Thanks for the comment...
I should thank you :) this really helps
..NIce post! I like it very much, keep it up!
Thank you jaffs!
Thank You...appreciate the help