Welcome to my bio. I will be giving you easily tips in drawing a character design using images and little note in explaining. First, we’ll start by drawing the head. NOTE: - These steps are the ones I use and it works well and fast, once again they are the ones I use (my style). So therefore, grab your lead pencil/coloured pencil, eraser and paper and let’s start.
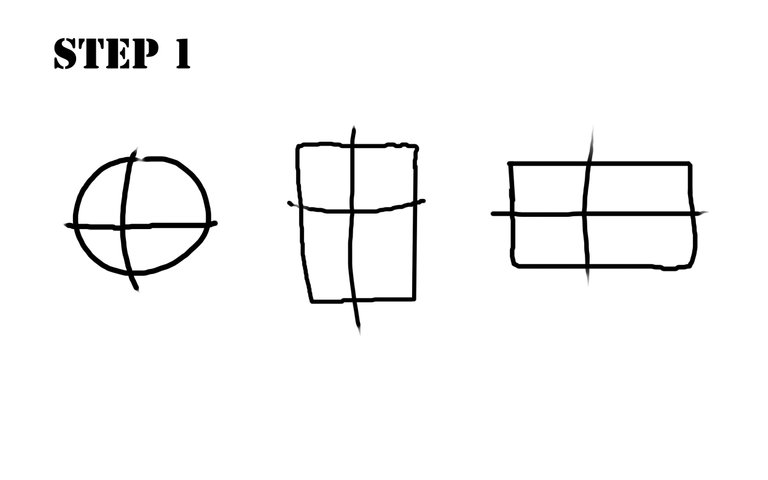
STEP 1 : Depending on How you want your character’s head to be either rectangle, square or circle etc. Draw lines splitting the shapes, showing where you want the parts (eyes, nose, mouth, ear and nose). wants to be positioned.

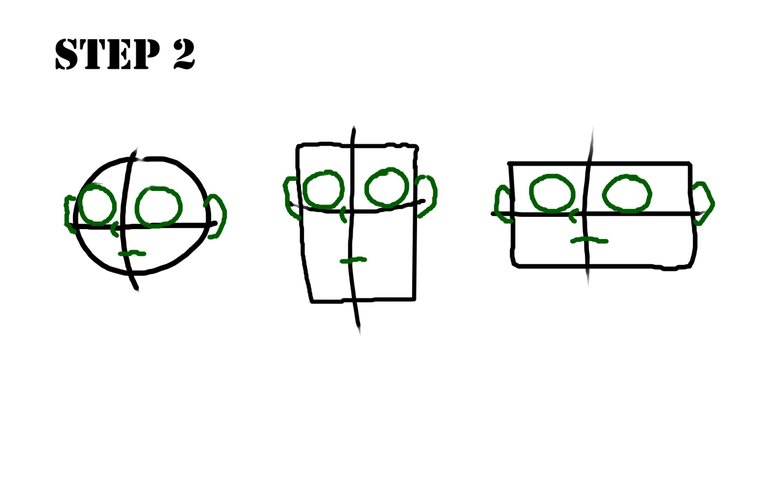
STEP 2 : Start representing (using either another different coloured pencil from the first or tainted lead pencil e.g 3h, 4h) where you want the eyes, nose, mouth and ears to be with circles, and lines. Circles over the lines left and right, some horizontal lines cutting the lines
-y axis .

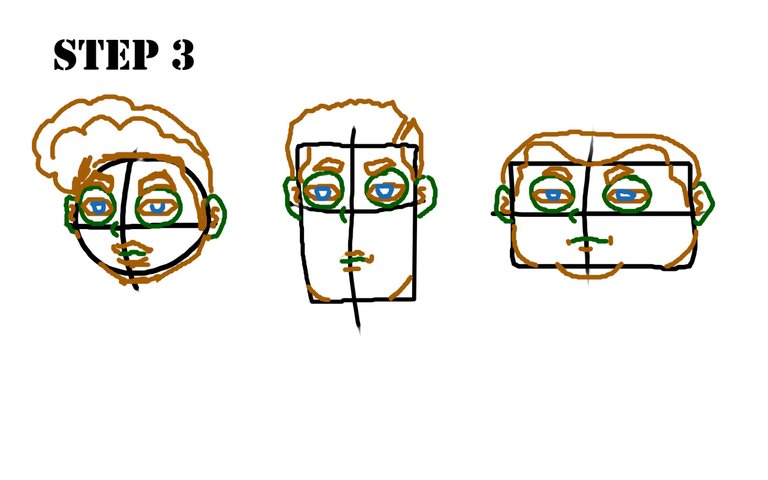
STEP 3 : Start fitting the parts (eyes, nose, mouth and nose). Drawing oval shape in the circles, drawing the nostrils completely, adding more lines to depict the mouth, drawing a semi-circle and curve for the head/ hair and lower jaw

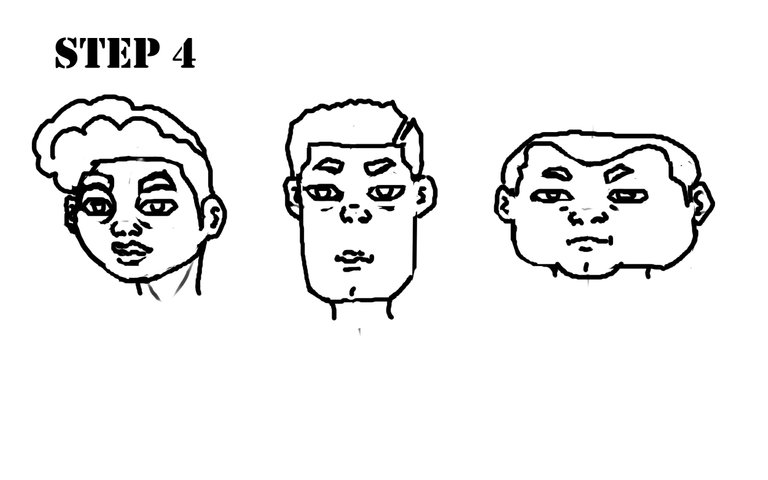
STEP 4 : Clean up the unwanted areas. Redraw all part with ink or whatever is darker than the ones used before to differentiate them. Fit the hair and every part (nose, eyes, ears, eye brows and mouth) properly. There you have it your idea and imaginations has come into reality.

Please do so upvote, comment if you like the lesson.
   **STAY POSTED NEXT TIME FOR ANOTHER
        TUTORIAL**
                          THANKS :)
Nicely done. Straight to the point.thumbs up
Thanks so much, really appreciate it. :)
Wow i really love this.
Nice one bro
Welldone...
Keep steeming
Thanks alot
Very neat and impressive. Keep it up bro👏👏
Thanks brov
Thanks bruv
Wow this is really helpful,,, i gat a lot on from this
Good
Good
Thanks
WOW! Good one.