Dear Steemian!!
This time I want to share how to draw a realistic portrait using graphite pencil. Basically I prefer to draw portrait and that's what I've made most for almost five years. During this time, I keep exercising to improve my skills to master some techniques in drawing. My goal is to master how to draw with a pencil to make a hyperrealistic drawing. It took me a long time to do that and I had to increase concentration, and focus and thoroughness in observing to realize my dream.
Kali saya ingin berbagi bagaimana cara menggambar portrait realis dengan menggunakan pensil grafit. Pada dasarnya suka memang lebih suka menggambar portrait dan itu yang paling sering saya buat selama hampir lima tahun ini. Dari waktu ke waktu saya terus latihan untuk meningkatkan kemampuan saya hingga menguasai beberapa teknik dalam menggambar. Tujuan saya ialah untuk menguasai bagaimana menggambar dengan pensil hingga bisa membuat gambar yang hyper realis. Itu butuh waktu yang panjang bagiku bisa melakukan itu dan saya harus meningkatkan, konsentrasi, dan fokus dan ketelitian dalam mengamati untuk mewujudkan mimpi saya.
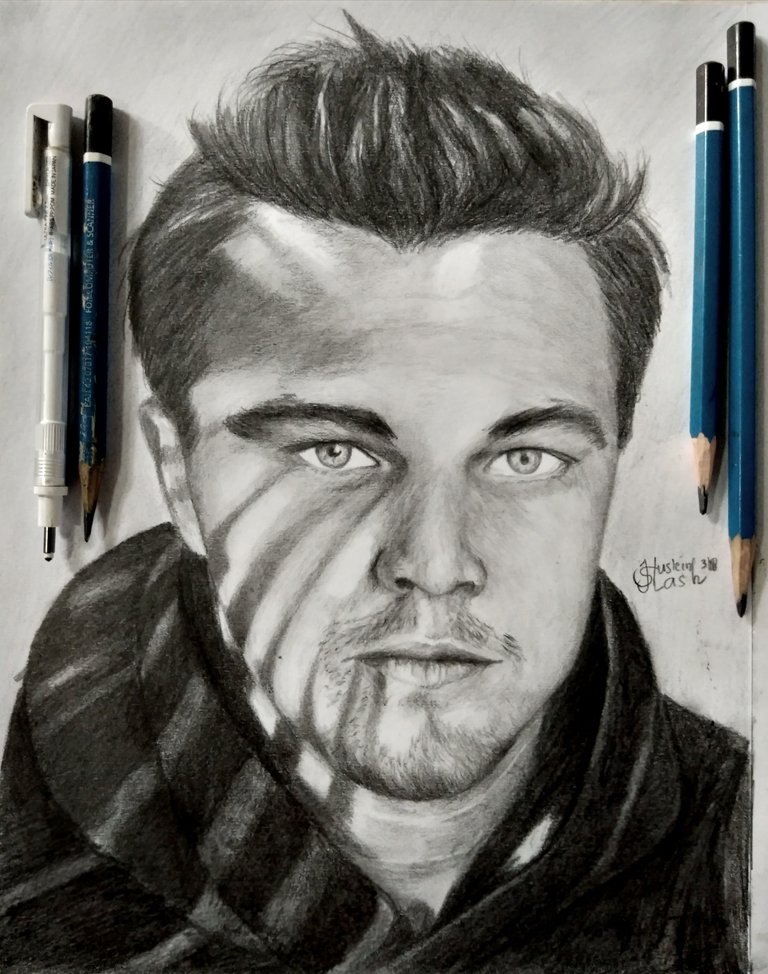
But after making this picture I felt proud of the result that is almost close to hyperrealistic. So I just need a little more time to master it even though in this drawing there are still many shortcomings because I have no any supporting mediums. I only used 4 pencils: 2B, 3B, 4B, mechanical pencils and mono-zero eraser on A4 sized paper.
Namun setelah membuat gambar ini saya merasa bangga dengan hasilnya yang hampir mendekati hyper. Jadi saya hanya butuh sedikit waktu lagi meskipun digambar ini masih banyak kekurangan karena saya minim media pendukung. Saya hanya memanfaatkan 4 pensil pensil yaitu pensil 2B, 3B, 4B dan pensil mekanik serta mono-zero eraser di kertas berukuran A4.
I used a reference image that I found at Pinterest. I was very interesting to draw this portrait, as I said a few days ago that I alway very interest to draw object with lighting and there are many shadows. Also because he is a famous actor and I am sure everyone here knows him, he is Leonardo DiCaprio who often starred in big movies one of them The Titanic. I wanted to draw it exactly the same as the reference image, but I have not been able to like the reason I described above. So I made it better than ever very carefully. Getting close results has made me feel proud but still not satisfied enough before I reach my dream.
Saya menggunakan gambar referensi yang saya temukan di Pinterest. Saya sangat tertarik untuk menggambar portrait ini karena seperti yang saya bilang beberapa hari yang lalu bahwa saya sangat senang menggambar objek dengan pencahayaan dan banyak terdapat bayangan seperti pada gambar tersebut. Selain itu juga karena dia merupakan aktor terkenal dan saya yakin semua orang disini mengenalnya, dialah Leonardo DiCaprio yang sering membintangi film-film besar salah satunya The Titanic. Saya ingin menggambarnya sama persis dengan gambar referensi, tapi saya belum mampu seperti alasan yang saya jelaskan di atas. Oleh karena itu saya membuatnya lebih baik dari sebelumnya dengan sangat hati hati. Mendapatkan hasil yang mendekati saja sudah membuatku merasa bangga namun masih belum puas sebelum saya bisa meraih mimpi.
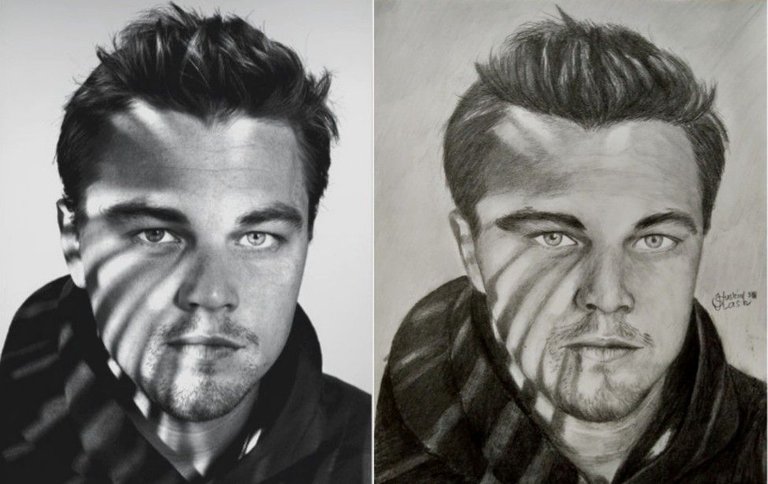
The key in realistic drawing is the correct proportion, scale and shading technique. For that it takes a lot of patience and thoroughness to see where the dark and bright areas and we should be able to see the smallest object, we must focus and enjoy each process. If you already feel less focused better leave it first and rest to calm the mind and then resumed. In making this drawing I need two days to pay attention to where the shortcomings and fix it again and again. I also without using blending stump or cotton, so this picture full shading.
Kunci dalam menggambar realis adalah proporsi, skala dan teknik mengarsir yang benar. Untuk itu dibutuhkan banyak kesabaran dan ketelitian dimana area yang gelap dan dan terang serta kita harus mampu melihat objek yang sekecil apapun, kita harus fokus dan menikmati setiap prosesnya. Bila sudah merasa kurang fokus lebih baik tinggalkan dulu dan istirahat untuk menenangkan pikiran kemudian baru dilanjutkan lagi. Dalam membuat gambar ini saya membutuhkan waktu dua hari untuk memperhatikan dimana letak kekurangannya dan memperbaikinnya lagi dan lagi. Saya juga tanpa menggunakan blending stamp atau kapas, jadi gambar ini full arsir.
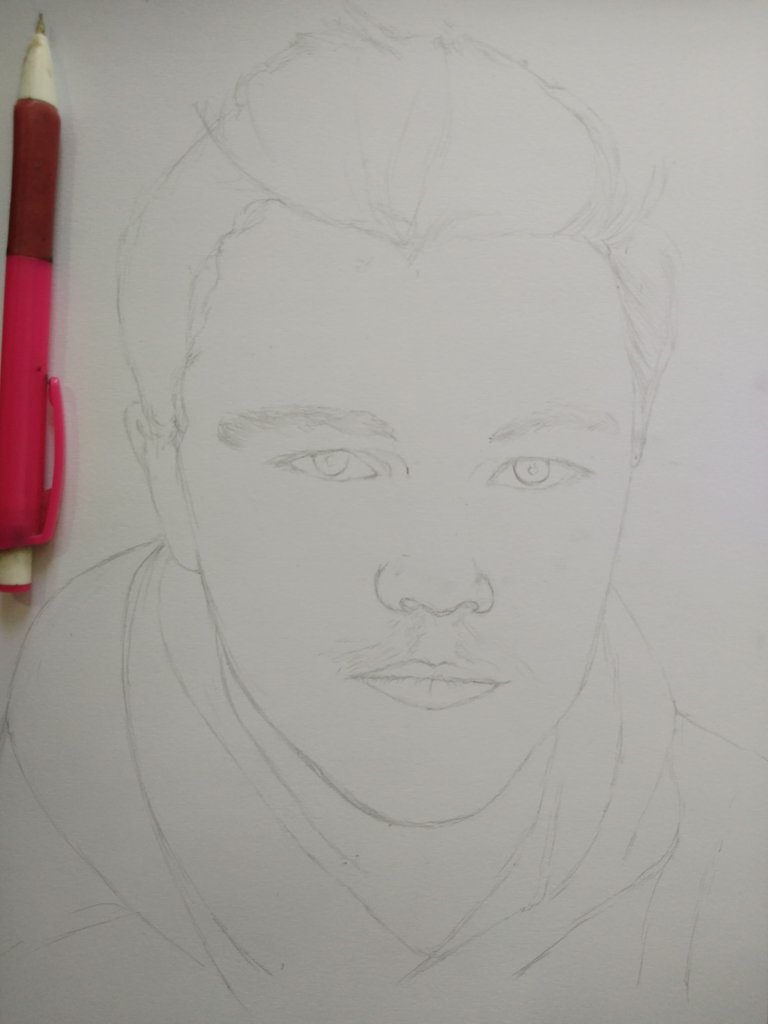
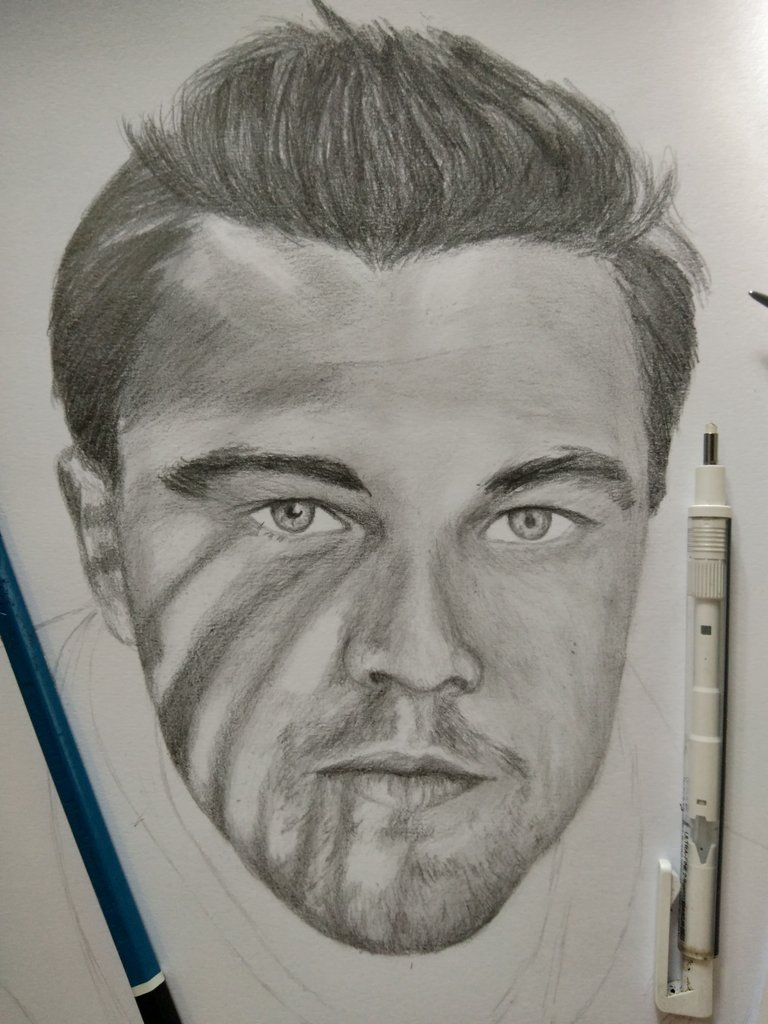
Well, just go straight to the process of making it. First I made a sketch with a mechanical pencil. Here is what I mean about the correct proportions and scales. There are many ways to determine proportions for example through eye projection, grid, with the help of box shapes, circles and so on or measure them manually. Everyone has their own way, I prefered to measure it manually by zoom in the image on my mobile screen and then measuring it with a pencil or roller. This is more effective for me in determining the scale and proportion.
Baiklah langsung saja kita menuju ke proses pembuatannya. Pertama sekali saya membuat sketsanya dengan pensil mekanik. Disinilah yang saya maksud tentang proporsi dan skala yang benar. Ada banyak cara untuk menentukan proporsi misalnya melalui proyeksi mata, grid, dengan bantuan bentuk kotak, lingkaran dan sebagainya atau mengukurnya secara manual. Setiap orang punya cara mereka masing masing, saya lebih suka mengukurnya secara manual dengan memperbesar ukuran gambar di layar HP saya kemudian mengukurnya dengan pensil atau rol. Ini lebih efektif bagi saya dalam menentukan skala dan proporsi.
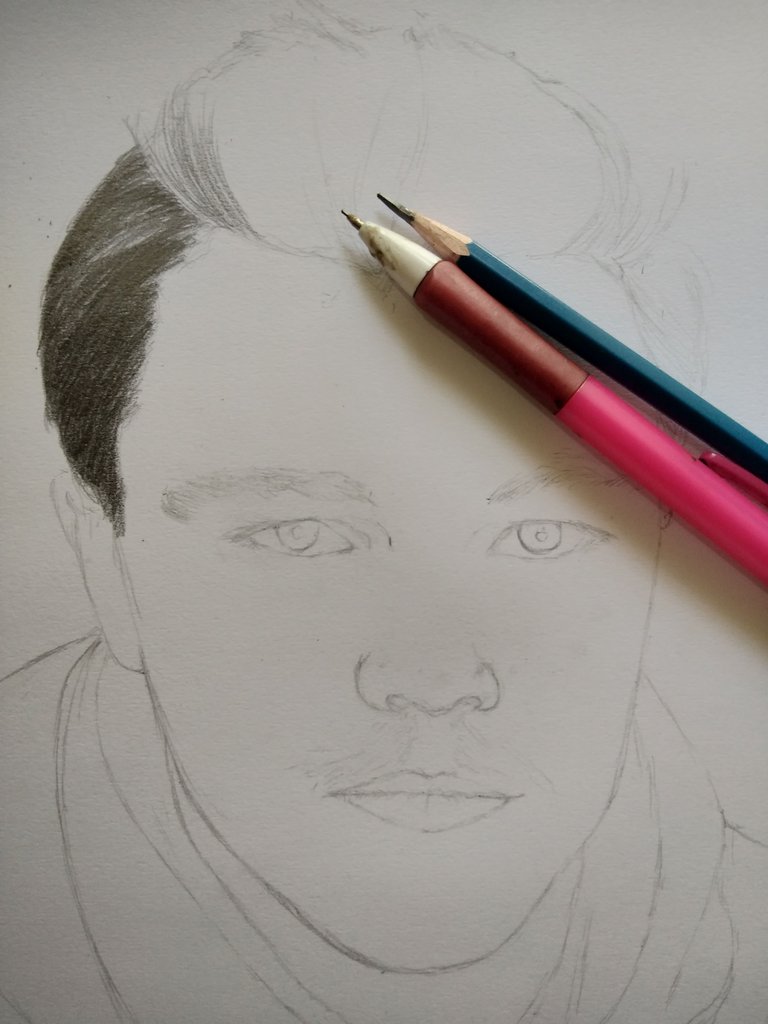
I started from the left side of the hair and continued to the right using a 4B pencil. Actually it would be great if we had a darker pencil like 8B to shade his hair. I drew the lines one by one to cover all the heads. I do it repeatedly in order to get the maximum black as in the reference image, but still this pencil has not been able to get the black as I expected it though with a strong emphasis.
Saya memulainya dari bagian rambut sebelah kiri dan terus ke kanan dengan dengan menggunakan pensil 4B. Sebenarnya akan lebih bagus bila kita memiliki pensil yang lebih gelap seperti 8B untuk mengarsir rambutnya. Saya menarik garis satu persatu hingga menutupi semua bagian kepala. Saya melakukannya secara berulang ulang agar mendapatkan hilang yang maksimal seperti pada gambar referensi, tapi tetap saja pensil ini belum mampu untuk mendapatkan hitam seperti yang saya inginkan walaupun dengan penekanan yang kuat.
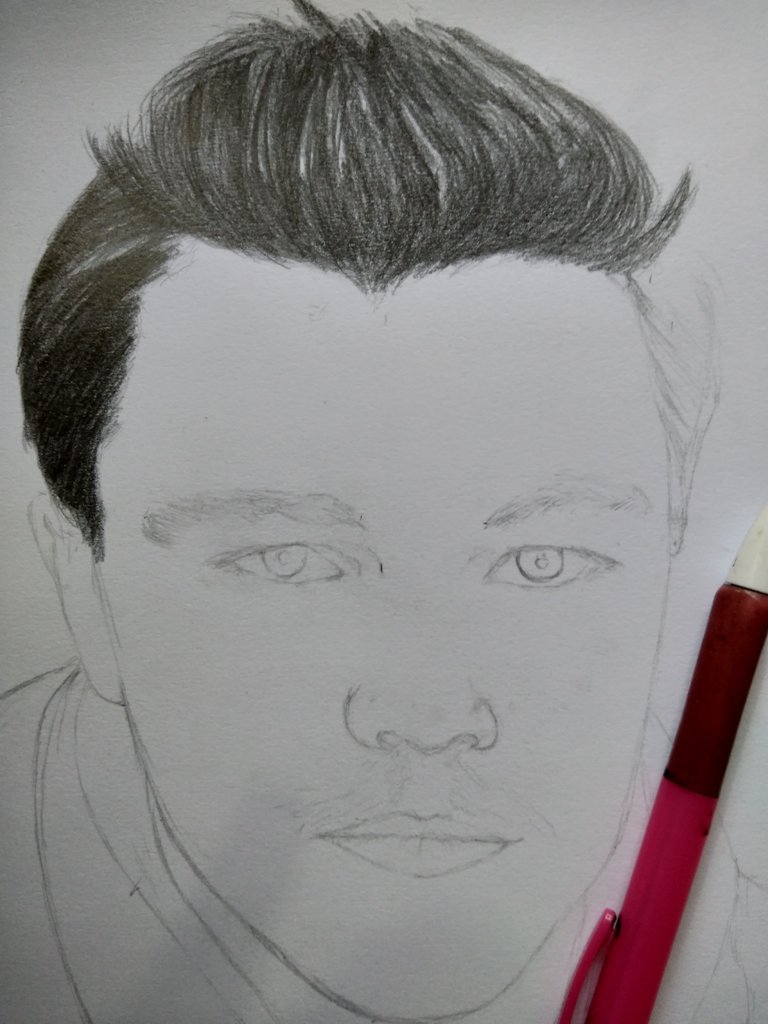
When finished with the hair, I continued to shade in the area of forehead and eyebrows by using a mix of 2B and 3B pencils to match the dark and bright areas, then in my eyebrows I used a 4B pencil.
Setelah selesai dengan rambut, saya lanjutkan untuk mengarsir di area dahi dan alisnya dengan menggunakan perpaduan pensil 2B dan 3B disuaikan dengan area yang gelap dan terangnya, kemudian di alisnya saya menggunakan pensil 4B.
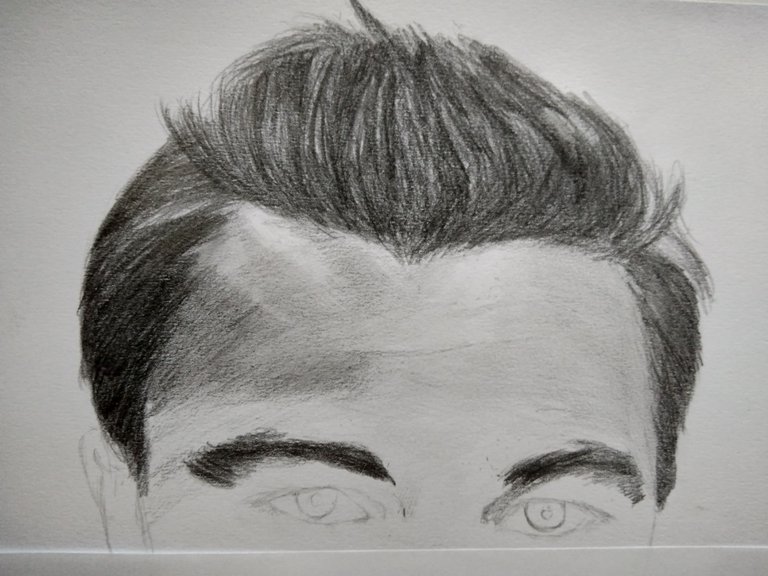
Next I shaded the eye area with 4B and 2B pencil followed by nose with 3B and 4B pencil. Up here I spent 3 hours for darkness adjustment the brightness.
Selanjutnya saya mengarsir area mata dengan pensil 4B dan 2B dilanjutkan dengan hidungnya dengan pensil 3B dan 4B. Sampai disini saja saya menghabiskan waktu selama 3 jam untuk penyesuaian gelap terangnya.
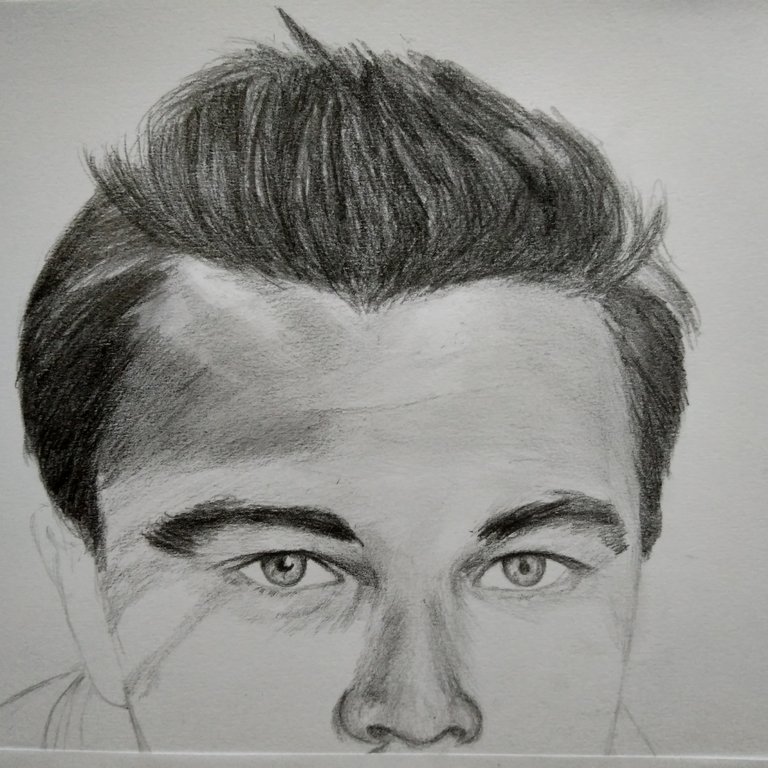
Then I shaded the left and right cheeks with the combination of the three pencils, I darkened the shadow area on his cheeks. Then I continued on the lips and chin. To created the areas exposed to light, I use the mono-zero eraser to remove the brightest part.
Kemudian saya arsir bagian pipi sebelah kiri dan kanannya dengan kombinasi ketiga pensil tersebut, saya menggelapkan pada area bayangan yang terdapat pada pipinya. Kemudian saya lanjutkan di bagian bibir dan dagu. Untuk membuat area yang terkena cahaya, saya menggunakan mono-zero eraser untuk menghapus bagian yang terangnya.
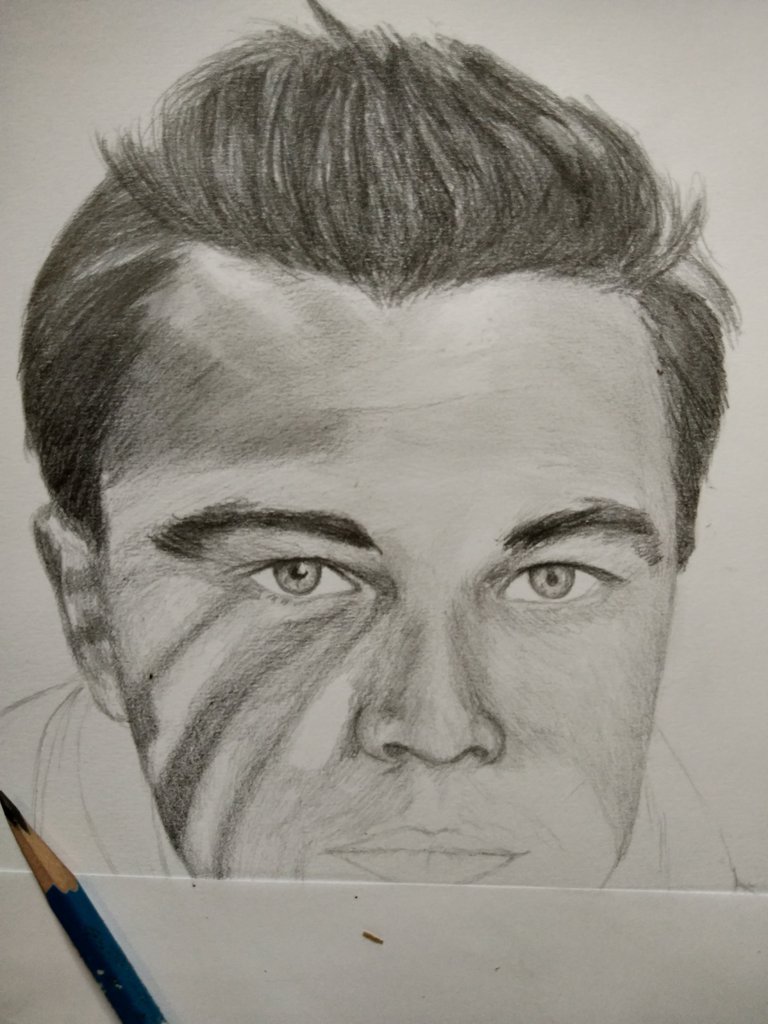
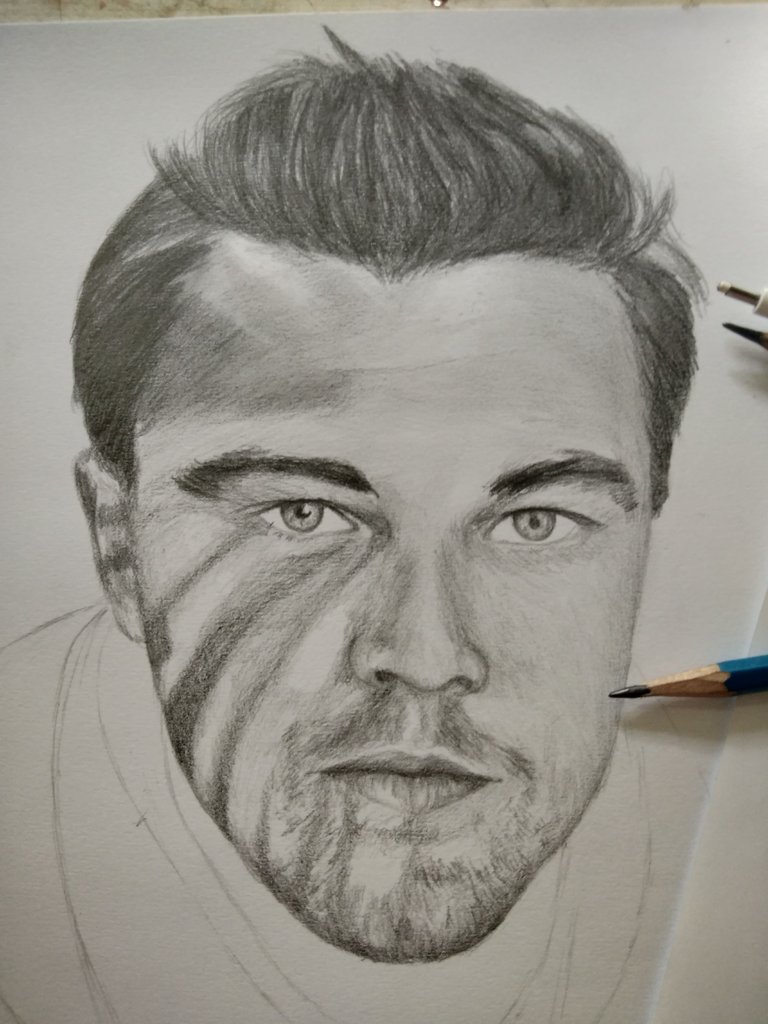
We're done with faces. The next stage is to shade the neck and jacket. We have to adjust where the darkest area and and where the light then shade slowly until it finds the black as we want it to be. I started from the left to the right until finished.
Kita sudah selesai dengan wajah. Tahap selanjutnya ialah mengarsir bagian leher dan jaketnya. Kita harus mensesuaikan dimana area paling gelap dan dan dimana yang terang kemudian arsir secara perlahan hingga menemukan kehitaman seperti yang kita inginkan. Saya memulai dari yang sebelah kiri ke kanan hingga selesai.
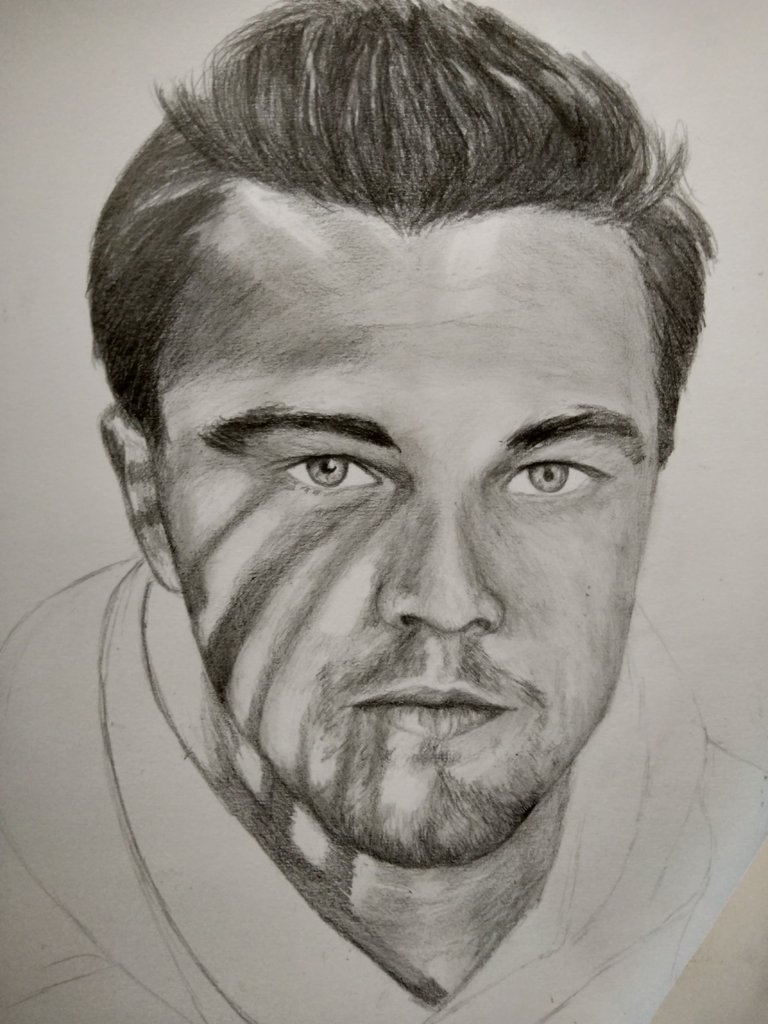
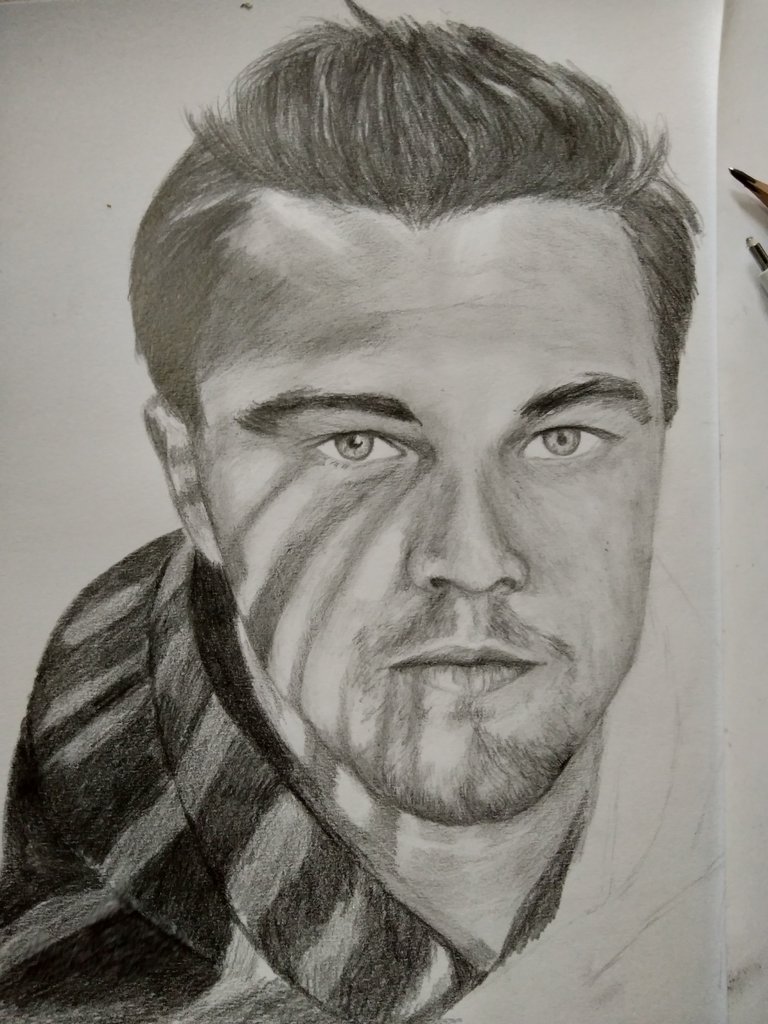
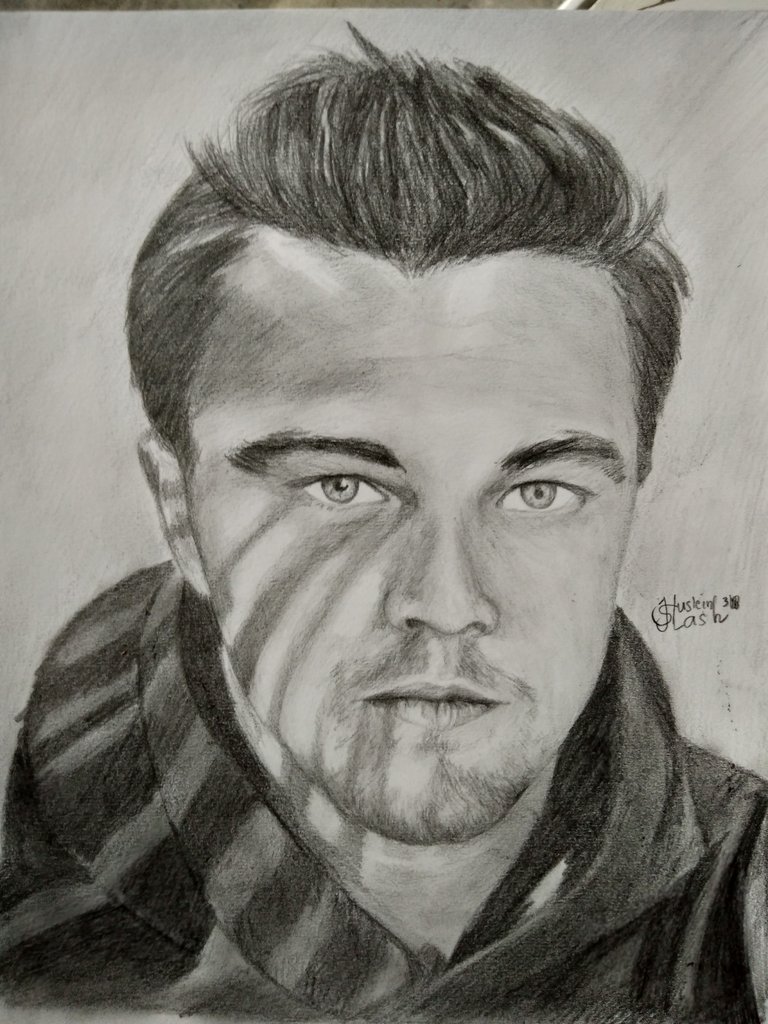
I thought this is over on the first day, but after I noticed there are still many shortcomings and still less dark. I also get some suggestions from @marika.lubis and other friends to improve where the rest of shortcomings. Therefore today I continued to add blackish and soften the shade. Finally I can make it better than yesterday.
Saya pikir ini sudah selesai dihari pertama, tapi setelah saya perhatikan masih banyak kekurangan dan masih kurang gelap. Saya juga mendapatkan beberapa saran dari kak @marika.lubis dan teman lainya untuk memperbaiki dimana letak kekurangannya. Oleh karena itu hari ini saya melanjutkannya denga menambahkan kehitaman dan memperhalus arsirannya. Akhirnya saya bisa membuatnya lebih baik dari kemaren.
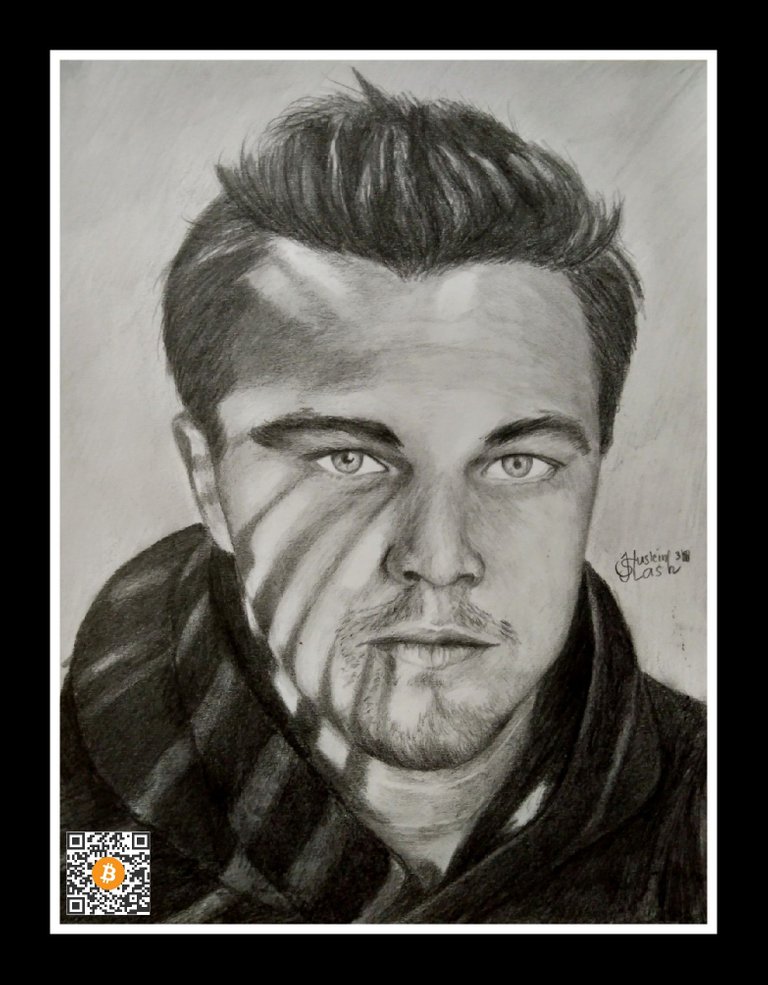
That's all my process of making it. Thanks for visiting my blog and hopefully you like my work and got inspired. I'm happy if you want to try it like I did. If you interested with this post, upvote, resteem and leave your comment.
Begitulah semua proses bagaimana pembuatannya. Terima kasih banyak sudah mengunjungi blog saya dan berharap kalian menyukai karyaku dan terinspirasi olehnya. Saya akan sangat senang lagi bila kamu ingin mencobanya juga seperti saya. Jika tertarik dengan postingan ini, silahkan upvote, resteem dan komen.
Join Steemfollower to get upvote back for upvote. It's free, simple, and easy to find all contents that you may what to upvote and get your own content to be seen by other users and possibly upvote. But you must upvote at least 5 post that you like everyday, automatically our related post will be displayed.
Regard @huslein.slash
#thealliance
Bagus sekali gambar yang telah engkau kerjakan
Terima kasih kawan
skali2 boleh dong request buat ngegambar anee 😂
Boleh2 aja, berapa sbd akan kuterima? hahahaha
hahaha, ane mundur aja dahh 😂
tu kan udah mundur. heheh
awak gak sanggup menanggung beban ini 😁😂
hahaha, jangan gtu lah bg, selow aja
Excellent friend, I love the way you work the faces, I like to draw a lot of them also, very well worked the eyes, the facial features, the hair, everything, congratulations ... greetings ..
Thank you so much, I just tried make it better. I'm glad you like it
wao too beautiful, you draw beautiful
Esta genial amigo te felicito
Impressive pencil work. Good job :-)
Wao! Impresionante! !!!!! Admiro tu arte!!!
mantap bikin bayangannya :)
Hehe makasih
This turned out wonderfully! Good job!!
Hey charita. Thank you, I'm glad you like my work
This post has received an upvote from @promo-mentors as it was listed in the Encouragement Boost of our discord server.
Thank you for supporting
Well done! I did a similar drawing of Leonardo Dicaprio when I was in art school. You did an excellent job with the shading.
Thank you for stopping, oh ya, nice to know, I tried to make hyper realist but I still can do it.
Great work man,keep doing great
Thank you
You've received an upvote from a @slothicorn! Neigh neigh! Click here to learn more! (@justatouchfey) ((.)ω(.))
Thank you so much for supporting.
Congratulations! This post has been upvoted from the communal account, @minnowsupport, by huslein slash from the Minnow Support Project. It's a witness project run by aggroed, ausbitbank, teamsteem, theprophet0, someguy123, neoxian, followbtcnews, and netuoso. The goal is to help Steemit grow by supporting Minnows. Please find us at the Peace, Abundance, and Liberty Network (PALnet) Discord Channel. It's a completely public and open space to all members of the Steemit community who voluntarily choose to be there.
If you would like to delegate to the Minnow Support Project you can do so by clicking on the following links: 50SP, 100SP, 250SP, 500SP, 1000SP, 5000SP.
Be sure to leave at least 50SP undelegated on your account.