If any of you are like me, the world of CNC is the pinacle of AWESOME!! The ability to take your designs and cut them into virtually anything.... Awesome!!
A few years back I dabbled with a CNC plasma table that my buddy Dave spent a lot of time getting up and running. Dave (The smartest machinist tech guru I know) was in charge of building, programming and running the machine. I got my toes wet a couple times, but never really did much with the development of the machine.
A couple of months ago, my nephew (Mentor) Ryan and I acquired a beastly old CNC machine called the Precision Automotion PA 1000. The deal was too good to pass up, so we picked it up.
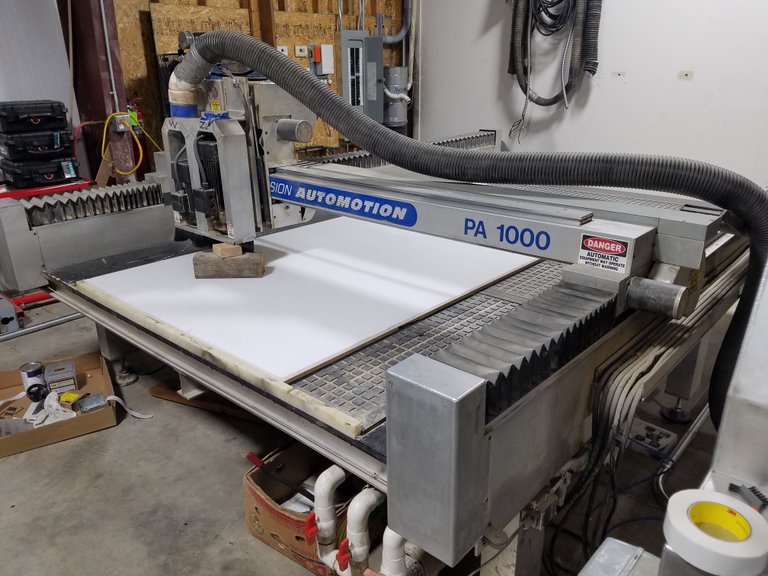
Built on a rediculously solid framework, this machine has been running since 1999 with no more than a little hickup. Fantastic right? Right, but there's only one problem. It runs on a program called Vector. If you don't know what that is, it's a very old gcode platform that is seriously as old as the dinosours and isn't very forgiving with modern autocad, solidworks or just basic dxf files. FYI if you don't know what those are, they are the programs and filetypes that turn your artwork into cutable gcode. Gcode being the language that makes the cnc machine work.
So I called up my buddy Dave and said Hey, can I convert this machine to something newer like Mach3 or some software that is more modern. Dave's response: "Convert it to GRBL and run it with an arduino."
Ok first off, this is the computer box:
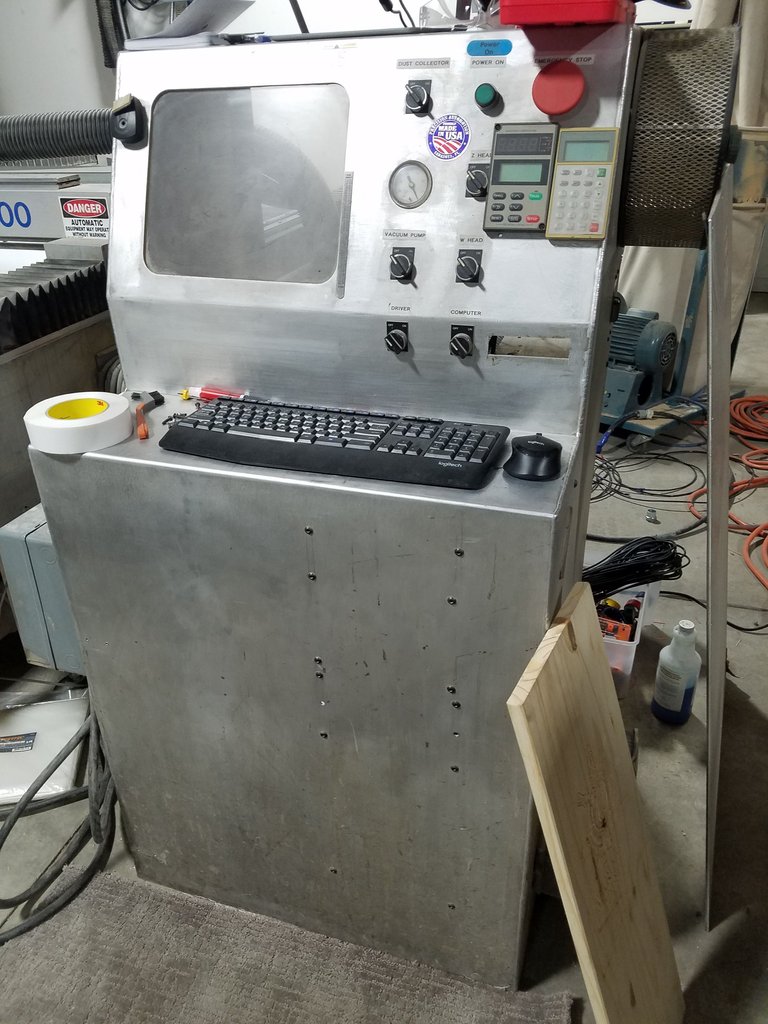
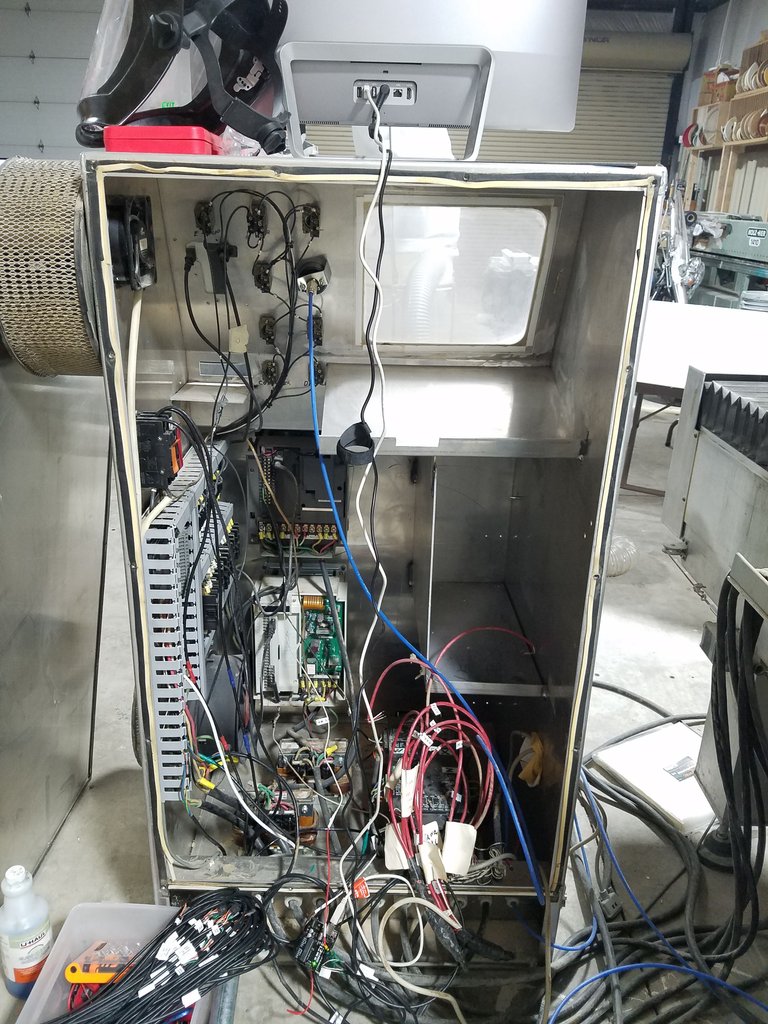
which by the way was run by a super old compaq presario desktop computer.
This is what he wants me to convert it to.
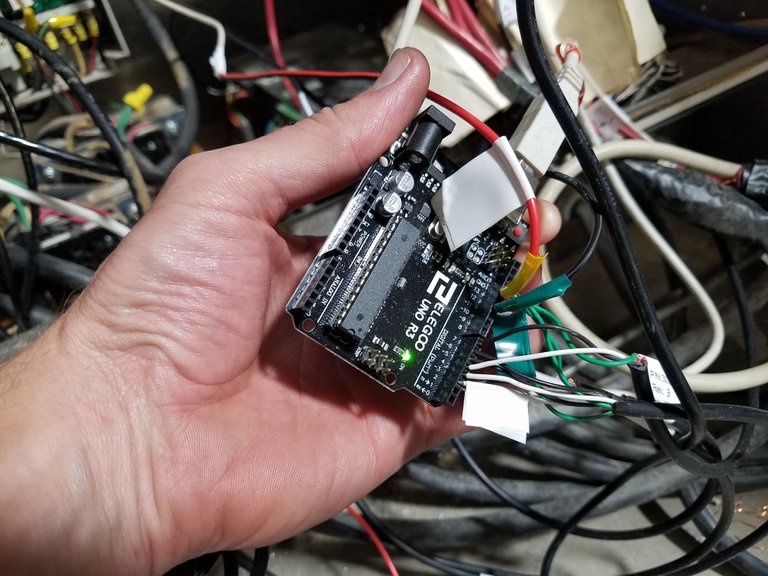
The iddy biddy super awesome arduino.
Now Dave has all this knowledge tucked away in his super human brain. I, on the other hand, am an artist who aspires to be as smart as Dave, but haven't reached God level yet in the world of tech.
After mulling it over for a few weeks and feebly attempting to get a file I want to cut to work with the old software, I give in a call Dave. "Let's do this!"
Dave in his patient way gives me a few pointers over the phone, asks for a few images of the drivers:
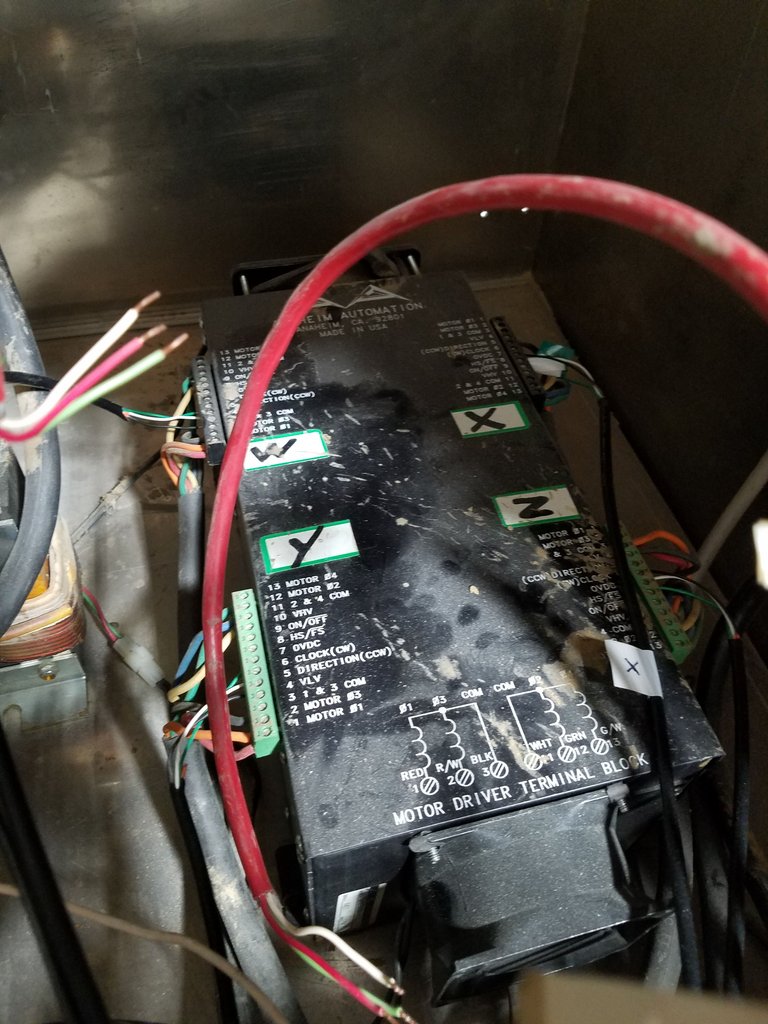.jpg)
So I send dave a pic and he calls me back and says I should be able to get rid of all of the red control wires and simply hook up three wires from the arduino to each axis on the drivers.
Ok, so let me get this straight.
I take all of this:
Which realistically is all of the red wires, the tan wire and the little row of wires all connected together.
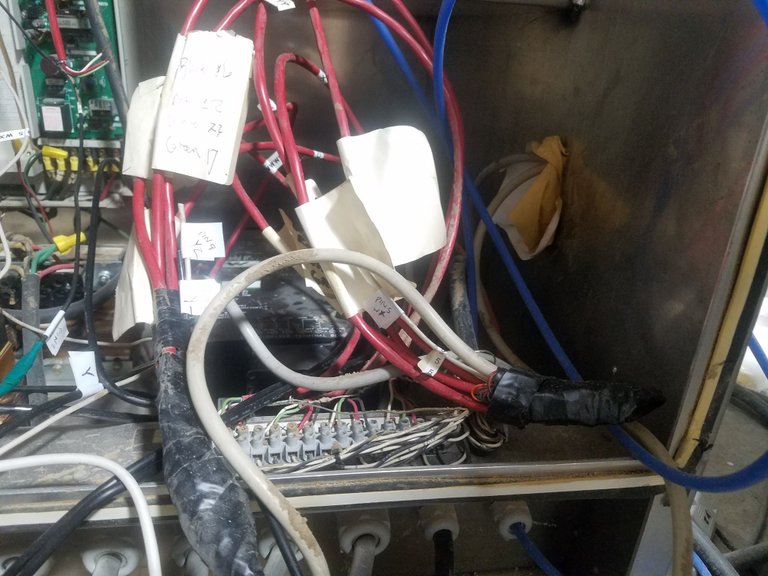
and replace it with this?
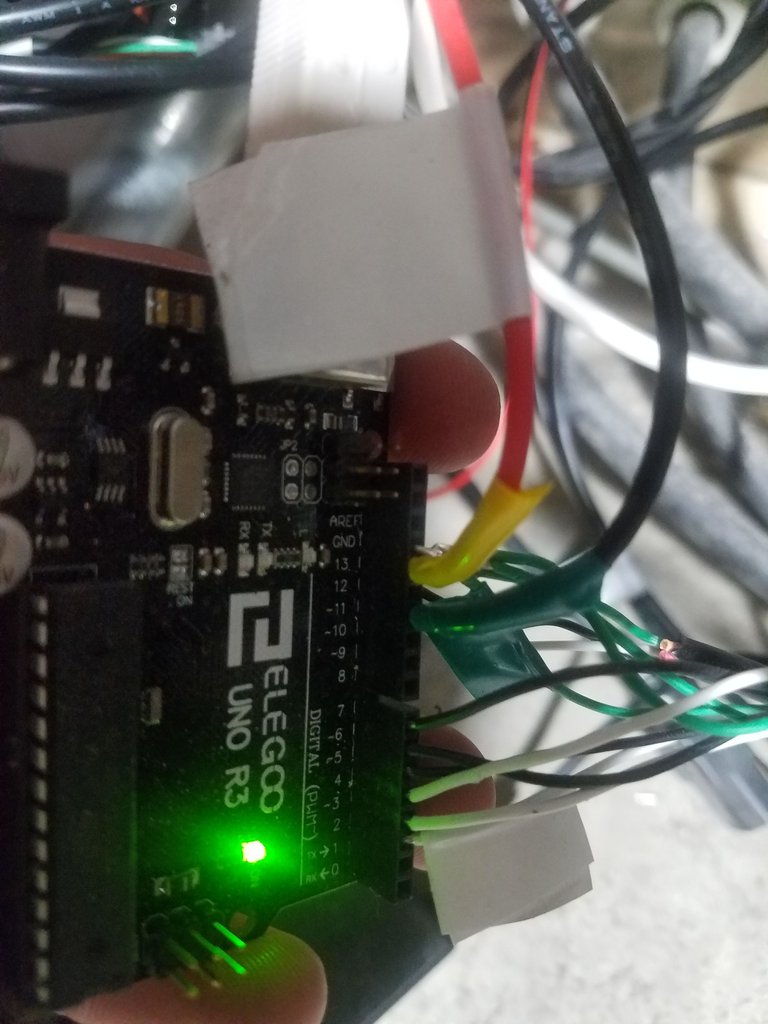
Yep, that's it.
So I'd like to say that I made the wire switch plugged in the arduino and vuala! Magic!
NO! Nothing is ever really that simple.
Here's what really went down to change those little wires.
- Dowload the latest version of GRBL (the makers version of a stepper driver operating system)
- If you haven't, download and install the arduino program.
- Load GRBL to the arduino program
- Hook your arduino to the computer and load the grbl program onto the arduino.
FYI - There's a lot of steps to just getting to step 4 - Plug the wired into their correct location on the arduino
- make sure that the correct wires are plugged into their correct ports on each driver
- Download Universal Gcode Sender or UGS
- Try to connect to your arduino
- Test an axis movement to see if it works.
- Pray like HELL that it works.
Though I'd love to say it worked right off the bat, It didn't.
I had the wrong version of grbl installed, so I had to try it again. This time the connection to the arduino worked, but nothing happened when I told an axis to move. Frazzled and frustrated, I called up Dave.
"Send me another picture of the drivers." He says
So I did. Now this is where you give your utmost gratitude and appreciation for people who understand machinery.
Dave does some Dave Analysis of the situation and calls me back. He proceeds to explain to me that the drivers are super old and don't follow the same wiring as new stepper drivers. Then he kindly gives me the right configuration.
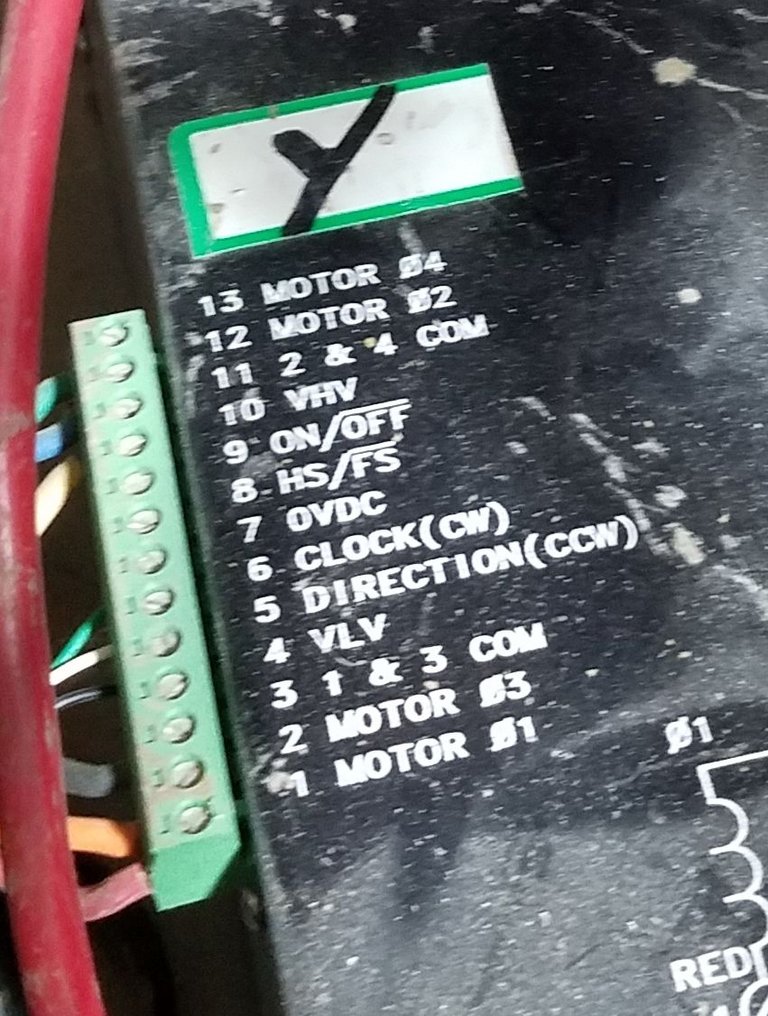
All you have to worry about is pins 7, 6 and 5
#7 OVDC stands for 0VDC as in in Zero Volts DC - That's your ground wire
#6 CLOCK (CW) which stands for clockwise in old wiring - That's your Step Pulse wire
#5 Direction (CCW) which stands for counter clockwise in old wiring - That's your direction wire
So I followed his wiring advice, aligned the above info with the GRBL pinout diagram and this time VUALA!!!
IT'S ALIVE!!!!!!!!
Last night I stayed up till 2am and cut my first test run of the very same file I failed at cutting on the old computer system.
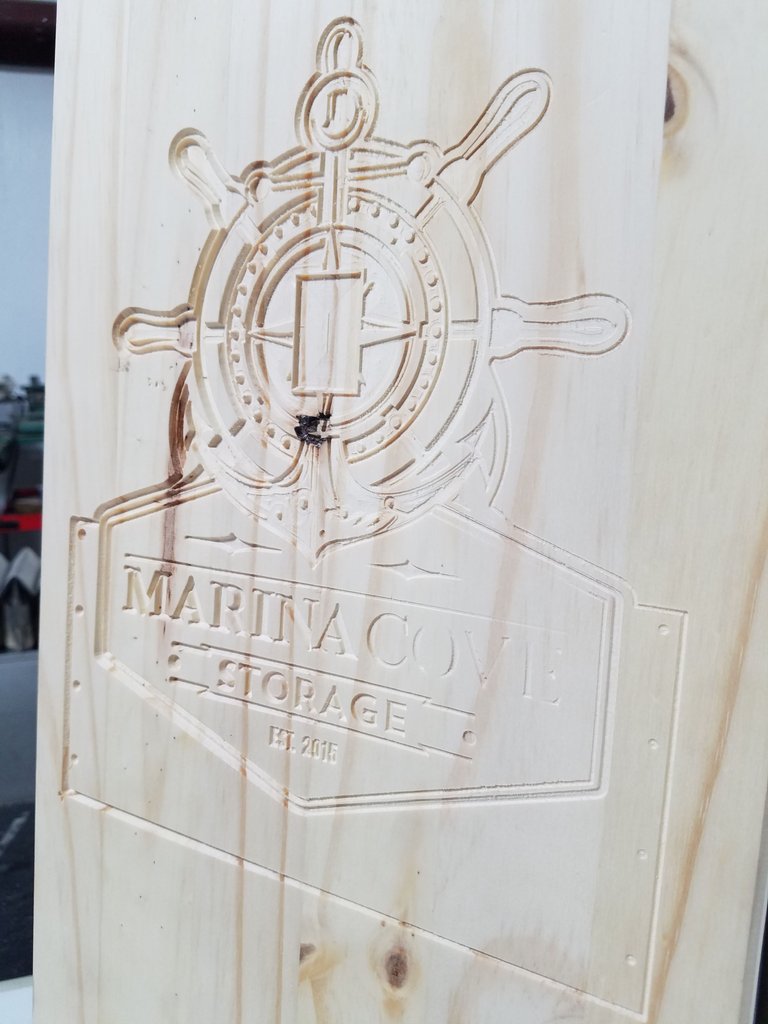
I know, my piece of wood wasn't perfectly flat, so the cut isn't as clean where the wood dips down a little, but this beautiful piece of wood is just the beginning of a long awaited relationship with the world of CNC.
Hey @graphicmonster, nice post! I've developed a better appreciation for art and photos, so it's nice to see good content here on Steemit! Cheers
Thanks @exxodus. It's nice to be in the realm of crypto. I wouldn't want my blog anywhere else.
Be advised @graphicmonster
The comment from @exxodus has been identified as being copy/pasted comment spam intended to trick their targets into upvoting them. Please, refrain from doing so. They have been reported to @steemcleaners and we are giving users a heads-up. We have identified 395 comments identifed as having a 75% similarity. If there were rewards on the spam, I have used up to a full weight downvote to neutralize them! Please, feel free to contact @anthonyadavisii if you have any questions about this process.
OK, thanks no upvote was given and thanks for the heads up
Congratulations @graphicmonster! You received a personal award!
You can view your badges on your Steem Board and compare to others on the Steem Ranking
Do not miss the last post from @steemitboard:
Vote for @Steemitboard as a witness to get one more award and increased upvotes!
Congratulations @graphicmonster! You have completed the following achievement on the Hive blockchain and have been rewarded with new badge(s) :
Your next target is to reach 50 replies.
You can view your badges on your board and compare yourself to others in the Ranking
If you no longer want to receive notifications, reply to this comment with the word
STOPSupport the HiveBuzz project. Vote for our proposal!