I warmly welcome you all to the Basic Drawing Guide #2

In this edition, I will be presenting a theme to learn in how to improve our drawing quality, lines and shadows (part I).

Since the moment that human beings discovered how they could capture figures and objects from the 3D plane to a 2D plane by joining lines, little by little they created and experimented. All this was developing, evolving in this great creative diversity that today we call art; in which the line has been the protagonist and pioneer. We will give importance to know more about this content, since, in a drawing, they help us to create sensations of depth, of distance and closeness, definition. I think the fact of helping us create something; to express ourselves in total freedom, and that gives it great importance, what do not you think? And also, a lot depends on the lines, the style of the drawing that we want to achieve. Just as the lines are part of all artistic expression, the shadows have their place in this story, since we all know that without them we could not capture the depth in a 2D plane, create the effect of over position among many other things.
Line is not the same as stroke.
One of the things we must know how to handle when it comes to giving more expression to a drawing is the stroke.
fuente
The strokes are a type of free and spontaneous line, you can bring sensitivity or character, smoothness or roughness to the lines. The strokes are used for artistic drawing since it is the most personal form of expression that a line has.
Between lines there are differences, one of them is the realization. The strokes should be done without lifting the pencil from the paper, you have to achieve it ease and continuity.
fuente
As in the previous post, where I showed a series of exercises using these strokes; Here I will show you some different strokes that I found on a page on the Internet, which are excellent for improving the own domain with the pencil.
It's all about practice and perseverance in order to achieve the ability to make perfect lines and strokes by freehand, for you to increase that potential, we can all develop our potential to draw.
There are factors that we must take into account to execute the exercises correctly and thus give effectiveness to our practice.
.- Do not settle the pencil.
.- Draw quickly "in just one stroke".
.- Try to give continuity.
.- Hold the pencil firmly.
http://www.dibujemos.com/artistica/articles/gimnasia-de-trazos/
Guidelines
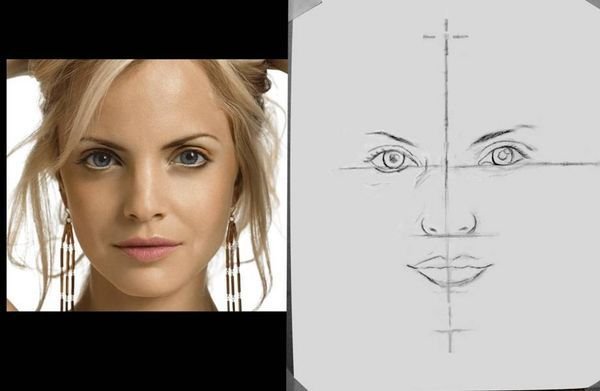
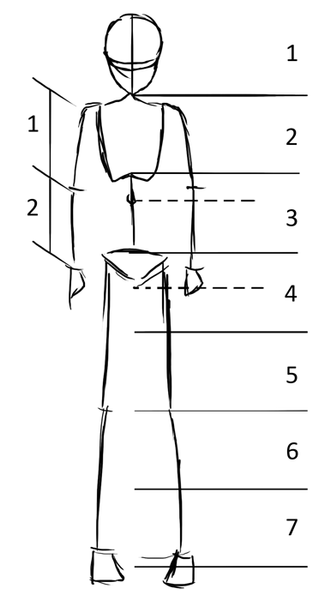
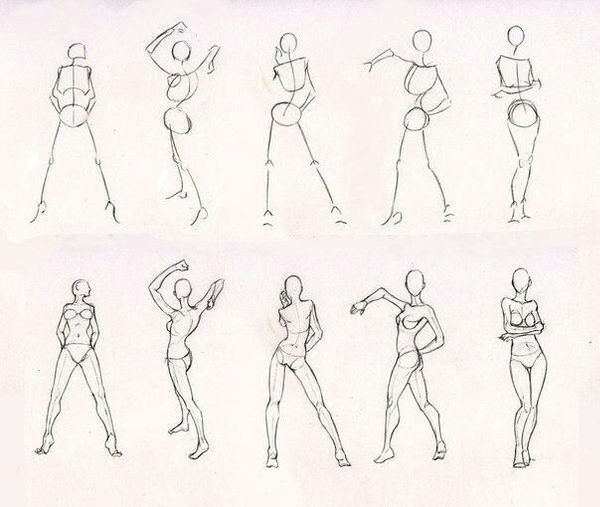
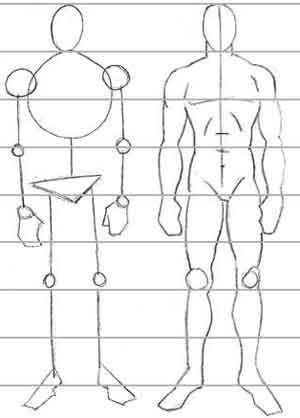
These guidelines are those we use to provide a face, body or object. In this way we can obtain harmony in the drawing that we are making; I have to let you know that it is good to perform observation exercises with the human body and objects to apply these lines correctly, because if you have not taken an art education in an institute or drawing course, they could be a little lost at the time of apply the distances. This happened to me so that I did not know about this at the beginning. However, I was learning little by little how to observe the body its depth and its details. I learned how to take the reference to an object in space and I could locate the size and distance between one object and any other.
fuente
One positive thing about these lines is that we can practice them until we know the correct proportion of what we are going to translate. You have to know that these lines are applied smoothly, whatever the style; since in this process we will be tracing and erasing, modeling our drawing; if we apply very settled or dark lines, whenever we want to eliminate some error we could damage the drawing sheet and our shadows will not be as smooth as we want; besides, when we are erasing the layout it will be noticed.
With observation exercises, we can observe that there are details in the human body that we do not notice in our daily life, since we really only "see" but do not "observe" it. And these details can make a difference in our work.
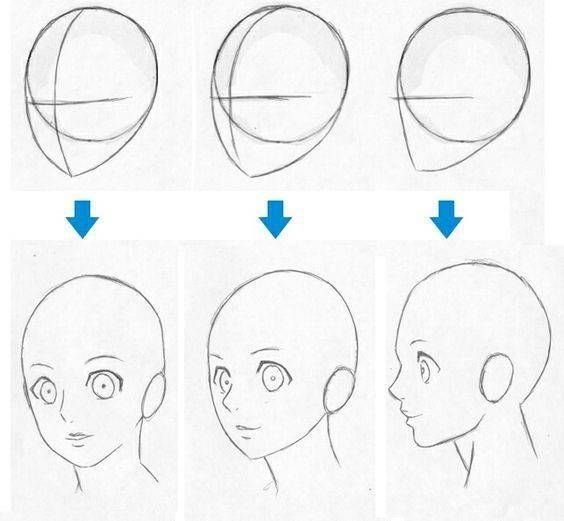
Here we can see a reference image of these guide lines, and these are the ones which, we apply in the sketch, they should be soft in order to maintain our drawing neat and clean.
fuente
Little by little, as we get into this practice, we will be accustomed our mind to perform this kind of calculation and measurements as we make a face or a human body.
fuente
fuente
fuente
In my previous post “Drawing Guide # 1”. I explained about the pencils, that it is very important to know if we are going to start a professionally or not drawings. For these lines, I recommend using H or HB pencils.
Projection of the shadows.
We turn to a topic that we all want to understand very well so that we can apply it correctly in the drawing, these are the shadows.
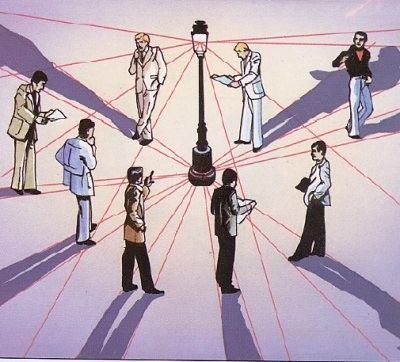
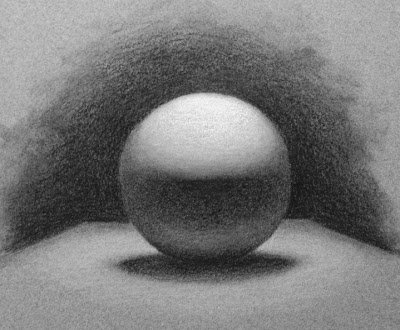
There are two basic points for shading and it will be enough to begin to draw the shadows in our drawing. These are the point of light and the angles. When I speak of a point of light, I refer to the direction from which the light comes. From this point, we can know where the shadow will have been projected. For Example:
fuente
In the following image, we can clearly see the point of light and the projected shadows. So, when we bring this to our drawing we know where the shadows will be, and we will know where the clarity and angle of the shadow is going to be placed. In this way, we can begin to shade our drawing. We can see that the point of light will be our guide. As we are doing the shading, we can start by applying light layers and then we start to darken it, until we get the degraded effect in the drawing.
fuente
Application of shadows
In this first section of shadows and lines, from the basic guide of the drawing, I will start a new topic that it will give a better understanding for the 2nd part and it is the application of shadows. they will have the uniform effect and neatness that we want to capture. This effect is much better because we must know it for the execution of the shadows and their application.
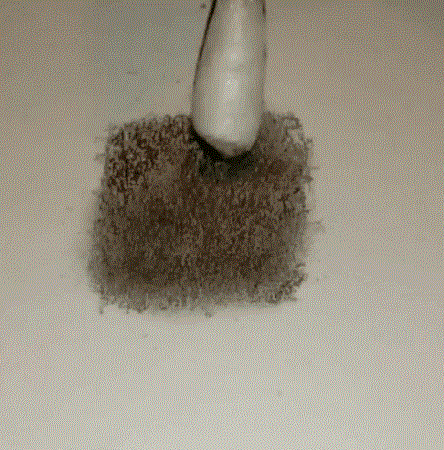
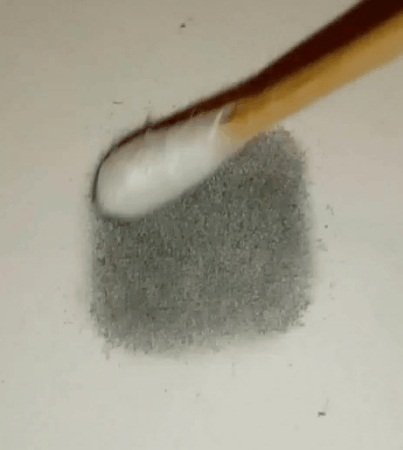
First of all, we should remember that the drawing has its own sequence, in order to know what the real order is. The application of shadows is done by establishing a sequence of layers, that is, we are doing one layer at the time, in different directions and following the movement of the object.
Example:
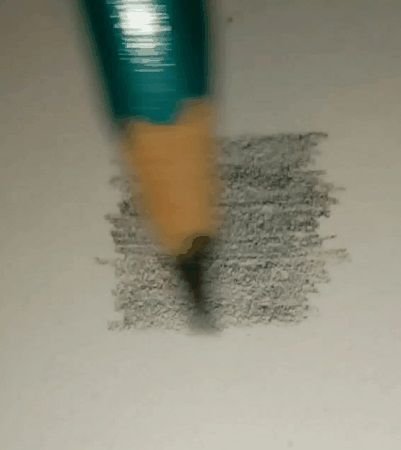
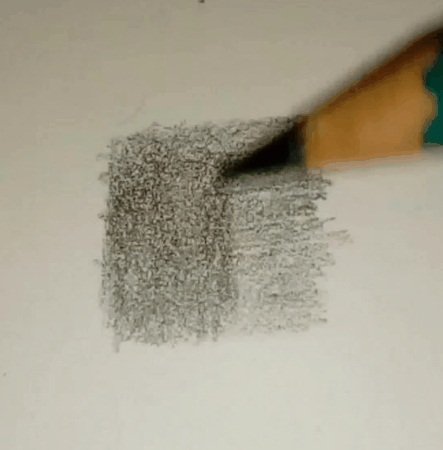

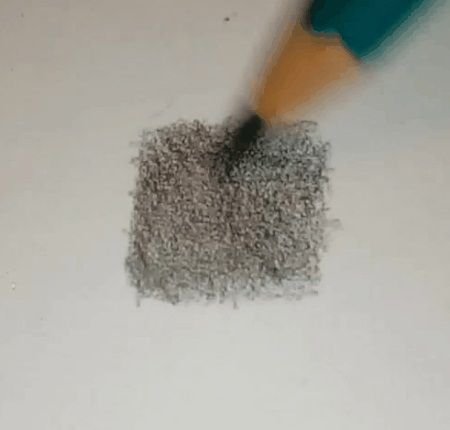

In the following post, I will give you a more detail information on shadows applications and how to use them in different ways so that the shadows are rounded.
These basic information, in this guide helps us to remember or learn things that perhaps we overlook or did not notice when we start a drawing. In my case it has been a lovely experience to transfer all my knowledge and help you as much as I possible could.